How to properly glue ceiling tiles: installation instructions + advantages and disadvantages of the material
Ceilings decide quite a lot in interior design, don’t they? To ensure their neat appearance and smooth surface, ceiling tiles are often used. We will talk about the advantages of this facing material, as well as how to properly glue ceiling tiles, in this article.
We will tell you how to transform a room using ceiling tiles, and give advice on its correct installation. And photographs and videos will help you cope with this seemingly difficult task.
The content of the article:
Advantages and disadvantages of the material
Ceiling tiles are a type of facing material that is widespread on the modern market.
Unlike similar products, it allows you not only to transform the room, but also to visually level the ceiling. The use of panels is possible both during initial repairs and during renovation.

The advantageous characteristics of the facing material in the form of ceiling panels are:
- Versatility. Foam boards (the most common material for ceiling panels) can be glued to any type of surface: concrete, plaster, wood, brick and more. You can use ceiling tiles when decorating kitchens, bedrooms and even children's rooms.
- Sound- and thermal insulation. Ceiling plates increase these characteristics of the room. This function is especially relevant for apartments in multi-storey buildings. The tiles will help reduce the audibility of neighbors above.
- Easy to install. You can handle the installation of ceiling panels yourself. This process does not require special construction skills. In many cases it is simpler than usual sticking wallpaper Moreover, even if for some reason one or more slabs are damaged, they can be easily replaced.
- Affordable price. Ceiling tiles are considered one of the most budget-friendly materials for ceiling cladding. At the same time, in terms of its aesthetic and technical qualities, it is in no way inferior to expensive options for finishing panels, especially if the relief parts are additionally painted.
- Basic care. The tiled ceiling retains its attractive appearance for a long period. You can clean it with a regular dry cloth or even a vacuum cleaner. You will find detailed instructions for caring for this material at the end of the article.
The only disadvantage of this material is its susceptibility to fading. Regular penetration of sunlight onto the surface of the slabs, which is typical for panels located above the window, leads to a change in their color. Therefore, in rooms located on the sunny side, it is not recommended to install bright panels.
Types of tile ceiling panels
Ceiling panels differ from each other not only in external indicators - relief, color, dimensions, but also in the production method.
In accordance with this characteristic, all materials are divided into three categories:
- injection. Made from raw materials using the “sintering” method, they are distinguished by their original shape, deep pattern and thickness of 9-14 mm;
- pressed. They are produced by stamping from polystyrene, standard thickness is 6-8 mm;
- extruded. They are also made from polystyrene, but using the pressing method, they can have a relief similar to wood, marble and other natural materials.
Based on the type of fastening, panels are divided into suture and seamless. The first are classic slabs, with sticking between which a noticeable seam is formed. Seamless products do not imply the presence of a distance between the individual slabs, which allows you to create the effect of a monolithic coating.

Facing materials also differ in their shape. A standard slab is a square with a side of 50 cm. At the same time, rectangular products with different aspect ratios are also available on the market: 30x60, 40x70, 30x70 cm, etc.
The dimensions of facing materials should be selected taking into account the characteristics of the room where they are planned to be installed. A detailed system for calculating panels for any type of room is given below.
Subtleties of product selection
When choosing a facing material for the ceiling, it is necessary to take into account not only its aesthetic characteristics, but also other important characteristics:
- The edges of products (especially polystyrene panels) - they should not crumble, the grain size should be equal.
- Load distribution (applies to expanded polystyrene panels) - when holding the slab by the corner, no creases or cracks should occur.
You should also pay attention to the geometry of the products. It is important that each angle corresponds to the set value of 90 degrees. Any deviation from this norm is fraught with the appearance of uneven seams.

Adhesive for mounting ceiling panels
In order for the facing material to lay flat on the ceiling and perform its functions properly over a long period, it is necessary to choose the right adhesive. The adhesive composition is the basis that holds the tile blocks.
Due to the fact that the panels, due to the force of gravity, always tend downwards, special requirements are put forward for the glue. The adhesion of such a material should be maximum, the color should be white so that the seams are as invisible as possible, and the viscosity should be dense to prevent the panel blocks from moving during the installation process.
The building materials market today offers several types of adhesives for ceiling tiles.
| Glue type | Advantages | Flaws |
| Eltitans(universal) | Universal Transparent Suitable for plaster, wood, concrete Forms a flexible seam | Long drying process |
| Titanium | Viscous consistency Sold in ready-to-use form Resistant to high humidity and temperature changes | It is necessary to hold the panel for a long time to adhere to the surface |
| Silicone | Quick clutch Closes intertile space Economical consumption | Incompatible with metal. If it comes in contact with metal, it can cause corrosion. |
| Acrylic putty | High viscosity Reliable adhesion to any type of surface Can be used for caulking intertile seams | None |
| Liquid Nails | Strong adhesion to the surface Long service life - as long as the glued material | It is impossible to dismantle the tiles for reuse |
| PVA | Completely odorless Transparency of the layer after drying | It is characterized by low viscosity, which increases consumption, as well as a long drying and setting process |
You should purchase glue after purchasing the ceiling tiles themselves. It is recommended to do this in one store.
In this case, a specialist will be able to help you make a choice and recommend the most suitable adhesive composition for a particular facing material.

Calculation of materials for ceiling cladding
You can calculate the number of tile panels and glue that will be required in the process of gluing the ceiling yourself.
For slabs, the calculation is made using the following algorithm:
- We calculate the area of one slab. For example, for panels with dimensions of 50x50 cm it will be 0.25 sq.m.;
- We calculate the area of the ceiling. For an aspect ratio of 5x6 m it will be 30 sq.m.;
- We determine the number of individual slabs. To do this, divide the ceiling area by the area of one slab: 30/0.25=60.
As a result of the calculations, you will receive the number of panels required to cover the upper surface of the room. But it should be borne in mind that during the installation of the slabs difficulties may arise, due to which the material itself may be damaged.
Therefore, you should always buy a few more tiles (it is customary to purchase 10% more material). This will prevent you from having to go to the hardware store in the middle of the work process.

Step-by-step instructions for installing tiles
You can install ceiling tiles yourself. At the initial stage, it is important to decide on the type of gluing of the facing material to the ceiling.
Fastening the panels is possible in two ways: with a square - the classic pattern of laying slabs parallel to the walls and with a diamond - laying blocks diagonally.
However, you can start laying the material from the wall, usually opposite the entrance.This option is used if several chandeliers are installed on the ceiling in different places or there are ceiling sockets.
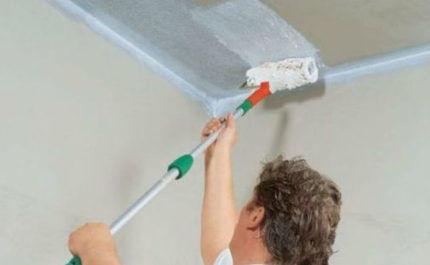
Stage #1 - surface preparation
The first stage of any installation work is preparing the surface for installation. In the case of laying tile blocks on the ceiling, the preparatory process involves cleaning the top covering of the room. It is necessary to completely clean the ceiling from traces of previous finishing.
If there are dents or minor irregularities on the surface, they should be eliminated with putty. This will contribute to better adhesion of the materials to the surface and also ensure their long-term operation. We also recommend at this stage to arrange sound insulation of the ceiling - this is especially true for residents of high-rise buildings.
To perform installation work, you will need a stepladder, glue for pasting, a ruler or construction tape, a pencil, a stationery knife, a brush for adhesive, gloves, a respirator, etc. all this can be purchased at a construction supermarket in accordance with personal preferences.
Before starting work, all windows in the room should be tightly closed to prevent possible drafts. It is also necessary to de-energize the room - if the installation will be carried out at the location of the light device.
Stage #2 - marking
The second most important stage of laying tile panels on the ceiling is applying markings. Many novice craftsmen neglect it, counting on their perfect visual perception of the work area.
This often leads to uneven joints between tiles, the need to trim individual blocks and, in extreme cases, the dismantling of some products. Therefore, you should not neglect marking the ceiling surface. You can do it with a simple pencil. But first, it is recommended to clearly define the center of the room.
For this:
- Stretch a painting thread with paint from one corner of the room to the other, pull it down and release it so that a straight line remains on the surface of the ceiling;
- Repeat the procedure with opposite corners.
This method will help you accurately determine the middle of the room. It is especially relevant in cases of diagonal sticking panels starting in the center. But it should be taken into account that if the central point does not coincide with the chandelier, then it will have to be shifted towards it.

It is not necessary to mark every tile on the surface. The main thing is to lay the first one correctly. The subsequent ones will be folded like puzzles, leaning against each other with their side edges.
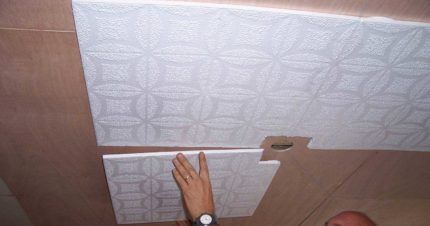
Stage #3 - installation of tiles
The standard installation sequence for ceiling tiles, provided the ceiling is level or previously leveled with putty, is as follows:
- Lubricating the facing material with an adhesive composition along the entire perimeter, while the edges do not need to be lubricated.
- Applying the block to the ceiling surface, pressing it tightly.
- Fixing the tiles - hold it for about 0.5-1 minutes so that the glue sets.
- Repeat similar operations with the remaining ceiling materials.
Each tile is applied exactly to the edge of the one already glued.When performing installation, you should remember the drawing of the planes.
If necessary, trim the tiles, make a hole for a chandelier, attach the tiles tightly to the wall, etc.

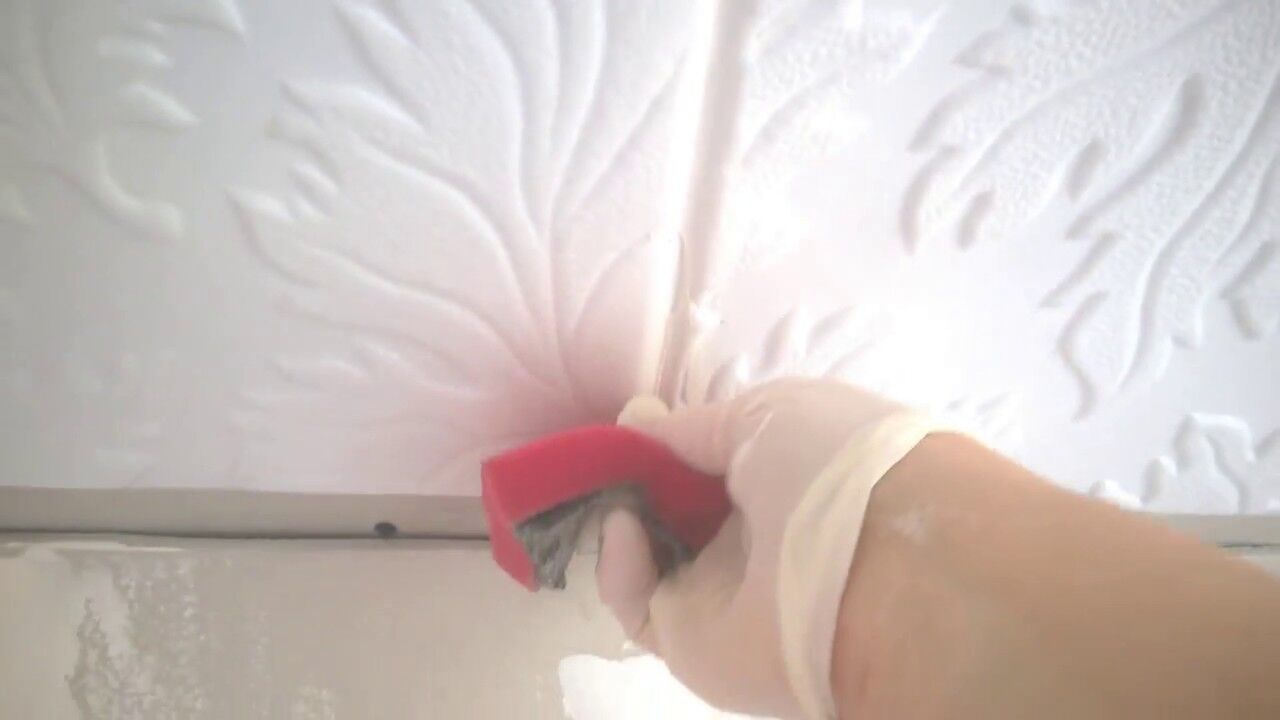
Stage #3 - caulking the seams
After the laying of the tile blocks has been completed, it is necessary to fill the joints. This procedure is performed for both suture and seamless installation. To do this, you need to purchase acrylic sealant.
Further work is carried out according to the following algorithm:
- Fixing the sealant in the gun.
- Cut the sealant tip at an angle of 45 degrees.
- Distributing the composition along the seam by pressing on the handle.
After completing this work, all that remains is to wait for the sealant to dry completely. The average speed of this process is 4-6 hours.
Silicone sealant takes a little longer to dry – 24 hours. You will find detailed instructions for using the product you have chosen in its description.

Methods for placing tile panels
There are several ways to glue tile panels to the ceiling.The first, most common, involves laying tiles parallel to the walls. Pasting can be done in any direction.
Work begins by fixing the central square. The method for determining the center is described above.
More original is considered to be pasting the ceiling diagonally. In this case, the panels run at an angle of 45 degrees relative to the walls. Laying also begins from the center of the ceiling. But it is defined a little differently.
To find the center point, you can use one of the following methods:
- Draw two transverse stripes from the center already determined using a paint cord.
- Divide each angle formed from the intersection of the center lines in half.
The created lines will serve as guides for you when laying the tile blocks.
A very common installation method is to lay panels on the ceiling in a checkerboard pattern. The material is laid out from the center parallel to the walls. It is recommended to use this option in rooms with a large area.
Another interesting way to decorate the ceiling is to lay the panels in a snake pattern. In this case, the installation scheme is similar to classic diagonal gluing. The peculiarity is the alternation of colors.

If the surface of the tile is too soft, use a soft wallpaper spatula as a holder - it will help prevent fingerprints from appearing on the material. If these basic requirements are met, installation will be easy and quick.
Tips for installing tile panels
To ensure that the installation of ceiling tiles is as productive and quick as possible, we recommend following a few rules from professionals.
The first concerns the preparation of the panels: before gluing them, it is recommended to keep them in a dry and warm room for several days. This is necessary to eliminate excess moisture from the material, which can worsen the process of its adhesion to the ceiling surface.
After gluing each tile, remove any remaining adhesive from its surface. If this is not done, then with further attempts to remove the adhesive composition that has already dried, you can damage the material itself, worsening its aesthetically attractive appearance.
Tile ceiling care
To maintain the original appearance of the facing material, it is necessary to properly care for it. To do this, it is enough to regularly wipe the surface with a cloth.
But you should not use wet material - moisture can negatively affect the condition of the slabs. This applies only to products made of foam plastic (for others, wet cleaning is acceptable).

Grease stains on ceiling panels can be removed with alcohol. You can also use dishwashing detergent or washing gel.
Only aggressive chemicals, such as bleach, are prohibited. Old stains can be removed from the ceiling using ordinary vinegar.
Conclusions and useful video on the topic
Instructions for installing ceiling tiles:
Installation of ceiling tiles is one of the simplest installation jobs. Even a novice master or a person who has nothing to do with construction can do it. The main thing is to follow the recommendations presented above, do not forget about the importance of markings and carefully lay the material.


