Why the washing machine does not turn on: causes of breakdown + repair instructions
Regardless of the brand and functionality, the service life of washing equipment ranges from 5 to 15 years.However, due to frequent power fluctuations, poor-quality water, and mechanical damage, the units fail to operate the system.
The instructions below will help you independently determine the reason why the washing machine does not turn on, and will tell you how to fix the problem yourself.
The content of the article:
Causes of unit failure
Before throwing away the machine due to its malfunction, you can diagnose it yourself. Often the breakdowns in the product are minor, so parts are replaced without calling a technician.
The equipment may not start the washing program or even not turn on completely for several reasons. Their timely identification will extend the service life for several more years and save money.
No. 1 - lack of power supply in the network
In the case when the display does not light up when the power plug is plugged into the socket, and in products with a mechanical control type the device does not start at all, then there may be no current flowing.
The reason for this may be a malfunction in the electrical panel, failure of a circuit breaker, socket, or tripping of a protective shutdown in the presence of an RCD.
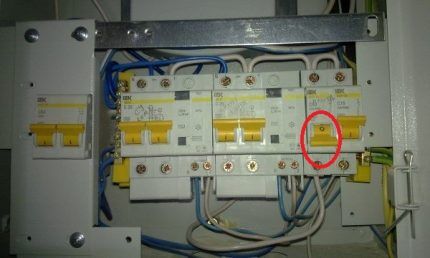
The machine, as a rule, knocks out when there is a short circuit, a sharp drop in current in the network, or water gets into the socket. To check its serviceability, you need to make sure that it is turned on correctly.
If the machine is knocked out, the lever will be in the down position - off. If after switching on the device does not work, it means it has failed and will need to be completely replaced.
Characteristic signs of a protective device being knocked out are an electric shock to the user when trying to start the machine, after which the device turns on.
The RCD is triggered to prevent fires due to current leakage and to prevent electric shock to a person when the equipment is turned on.
Therefore, there may have been a power failure or the device may have malfunctioned due to poor quality. If this is the reason for the lack of electricity, then it is necessary to check its performance and the presence of related problems in the panel.
In another case, the equipment does not start when the outlet breaks down.
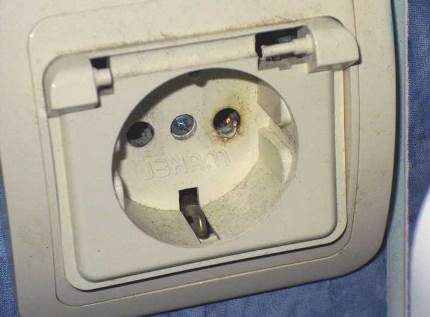
To check its serviceability, you need to use an indicator screwdriver and see if there is current in it.You can also try connecting another electrical appliance, such as a hair dryer, iron or table lamp. If the products work, then you need to look for another reason.
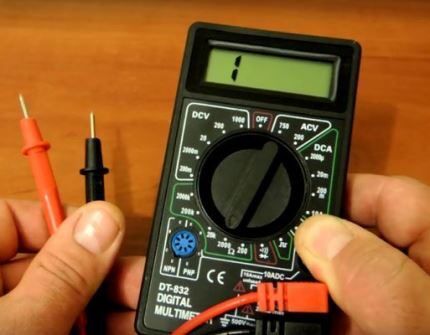
By using multimeter You can check the presence of a phase in the socket in the following way:
- Take the meter and turn on the alternating current (ACV) measurement mode.
- Set the maximum value on the device – 220 V.
- Connect the probes of the device to the socket connectors.
- Record the network readings on a special display.
- Based on the information received, draw a conclusion whether the socket is working or requires further replacement.
When the above methods have been carried out and the cause has not been identified, then the functionality of the machine parts should be checked.
No. 2 - malfunction of the power cord elements
The wire of the product is constantly subjected to various deformations - bends, pinches, tension, and creases. Therefore, the possibility of damage during operation cannot be ruled out.
To determine this type of failure, it is necessary to visually inspect the cord, as well as the plug. The devices may show signs of burning or melting plastic and a corresponding unpleasant odor.
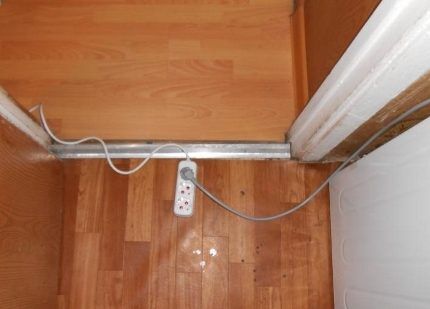
You can also check if there are any breaks in the wire using a multimeter. In this case, the device will need to be connected to all three wires in turn. If a breakdown is detected, it is advisable to replace the cable rather than connecting the elements using electrical tape.
If the machine is connected to the network using an extension cord, then the reason for the lack of startup may be hidden in this device.
The functionality of the extension cord should also be checked by connecting other electrical appliances. If it malfunctions, the equipment will need to be connected through another device or directly into an outlet.
No. 3 - problems with the “Power” button
The wash may not start due to problems with the “Start” button. This problem most often occurs in newer generation of device models. The operating principle of such products is to directly supply current from the power cord to the button.
To check whether a part is working or not, you need to perform the following series of actions:
- disconnect the device from the power supply;
- remove the upper part of the product body;
- unscrew and remove the control panel on which the button is located;
- disconnect the wire connections from the button;
- connect a multimeter to them and check for the presence of current when the button mode is on.
If the button works, the device will produce a corresponding sound. If a problem is found, the part must be replaced.
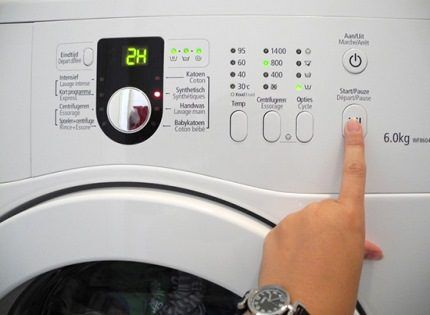
Some equipment has a slightly different design principle, and the voltage is supplied not to the power button, but to the command device or electronic module. This depends on the model and manufacturer of the particular unit.
No. 4 - failure of the electronic module or programmer
The serviceability of these parts is checked only after the correct connection of all electrical circuits, the integrity of the wires, plugs, and the device that locks the hatch have been checked.
These unit components are quite expensive, so the feasibility of replacing them must be decided independently on an individual basis.
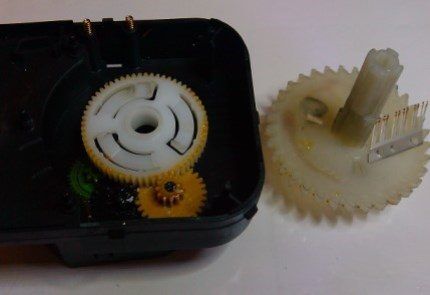
To identify a breakdown, the command device must be disassembled. Their devices differ depending on the model and brand of the machine. The general disassembly procedure is the same, but the appearance of the part may vary.
No. 5 - the locking system does not function
If the equipment is turned on and the power indicator lights up and the washing program does not start, you should check the serviceability of such an element as the hatch lock.
As a rule, the machine locks the door when starting a program. If this does not happen, then you need to pay attention to this node.
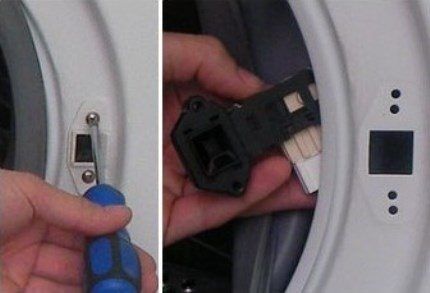
To do this, disassemble the front part of the product body and measure the presence of voltage in this element with a tester. If the current passes, but the mechanism does not work, then it will need to be completely replaced.
If the device shows no voltage, then the control unit - the electronic module or command device - needs to be checked and repaired.
No. 6 - interference filter malfunction
Each model is equipped with a special element that is responsible for damping electromagnetic radiation during operation - an interference filter.
The part allows you to protect other equipment from electric waves that can damage it.If this unit breaks down, the machine will not turn on and the indicators will not light up.
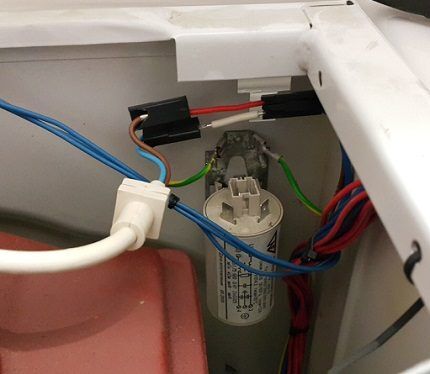
In addition, the surge protector prevents the electronic internal system of the device from burning out or failing.
The more expensive the product and the more functionality it has, the more the components are susceptible to breakdowns in the event of voltage surges. There is a high probability that one of the important elements will burn out: board, motor, heating element, wiring.
Therefore, it is imperative to carry out timely filter replacement in case of failure, in order to protect the device from more serious damage.
No. 7 - damage to internal wiring
Most devices have an internal structure in which the wires touch each other and, due to vibration, can intersect, twist, fall out of the electrical circuit sockets and break.
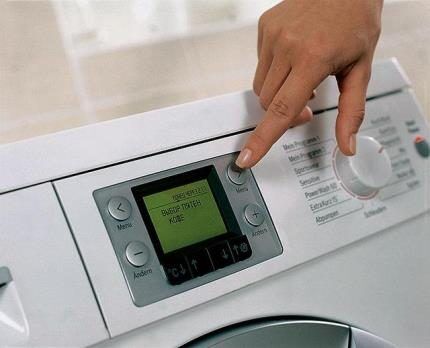
To identify the area of breakage or burnout, it is necessary to completely disassemble the device. Careful examination of wiring and diagrams, as well as the use of a tester, will help identify problem areas. In the future, you will need to replace or solder the damaged areas.
Step-by-step instructions for repairing equipment
Having studied all possible types of breakdowns, as well as diagnosed the washing machine, you should then proceed to replacing the required part or assembly.To carry out repairs, you will need screwdrivers, a multimeter, electrical tape, circuit diagrams, as well as new spare parts if necessary.
The instructions below will help you independently repair a specific unit of the product. Before disassembling and testing the unit, you should read the instructions in order to understand the features of the internal layout and the type of failure in a particular model.
Repair of switching element
The power button may not work due to sticking or contamination. In this case, it is recommended to clean the area in which the launch element is located.
It will be enough to use a napkin and some sharp object if there is a strong coating, for example, a knife.
To clean, you will have to unplug the device and disassemble the front panel. It is necessary to carefully disassemble the panel, remove the button and wipe all plastic parts. Then reassemble in reverse order.
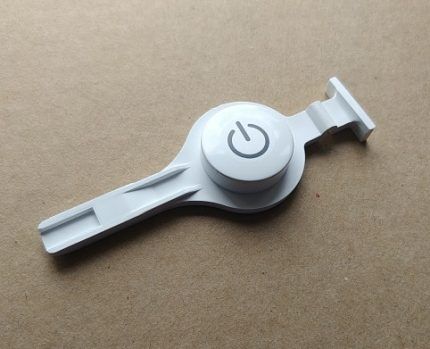
Disassembling the unit is carried out in a similar way. For convenience, it is better to use a camera or phone and record all the dismantling steps. This will prevent errors during the assembly process.
Next, you need to replace the spare part and check its functionality using a tester. After assembling the device, check again whether everything is done correctly and whether the program starts.
Checking the serviceability of the command device and repairing it
If other controls and the network connection of the unit are checked and working properly, then you should begin to analyze the control unit.You will need to completely disassemble this part into small particles and carefully inspect them.
To check for a breakdown and repair the programmer, you must:
- Disassemble the front panel of the unit to gain access to the mechanism.
- Remove the command device and proceed to disassembling it in detail.
- Press the side latches to release the cover and remove the board.
- Inspect the board and check for burnt areas, and if necessary, solder such areas.
- Using a multimeter, measure the resistance across the contacts.
- Check for foreign particles and debris in the central gear.
- Remove all gears and core from the device.
- Visually assess their integrity, treat the parts with alcohol and reassemble in reverse order.
When disassembling this unit, be sure to check the motor winding.
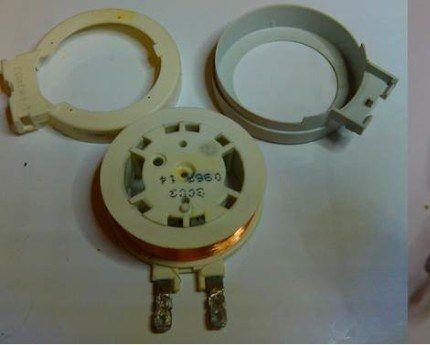
Some machines have a more complex programmer design, so repairing them is not always advisable. Often the elements are simply replaced with new ones.
Replacing the unit locking device
The locking device may become damaged due to prolonged use of the product.
Constant heating of the equipment and sudden cooling leads to the fact that the bimetallic plate is deformed and loses its functional properties. As a result, the element breaks down, the replacement of which requires complete disassembly of the lock.
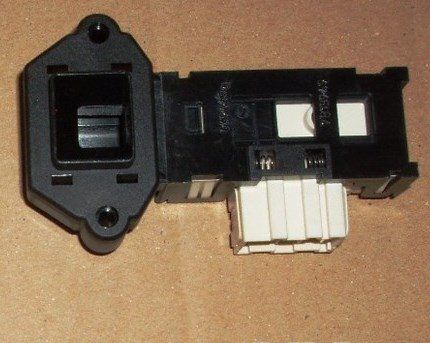
To carry out dismantling, you will need to unscrew the two screws that secure the lock to the body of the product. After releasing the element, you must remove it, carefully holding it with your hand on the back side.
For convenience, the body of the unit can be tilted back slightly so that the drum does not interfere with free access to the part. Replacing a lock with UBL is quite simple:
- It is necessary to disconnect the connectors with wires from the old element and reconnect them to the new part.
- Install the replaced part and secure it with screws.
- Return the cuff to its original position and secure it with a clamp.
- Check the functionality of the device by running a test wash.
If the device door is stuck in the closed position and cannot be opened, you will need to disassemble the upper part of the case.
Using your hand, feel for the location of the lock, press the latch to open the hatch. Next, replace the broken element according to the above instructions.
Read about other ways to unlock the washing machine door Further.
Step-by-step replacement of a broken interference filter
Initially, you should understand that the surge protector cannot be repaired. If it breaks, it will need to be completely replaced with a new part. You can purchase it in a specialized store - buy a similar one or select one with similar characteristics.
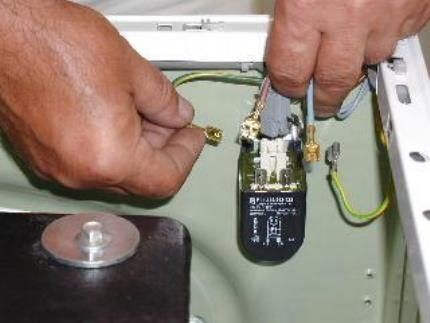
To check the need to replace this element, you will need to perform the following list of manipulations:
- disconnect the unit from the power supply;
- Unscrew the bolts on the rear panel and disconnect the upper part of the case;
- At the top there is a filter that needs to be checked with a multimeter.
The test should be carried out by first setting the tester to the resistance measurement position.
The contacts should be checked in pairs, and the resulting indicator should be 680 kOhm. Data may vary slightly from those shown.
However, if the resistance values are close to infinity and the capacitance of the capacitors is equal to zero, then this indicates a failure of the element.
Replacement of spare parts should be carried out in this order:
- Unscrew the fixing bolts that secure the filter to the housing.
- The disassembly steps can be photographed so as not to get confused in the assembly order.
- Disconnect the connectors with wires and connect them to a new product.
- Collect all the elements one by one.
Next, you need to check that the equipment is working correctly. It is better to run a short wash without loading laundry.
If the required part is not available in the store and you need to wait a while for it to be delivered, you can connect an external surge protector.
This device is similar to a regular extension cord and is connected to the mains through an outlet. You can connect other electrical appliances that you frequently use to it.
Conclusions and useful video on the topic
The video will help you figure out why the washing machine does not turn on using the example of a unit from Whirlpool, and also help you repair the necessary parts yourself or replace them:
Video instructions for identifying the cause of device failure and features of replacing the start button:
The story describes in detail the purpose of the interference filter in washing equipment, the features of replacing it in case of failure, as well as how to start the device without it:
It should be noted that modern equipment is distinguished by a high-tech electronic control system and complex design. Therefore, in the event of any breakdown, detailed diagnostics and testing of many elements of the washing machine will be required. This requires some knowledge and tools, and detailed photo and video instructions will help you solve even a complex problem yourself.
If you have the necessary knowledge or skills in the field of repairing washing machines, please share them with our readers. Leave comments, ask questions - the contact block is located below.


The washing machine's power cord was the first thing I checked when the washing machine wouldn't turn on. If you have dogs at home that love to chew on wires with their sharp teeth, damage to the cord is a common occurrence. We even had to make a special metallized braid in order to somehow protect the power cords from damage. Any door can be opened, they are so smart.
In the event of a breakdown, the main thing is to understand whether you can handle the repair yourself or whether it is better to invite a specialist. Otherwise, you can make it even worse with inept actions.I can handle it when I need to remove the front panel and check the contacts, tighten something, solder something, but I don’t risk disassembling the machine and replacing complex parts. Not everyone has enough knowledge to perform such repairs correctly, even with detailed instructions.
We once had an interesting situation when we bought a washing machine for our mother at the dacha. The choice fell on Candy (the best price-quality ratio in the store at that time). They brought it, my husband connected it, but she didn’t want to work. It didn't turn on at all. It turned on a couple of times, blinked the lights and went out again. As a result, the husband remembered that when she was being transported in a trailer, she was lying on the right side. I laid it on the left for half an hour and... lo and behold! She earned it. Since then there have been no problems with it, but we no longer trust this company)
It seems to me easier to buy a new one than to fool myself.