How to dismantle a split system with your own hands: features and work procedure
Most of the classic split systems are installed in a standard way, when the internal module is placed inside the room, and the external module, respectively, outside the room.Both modules are connected by a piping system and an electrical circuit.
Meanwhile, along with installation, in certain situations it is necessary to dismantle the split system by the owner himself. How to solve such a problem with your own hands without damaging the dismantled equipment? Let's consider this point in detail in our material.
We will also dwell on the reasons for dismantling the equipment and the preparatory work that must be performed before replacing the outdoor and indoor units of a used split system.
The content of the article:
Reasons for dismantling a household split system
It would seem that the obvious and main reason for decommissioning air conditioner modules is the complete expiration of the declared operating life of this equipment.
Indeed, it is best to replace an exhausted climate control device with a new one. And this practice occurs quite often among owners of used air conditioners.
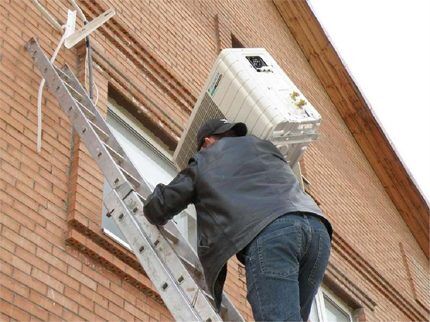
Meanwhile, the split system also has to be dismantled if the main process equipment, for example, a refrigeration compressor, fails. We recommend that you read more about compressor diagnostic methods and repair tips.
This can happen at any time, regardless of the established service life. In any case, it becomes necessary to dismantle the external unit of the equipment.
It is not excluded that air conditioner units may be removed for the purpose of transferring the system to another installation location. For example, when the owner of the device changes one place of residence to another.
This type of dismantling, although infrequent, is observed in everyday life. In any case, in order to dismantle the air conditioner yourself without damaging the equipment, you need to have certain knowledge.
What do you need to know before starting work?
People who have set themselves the task of dismantling a split system with their own hands, at a minimum, need to know the structure (diagram) of such a system. We talked in more detail about the design of the indoor unit Here.
In addition, this point should be taken into account: the working components of the equipment are under high pressure of freon, a gas that poses a health hazard.
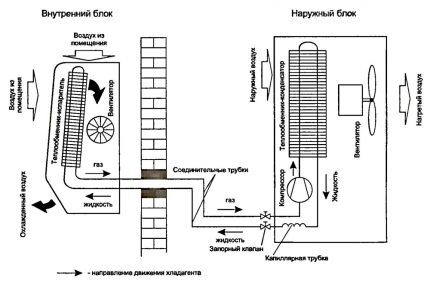
Also, the subject of study should be the electrical circuits of the air conditioning device, especially if it is planned to re-install the device in another place after dismantling is completed.
Finally, appropriate technical skills and proficiency in plumbing, electrical, and refrigeration specialty tools are required.
Work aimed at removing internal and external modules does not end with just disconnecting these modules and removing them.
After disconnecting and dismantling, each of the modules must be reliably sealed along the lines of the freon circuit. This is done to prevent dirt and dust particles from entering the circuit.
Knowledge of the classics of installing split systems contributes to facilitating dismantling work. Traditionally, work modules—internal and external—are placed as close to each other as possible, despite the fact that the two components are separated by a wall (several walls).
The length of the contour line during classical installation, as a rule, does not exceed two meters. This is a typical indicator for household systems.
The circuit pipelines are placed in insulation (each separately), grouped together with an electrical cable, and a working line connecting the two modules is built through the channel.
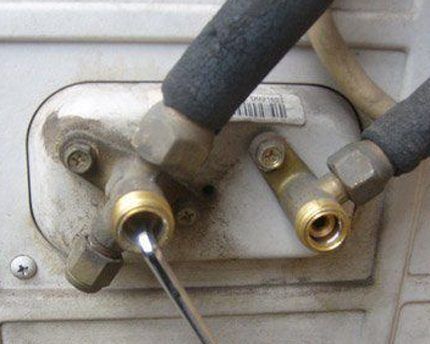
The circuit tube with a smaller diameter is the refrigerant discharge line of the compressor. Accordingly, the larger diameter tube is the refrigerant suction line.
Each of the tubes is connected to the external unit through system valves. Moreover, one of the valves, usually the suction line, is necessarily equipped with a service port.
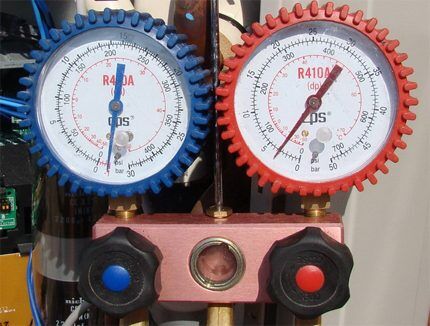
The so-called service port is a regular pipe outlet with a thread onto which the fitting of the filling hose or the fitting of the hose of the pressure gauge station is screwed. This outlet (service port) will be useful during system dismantling.
Detailed instructions for dismantling
So, if all of the above is taken into account, you can begin work related to taking the air conditioner out of operation and subsequent removal from its “workplace”. Let's look at this process step by step for better understanding and presentation.
Step #1 - freeing the system circuit from refrigerant
It is strictly forbidden to try to free the operating circuit of the installation from freon using the banal method of releasing refrigerant into the environment.
Only a person “far” from the topic can use the technique when it is enough to loosen (partially unscrew) any nut securing the loop pipes and in this way release the freon out.
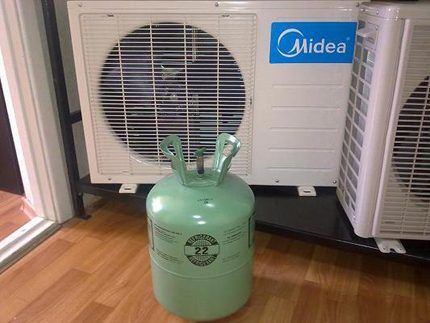
Everything is done much easier by collecting freon in the air conditioner condenser. Moreover, the same freon is successfully used at the new installation site. That is, there is not only a simple procedure for releasing the circuit from the refrigerant, but also a saving factor on refilling with freon.
Therefore, in order to free the system, it is necessary to close the valve on the discharge line when the air conditioner is operating in cooling mode. A hex wrench is used to rotate the valve stem. First you need to remove (unscrew) the protective brass valve cap.
In this mode, the split system will operate until the low pressure protection is triggered. However, it is recommended to use a pressure gauge station to be able to monitor the pressure in the circuit. The pressure gauge station is connected to the corresponding service port.
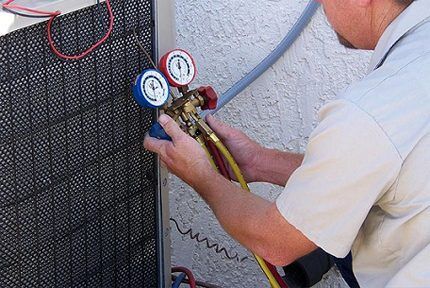
After the residual pressure in the circuit reaches the minimum possible (0 Bar), you need to turn off the air conditioner if the protection does not work.
Wait a while and if the pressure in the circuit rises, repeat the procedure.This completely removes the refrigerant from the operating circuit directly into the condenser of the device.
At the final stage:
- close the valve on the suction line;
- remove the pressure gauge station;
- Unscrew the nuts securing the copper tubes.
Then you need to seal the taps on the valves and seal the ends of the disconnected tubes.
Step #2 - disconnecting electrical circuits
Now that the circuit is free of refrigerant, it is logical to carry out work on dismantling the electrical circuits. In principle, each unit has an electrical connection diagram, which is usually located on the back of the valve block cover of the outdoor unit.
If there is no diagram or there are any doubts about the connection, it is recommended to sketch the contact wiring during the disconnection process.
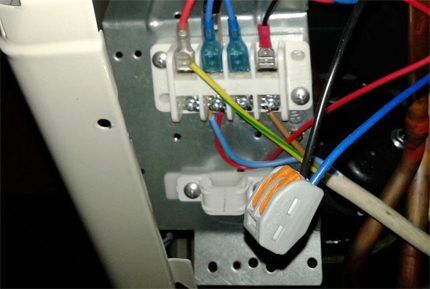
Only those that come to the external module from the indoor module should be disconnected. Also, most likely, you will have to turn off the network supply, given that in most cases this line is installed inside buildings.
After disconnecting the required circuits, you can proceed directly to removing the outdoor module from the metal brackets.
Step #3 - removal of internal and external modules
The order of removal of modules – internal and external – is not critical. However, it is recommended to remove the outdoor unit first.
To perform the removal operation of a completely disconnected external module, you need to:
- unscrew the bolts on the support brackets;
- tie the module with a reliable transportation rope (if at a height);
- carefully move from the brackets and lower to the ground;
- remove the support brackets.
Next, move on to the internal module. Here, before removing the indoor unit directly, carefully clear the junction of the copper pipes of the circuit and electrical conductors from obstacles.
If possible, it is recommended to remove the electrical wiring from the transition.
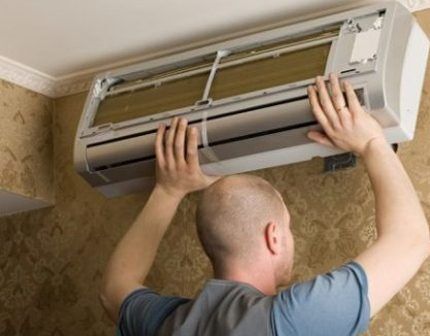
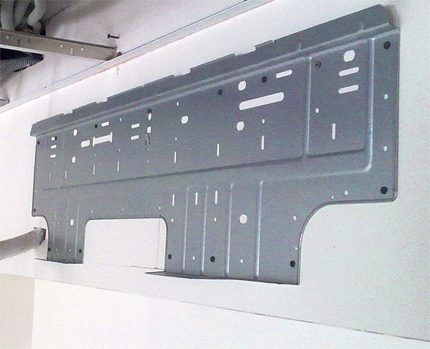
The indoor unit of a household split system is usually mounted on a mounting panel included in the installation kit. Moreover, fastening is carried out using the hanging method without additional fasteners.
Therefore, to remove the block, it is enough to apply a small traction force “on yourself” and then slightly lift the module upward.
Once removed from the mounting panel, the unit remains attached to the copper pipes of the circuit. It is necessary to unscrew the fastening nuts and disconnect the tubes. It should be noted that this work has to be done by weight.
You may need a stand or help from a neighbor, friend or acquaintance. After disconnecting, be sure to seal the pipe connections.
Finally, all that remains is to dismantle the mounting panel of the indoor module from the wall, remove copper tubes and other connection accessories from the transition in the wall. At this point, the dismantling of the household split system can be considered complete.
But eating is not always necessary. If we are talking about a breakdown or repair, then it is often possible to fix everything without removing the split units.So, if you are faced with the fact that the split system is leaking into the room, then you will not have to remove the equipment in such a situation. You can find the cause of the breakdown and fix it yourself.
We discussed in detail how to do this correctly and what procedures it is advisable to regularly perform when servicing the system in the following articles:
- What to do if the split system leaks into the room: common breakdowns and how to fix them
- Maintenance of split systems: cleaning, repairing and refilling climate control equipment yourself
Conclusions and useful video on the topic
A video demonstrating the dismantling procedure will be an additional help for people trying to remove the system with their own hands.
The video clearly demonstrates all the subtleties of the work:
Solving the problem of removing (dismantling) a household split system with your own hands is a completely feasible process. The main thing is to have an idea about the design of such equipment and how it is installed. Obviously, dismantling will have to be done in reverse order.
Are you installing, replacing, repairing and maintaining split systems and have repeatedly removed the equipment and put it back? Share your dismantling secrets with newcomers to this business - leave recommendations below under this article.
If this is your first time removing split system blocks and you have questions that we have not addressed in this material, ask them to our experts and other site visitors.


