Do-it-yourself rocking chair made of wood: photo ideas, drawings + step-by-step instructions
The ideal way to escape from all your worries and relax after a hard day at work is a rocking chair.But some may be put off by the high price of the finished product, while others cannot choose the best option for themselves. Why not try to make it yourself?
And we will tell you how to do this in our article. Let's look at how to assemble a wooden rocking chair with your own hands, what tools and materials are needed for this. We provide detailed instructions for assembling three different options, providing them with drawings, visual photos and videos.
The content of the article:
Design features of a rocking chair
The peculiarity of the chair lies in its design: two parts curved in the form of an arc that are attached to the legs. The design of the chair itself, its upholstery, and shape may be different.
In addition to a pleasant rest, rocking chair owners note that such rocking can help with various health problems. For example, in people with abnormal heart rhythms, regular rest in such a chair improves and stabilizes the heartbeat. Also, during swinging, most muscles relax, and the muscles of the back and legs undergo special training.

Preparation of tools and materials
Most often, wood is used to make such a chair, or it is combined with metal or plastic.Because wood is an environmentally friendly material that fits perfectly into almost any interior. At the same time, high-quality wood can emit the smell of freshness and forest for a long time.

Stage 1 - choosing wood
When creating rocking chairs, coniferous wood is especially popular.
It has several advantages:
- Light weight, making it easier to move the finished product later.
- Ease of production. Low density of the material itself, which facilitates the manufacturing process.
- Possibility of manual processing. Coniferous wood can be easily processed by hand.
- Low cost, when compared with other types of wood.
The wood itself has a light shade. The main disadvantage is that in case of rain or high humidity, the wood can swell and increase in size.
If you have enough money for more expensive species, such as oak, beech, then it is better to take them, because the wood of these varieties does not have pores, and accordingly they have higher strength.
It is not enough to choose the right species; it is important to monitor the moisture content of the wood. Especially at the initial stage. If it is not dry enough, it is better to give it a little time to return to its normal state, otherwise after drying the tree may become deformed, change its appearance, and you, as a result, will simply lose the money spent on the purchase.
Stage 2 - preparing tools
When making a rocking chair from wood, you will need the following tools:
- An electric jigsaw (the blade must be fine-toothed) for cutting out blanks for the future product.
- Planer for processing workpieces.
- Grinder machine.
- Wood glue (Moment, PVA or other).
- Hammer.
- Dowels wooden.
- Ties for fastening parts when gluing.
- Drawing tools (square, tape measure, pencil).
- Stapler building.
- Brush.
If you plan to varnish or paint the finished product after assembly, then it is advisable to also prepare respirator.
Stage 3 - choosing a chair model
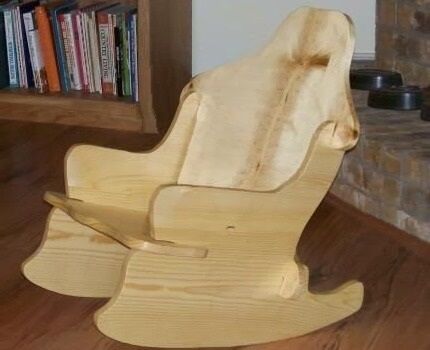
In the photo below you can see various options for a wooden rocking chair that anyone can make at home.
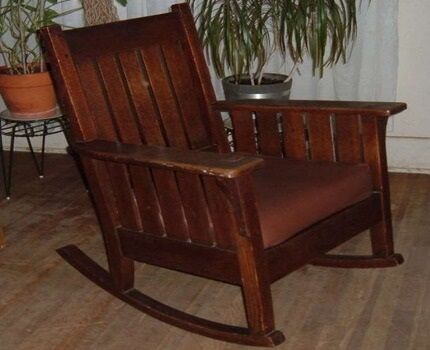
All you have to do is choose the appropriate option and you can start making it.
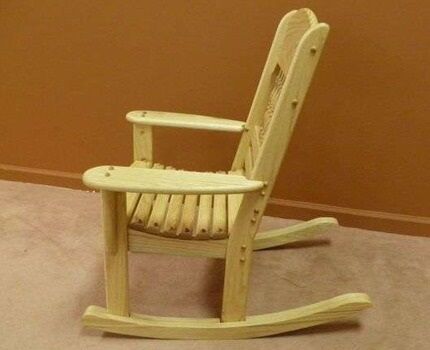
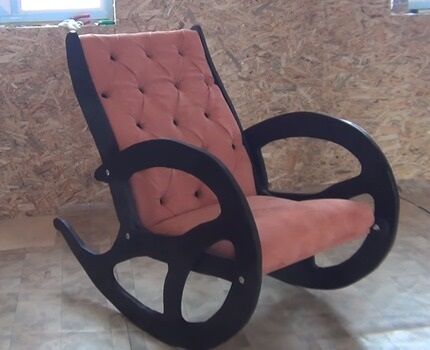
We will look at the process of making a rocking chair using the example of the last option - a chair with a soft seat and back.
No. 1. Making a chair from plywood
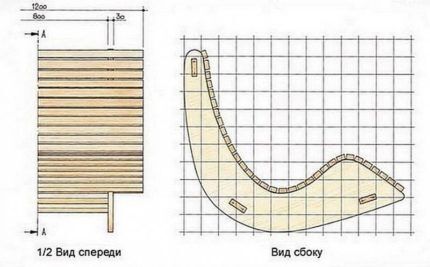
First, you will need to prepare a transparent film with checkered markings (the length of the cage is 100 mm), since we will use it to draw the outline of the blanks from the drawings onto the wood.
You will need a wooden sheet 29800 (14900*2) mm² (with correct and rational marking, the area may be smaller). Its thickness is approximately 20 mm.

Thus, to create this rocking chair model you will need:
- A sheet of plywood 20 mm about 30,000 mm² for the main parts in the drawing and additional boards (approximately 1,600 rubles);
- Sheet of foam rubber for the seat (300-400 rubles);
- Dowels (200 rubles per pack);
- Fabric for the seat (400 rubles, depending on the type of fabric);
- Glue PVA or other (100 rubles);
- Acrylic paint (450 rubles);
- Acrylic varnish (200 rubles);
- Acetone (150 rubles);
A total of 3,500 rubles, which is several times cheaper than ready-made chairs, plus you will have the opportunity to make everything “for yourself,” that is, in the way that is most convenient for you.
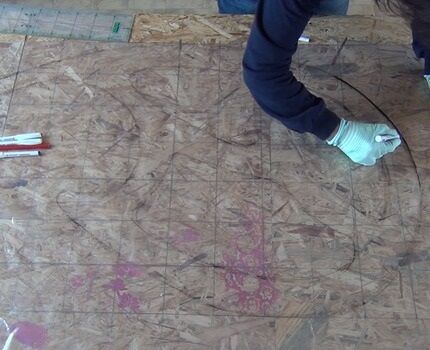
Using the stencils cut out of the film, we trace the outlines of the blanks on the wood using a marker. After this, we drill holes in the places of internal cutouts for more convenient work with a jigsaw or hacksaw.
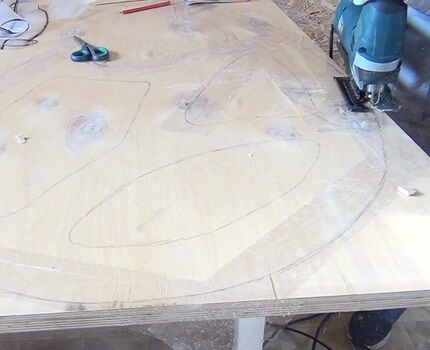
After cutting out all the parts, you will need to carefully sand the ends, without damaging or breaking off small particles along the contour. It is very important that the legs of the chair are very smooth and even, this way you can achieve the smoothest swing possible when relaxing on the chair.
You have already cut and processed the main parts of the chair, now you need to cut the boards for the seat itself. The length and width of the planks may vary depending on your body type. Recommended sizes: 70-80 mm in width and from 500 mm in length. You will need 6 of these blanks. And one about 100-120 mm wide, which will be the top one. They also need to be sanded and processed.
Next, on each side part we drill 7 pairs of recesses for fastening using dowels. The location of the recesses is shown in the photo; try to maintain the same distance between each pair.
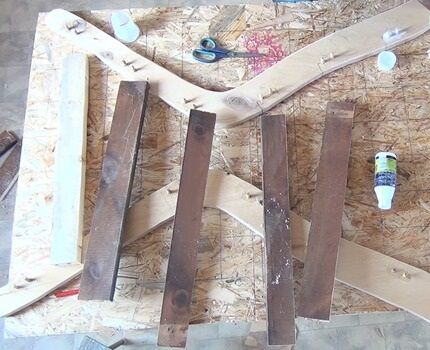
Now you need glue. Can be used PVA, or you can Moment, whichever one you like best. It is necessary to lubricate both the holes themselves and dowels.
Next, fasten the side parts together using sawn planks. In order for the structure to hold tightly, you need to fix it in this position using ties. And leave to dry.
In the meantime, you can drill holes in the two legs that will be attached to the side walls. In total, you need to drill 6 holes on each side - 3 in the leg and 3 in the side part.
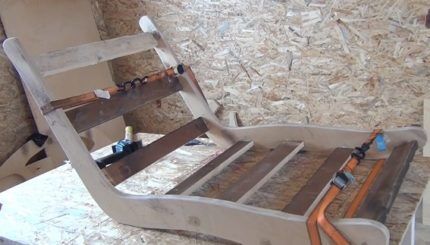
Now you need to decide whether you will paint the chair or leave the natural wood color. In principle, both options are good in their own way, but here you need to choose wisely according to the color and style of the interior.If you want to use a rocking chair in a country house or cottage, it is better to leave it as is, but a painted product would be appropriate in an apartment.
If you decide to paint the chair, you will need a separate room for painting. Perform all painting work wearing a respirator..
The first step is to clean the surfaces from dust and degrease with acetone. Next we prime with one, maximum two, layers of primer. Aerosol acrylic will do.
After the primer has dried, you can begin painting. If you are using spray paint, shake the can for about 30 seconds before use. After applying the first coat of paint, wait about 20 minutes until it dries before applying the second coat. When painting wood, it is recommended to apply 3 layers of paint.
Now to complete the work, all that remains is to coat the surface with acrylic varnish. It takes about 3 hours to dry, so don't rush, it's better to wait longer than to ruin everything.
If you don’t want to paint it a certain color, but want to leave it natural, then you do everything the same, only skipping the painting process. Use the varnish right away. You can use alcohol-based or oil-based paints.
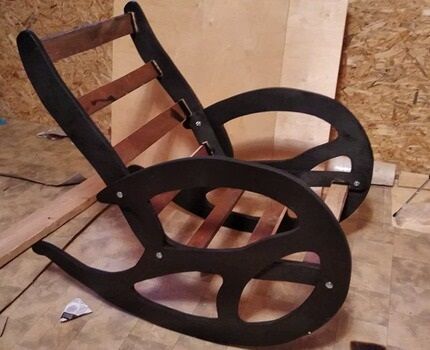
Thus, the rocking chair is assembled, but the only thing missing is the seat upholstery, which can be made from foam rubber. Then you need to take a fabric that is pleasant to the touch and has a color that matches the interior.
With the help of construction stapler secure it all to the chair itself. Well, that's all, the rocking chair is ready!
No. 2. Assembling a chair from planks
We've looked at a fairly classic version of a rocking chair, but this is far from the only option. So let's look at a few others.
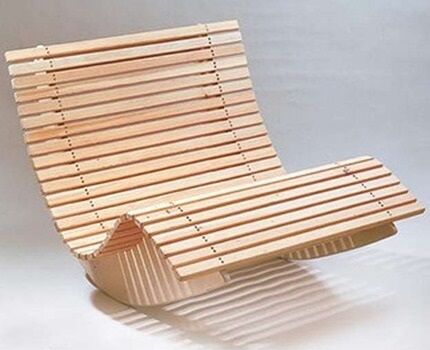
To create it you will need all the same tools, but slightly different materials. Here it is worth using a hammer and nails to fasten the parts.
No. 3. Cable reel chair
Another option is also possible, which will also be a little non-standard - a rocking chair made from a cable reel.

First you need to disassemble the coil itself, separate its parts from each other. Then, using a tape measure, we mark the holes for future fastening rods.
This needs to be done in this way: in the middle of the segment of the central edge of the coil to the other edge, the first hole is drilled, and the other two are made at an equal distance and at an equal angle relative to the first hole.
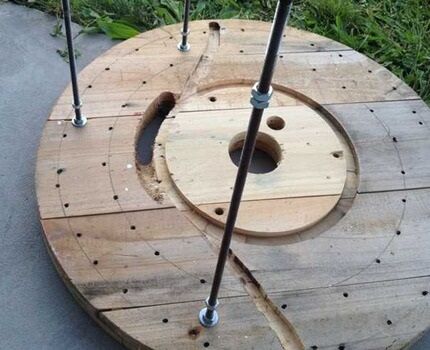
Then we proceed to installing the boards for the seat itself.You can leave them in the same form as they were before you disassembled the coil. It is recommended to additionally glue them PVA glue and leave to dry for a day. You also need to secure the boards with tape for now so that they are held correctly and do not become askew.
After the glue has dried, you can begin attaching the second side wall. First you just have to grease the boards with glue. Next, we securely twist and fasten both walls with rods. And now, the rocking chair is ready! If desired, you can also paint and reupholster the seat.
Didn't you like any of the proposed models? You yourself can come up with something interesting and make a rocking chair from any available materials. The most important thing is the strength of the chair so that you do not get injured while relaxing.
In addition to making a chair, we have other instructions on our website for assembling furniture at home - cabinet making, bed assembly And sofa with drawers.
Video and useful video on the topic
In this video, the author very clearly and competently explains the entire process of creating a rocking chair. The video is divided into several sections, including theory and practical stages:
In this video, the author shows in 6 minutes the entire process of creating a rocking chair, and everything is very simple and clear. Details are drawn for each person individually, using available tools:
The video was shot by an ordinary schoolboy who was able to make a rocking chair in his school’s workshop. The video shows all stages of work. The student used standard tools that almost everyone has (electric jigsaw, screwdriver, grinding machine), so repeating this work is easy:
We looked at several options for making a wooden rocking chair at home. The finished product will be several times cheaper than the purchased one, but will not be inferior to it either in functionality or design. Choose one of the proposed methods or come up with something of your own - it’s up to you!
Still have questions about making a rocking chair? Or want to share the results of your work? Add a photo of a homemade rocking chair, tell us about your personal experience of assembling it - the comment form is located below. Also here you can take part in the discussion, express your opinion on the feasibility of making such furniture with your own hands.
