How to do pressure testing of a heating system yourself
Many residential buildings are equipped with a water heating system.In practice, both after construction and during subsequent operation of municipal housing, heating systems are always pressure tested.
This is usually done by professional structures - Housing and communal services and similar organizations. Is it possible to do pressure testing of a heating system with your own hands, for example, for the owner of a private house?
We will help you understand this issue. The article describes in detail a set of works that make it possible to identify the “weak points” of the heating network. Practical recommendations for testing and crimping the system in different ways are also given.
The content of the article:
Tasks of pressure testing of heating in the house
Regardless of the scheme organization of the heating system (centralized or decentralized), SNiP requirements provide for the technical preparation of such systems for commissioning.
This includes a whole list of work performed at the stage before putting the heating equipment into operation, as well as work that must be performed already at the maintenance stage.
One of the main requirements for commissioning and servicing a water heating circuit used in a private or municipal home is pressure testing. According to the rules and requirements for units of sanitary systems, all elements of heating system circuits are subject to strength testing.
In addition to pre-launch tests, hydraulic or pneumatic testing is traditionally performed by:
- before each new heating season in order to identify places of depressurization and weakened areas;
- after repair operations and replacement of equipment, fittings, gaskets and other elements.
In addition to the main task of identifying areas and points capable of passing coolant, pressure testing helps to free the circuit from insoluble particles that clog the pipeline.

The homeowner can do the pressure testing with his own hands. The water or air pressure testing process does not involve any complex actions, just as there is no need to purchase expensive technological tools and equipment.
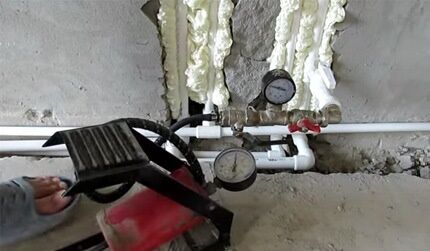
To check the tightness of the system using the hydrostatic method you will need:
- fill the circuit with coolant (water) with a temperature of 5-50°C;
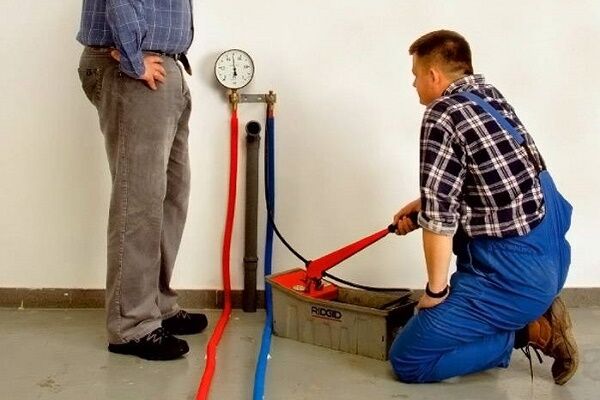
- connect a water pump to the system - electric or manual;
- install measuring instruments in the heating circuit - pressure gauges with a limiting upper pressure twice the operating pressure.
Pressure testing of the heating circuit without water is also used - pneumatic testing of the system with air pressure (manometric method).
This option has its own characteristics and is often used to test individual components of a heating circuit, such as radiators, heating panels, heat exchangers, etc.

How to check for leaks
The initial stage is filling the heating circuit with water whose temperature is not lower than 5°C. Next, the crimping process begins - system pressure raised to the test value (Pslave × 1,5).
Considering that the decentralized system of a private home is being checked, the operating pressure here, as a rule, is no more than 0.1-0.2 MPa. This coolant pressure is provided by most modern heating boilers equipped with circulation pumps.
However, for schemes with centralized connections, the parameters are higher - up to 1.5 MPa.
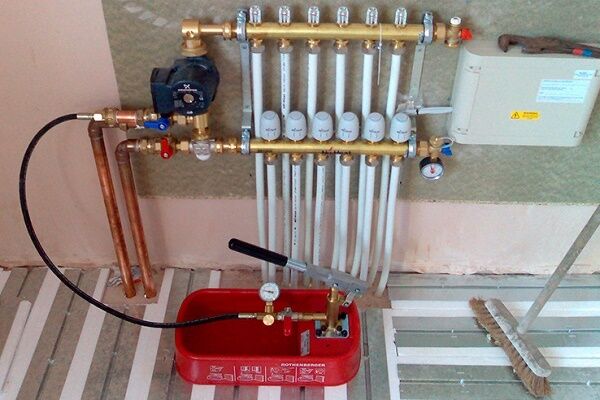
Based on the operating pressure of the decentralized scheme, a test pressure value of 0.2-0.3 MPa is set. A pressure test pump will help raise the pressure in the heating circuit to such values.
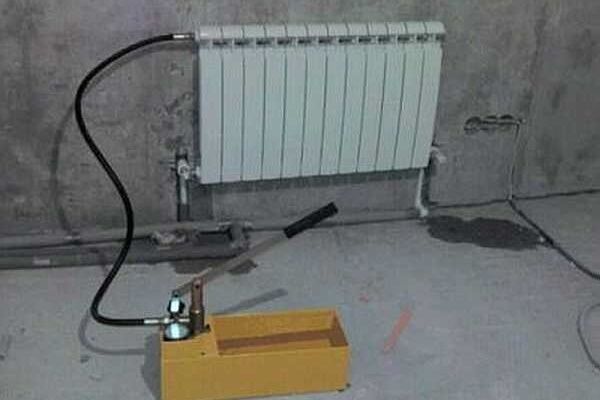
You can use a small electric device, but in private households it is more advisable to use a hand pump.
The choice of such devices is extensive. For example, crimping series pumps H.A., RP, TR – inexpensive, simple and convenient designs, equipped with a control pressure gauge. Their market price ranges from 4,000 to 9,000 rubles.

It is irrational to use electric pumps for pressure testing heating systems assembled by hand due to their high cost. These devices are usually designed for high operating pressures, which is also not necessary when testing a decentralized system in a private home.
The only benefit for the homeowner is that there is no need to put in extra physical effort. Therefore, for those who wish to choose pumps like MGF, R.P., "Saturn" and others. Price range 17,000 – 65,000 rub.
The priority of choosing a hand pump should also be justified by its design features. This type of equipment provides a smooth increase in pressure, which is important both in terms of safety for the tester and in terms of protecting the heating system from water hammer.
In small systems with heating boilers water hammer may damage some items. Therefore manual crimping the pump is optimal for testing small heating networks made by yourself.

Subtleties of the testing process
Filling the system with water and subsequent pressure testing is permissible provided the indoor temperature is above zero. Heating boilers and expansion tanks are disconnected from the system for the duration of the tests.
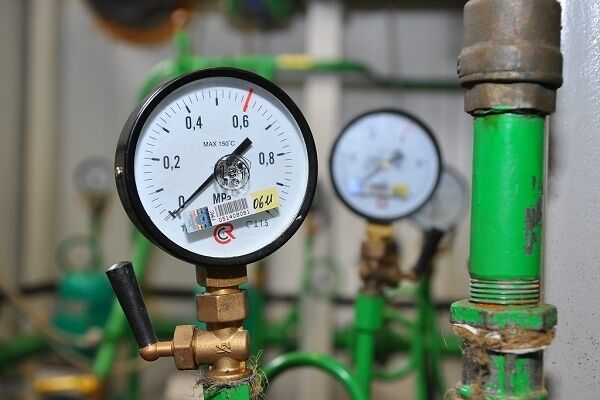
For control, two pressure gauges installed at different points are required. During pressure testing of the heating system, it is not allowed to try to eliminate defects, twist valve stems, or tap joints.

During the pressure raising process, care must be taken to ensure effective removing air from the system. Special devices installed at different points of the pipelines help to achieve this - air vents.
If the heating circuit is not equipped air release device, you should raise the pressure to operating pressure and then open for a short time any tap located in the heating circuit at a level higher than the others.
After air is removed, the pressure build-up continues to the test value (not less than 0.2 MPa). For small decentralized heating systems of private households, the test pressure is usually 0.2-0.3 MPa.
The liquid in the system under such pressure must be maintained for a specified time. The minimum exposure time setting is 5 minutes. If during this period there is no pressure drop of more than 0.01-0.02 MPa, in general, do-it-yourself pressure testing of the heating system can be considered successful.

Other important test points
Similar to the process described above, heating is pressurized with a centralized circuit. True, pressure calculations should be made taking into account the operating parameters of just such a system. After pressure testing, relieve the pressure in the heating system to the operating level and carefully check all accessible areas.
In this state, the heating circuit is visually inspected for possible leaks:
- pipelines and fittings are checked;
- installation locations of measuring instruments;
- flange connections of circulation pumps;
- heating boiler valve seals;
- shut-off valves of the expansion tank, etc.
A hydraulic test, based on the results of which no leaks were detected in the area of welds, destruction or deformation of pipelines and equipment elements, tightness violations in threaded connections, leaks in heating devices and fittings, is considered passed.
Shut-off valves (taps, valves, gate valves) are considered to have passed the hydrostatic test for integrity and tightness if, after turning the shut-off valve rod twice, no traces of water appear in the area of the stuffing box group.
Pneumatic crimping method
Checking the tightness of the home heating network can be done pneumatically. It is noteworthy that the manometric technique allows testing networks and equipment at low temperatures.
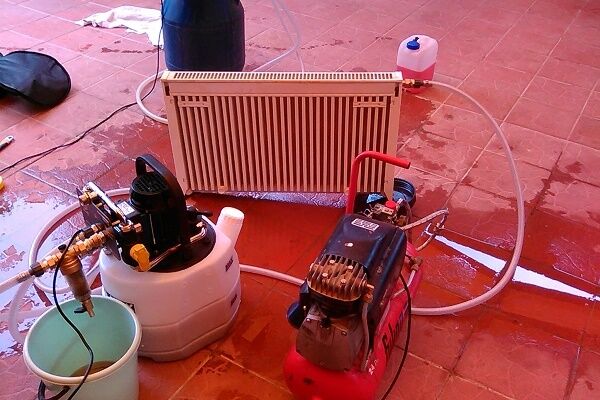
Typically this test method is used to test individual thermal equipment for density. Thus, radiators, boiler heat exchangers, and expansion tanks are checked for leaks using pressurized air.

The air pressure testing process is carried out in a similar way to the hydraulic pressure testing technique. An air compressor or a conventional automobile air pump is used as a source of working fluid.
High pressures are not used here.To check for density using the manometric method, a small pressure (0.1 -0.15 MPa) is sufficient.
If leaks caused by installation defects are detected under an air pressure of 0.15 MPa, the pressure is released and the defects are eliminated. Then the process is repeated - the heating system is filled with air at a pressure of 0.1 MPa and remains in such conditions for at least 5 minutes.
Pressure control in this case allows a pressure drop of no more than 0.01 MPa over a specified period of time. With this result, the system is considered complete and ready for use.
There are often cases of the introduction of specific equipment into the heating system of a private household. It is also not always possible to check equipment using the hydrostatic method, when high pressures are required for pressure testing.
For example, SNiP and GOST provide for testing cast iron or steel radiators with a water pressure of at least 0.9 MPa (9 ATI). However, to perform the same tests using the manometric method (pneumatic), a pressure of 0.1 MPa (1 ATI).
Convector modules require water pressure testing of at least 1.5 MPa (15 kg/cm2). At the same time, if you resort to pneumatic tests, pressure testing of the convector module in order to confirm its quality guarantees is allowed with air at a pressure of 0.15 MPa.
The testing procedure for such devices is as follows:
- filling devices with air at the specified pressure;
- immersing devices in a container of water;
- check for leaks within 5 minutes.
Some technological elements of the heating circuit have a design that can be checked for integrity using the pneumatic method. You can learn about this from the recommendations for servicing the device.
Typically, instructions on crimping methods are given in the operating instructions that come with any heating equipment.
It must be emphasized: the pneumatic (manometric) method is good specifically for checking density. However, it is recommended to check the strength of a heating system, including one made by yourself, using the hydraulic method. Also, the hydrostatic crimping method is preferable for panel heating systems.

Checking steam and panel heating systems
Pressure testing of panel heating systems using the hydrostatic method is carried out at the installation stage, subject to full access to components and devices through the installation windows. Conditions for pressure testing, including with your own hands, imply a rise in pressure inside the system to a level of 1 MPa.
The test is carried out for a minimum of 15 minutes. During this period of time, there should not be a decrease in pressure of more than 0.01 MPa.
If the heating circuit is built taking into account the combination of heating panels with other heating devices, the test pressure value is set equal to the parameters of other heating devices.
Pressure testing of heating panel systems using the manometric method is performed under an air pressure of 0.1 MPa. Exposure time 5 minutes.The permissible pressure drop is not more than 0.01 MPa.
Individual test conditions apply to steam system piping and equipment. If steam heating is designed for an operating pressure of 0.07 MPa, the hydraulic test pressure value will be 0.25 MPa.
At operating pressures greater than 0.07 MPa, crimping is carried out under pressure P slave + 0.1 MPa, but not less than 0.3 MPa. The holding time for steam systems is 5 minutes. The permissible minus pressure difference is no more than 0.02 MPa. After completion of the tests, the circuit is additionally checked under operating steam pressure.

Thermal testing of heating systems
In addition to hydraulic and pneumatic tests of residential heating systems, a thermal test is also provided. The essence of this procedure is to check the uniform distribution of the coolant, testing the heating and thermal output of each individual heating device.
The process is carried out under positive ambient temperatures. The coolant temperature is not lower than 60°C.
If a thermal test is possible only in the cold season (for example, due to the lack of coolant), it is performed immediately after the system is started in operating mode. Test at water temperature, which must correspond to the heating temperature schedule, but not lower than 50ºС.
The coolant pressure must correspond to the operating pressure. The thermal test takes at least 7 hours.During this period of time, the uniformity of heating of all available heating devices is periodically checked.

Certificate of pressure testing
When testing the strength of the heating system is carried out by professional organizations in residential buildings with a centralized scheme, a report on the work performed must be drawn up. This document describes the test conditions and provides an opinion on the quality of the heating network and equipment.
However, a certificate of pressure testing is needed by the person responsible for the operation of centralized heating systems.
For a private household with decentralized heating, especially one made with one’s own hands, the responsible person by default is the homeowner himself. Naturally, when performing work aimed at checking the integrity and reliability of home heating, the owner is unlikely to write a report on the tests performed to himself.

It would not be superfluous to save for the future the conditions and parameters under which the crimping was carried out:
- test pressure values;
- holding time;
- temperature of the liquid medium;
- the difference in pressure at the beginning and end of the holding period.
This data will be useful for comparison with the next audit. The numbers can to some extent judge the general condition of the heating system.It is advisable to record and store information in a home journal specially made for this purpose. Or choose a more modern option - an electronic magazine.
Despite the relatively low values of the operating parameters of a decentralized heating system of a private home, it is recommended that pressure testing be carried out in accordance with all the laws for testing such systems. This approach will provide protection from unexpected impulses and will allow timely identification of potential defects.
Detailed information about crimping metal-plastic pipelines is presented in this article.
Conclusions and useful video on the topic
Video about testing the heating system using the pneumatic test method:
The process of hydraulic pressure testing of heating in a municipal house:
Periodic maintenance helps keep your heating system in good condition. And the reliability of the equipment is a guarantee of stable heating of housing during the cold period.
Do you have practical skills in performing pressure testing of a heating system? Share your accumulated knowledge with our readers, and also ask questions on the topic of the article in the comments below.


My husband did the pressure testing of the heating system with his own hands, because the technician we called couldn’t do it properly. The pressure in the boiler was constantly dropping, the technician said “look for a leak,” instead of simply changing the gasket in the place where there was depressurization. The husband himself identified the problem, replaced several elements (gaskets), and cleaned the pipes. Now the unit works perfectly and the heat dissipation is good.
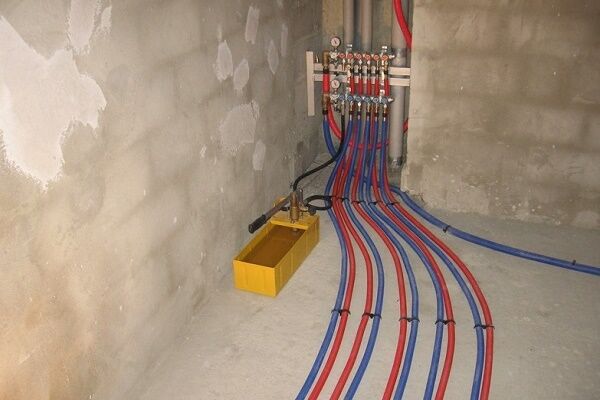
All my heating pipes are laid in the walls, in the curtains, polypropylene.Therefore, crimping was a mandatory process before walling up. Plus, there is a warm floor in four rooms; it also needs to be filled with test pressure before pouring. You understand, this is a responsible matter.
True, I didn’t buy an automatic pump, it’s a waste of money, I even got by with a manual one. And then, I rented it, bought only a pressure gauge, and it’s inexpensive.
I don’t quite understand why only 0.15 MPa is enough for testing. 0.1 MPa is 1 Bar, but I was always told that testing should be done at 5 Bar. Is this outdated?
Hello, Maxim. For a private home, to check the tightness of the system, it is enough to exceed the maximum operating pressure by 1.5 times. At the same time, it should not be lower than the minimum limit of 0.2 MPa (2 kgf/cm). This requirement is specified in SP 73.13330.2016, clause 7.3. It is better to take measurements at the lowest point of the system, i.e. where the pressure is greatest.
If we talk about the manometric method of checking, then in this case the pressure of the injected air should be no higher than 0.15 MPa. If at the same time you hear a characteristic “whistle,” it means that the pressure needs to be increased by another 0.1 MPa and wait 5 minutes. The circuit can be considered to have passed the test if after this the pressure does not drop by more than 0.01 MPa.
To test steam heating, for example, using the hydrostatic method, the pressure can reach up to 0.25 MPa, but no more.
The requirements are relevant for all types of systems, regardless of the type of pipes from which the pipelines are made. The indicator of 5 MPa does not appear in any standards.