How to make shoe racks with your own hands: master classes on making simple options
In a large family there is always a lot of shoes. Therefore, there should be plenty of storage space in the hallway.One of the options is spacious shoe shelves made from different materials. Their design is simple, so you can try to do something with your own hands if you have the necessary tools for this.
The content of the article:
What design should be
Structurally, shoe racks are divided into 2 categories:
- open;
- closed, with cabinet-type doors.
There is another classification, which is based on the type of installation:
- wall shelves;
- floor
There are options with various additions. For example, a soft seat is installed on top; under it you can build a hidden cabinet for a shoehorn, shoe polish, etc.
But in any case, the design of the shelf should be comfortable, spacious and durable.
We bring to your attention the article - DIY garage shelves.
Options for shoe shelves
If we talk about making it ourselves, the best option is an open floor-type shelf made from simple building materials. Even used ones can be used. After assembling the structure, it is worth updating it: painting it, finishing it with fabric and applying other types of finishing.
Master class on how to create shoe shelves yourself
To make simpler those products that do not require the use of complex technologies. For example, electric welding.Not everyone can use it, and the presence of a welding machine often causes a problem. Therefore, we will consider those options that you can do with your own hands using simple tools.
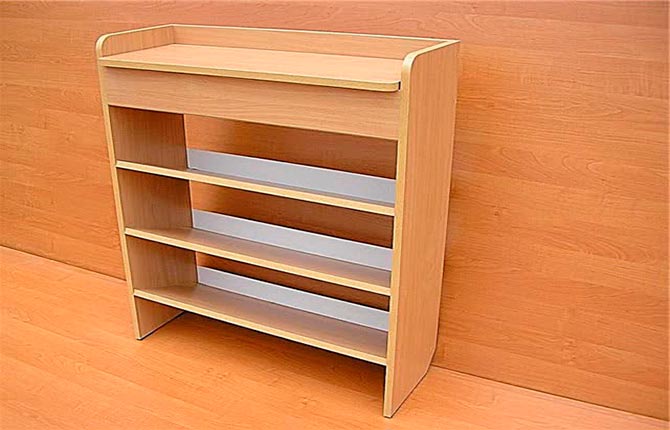
Made from laminated chipboard
This material is easy to process. To trim it you need a regular saw or jigsaw. The screws screw into it easily. In addition, it is a flat material from which you can cut pieces of different shapes and sizes.
It is optimal to make a rack in the form of a long bookcase from laminated chipboard. In its design, you can install a back wall or do without it.
Approximate shelf dimensions:
- depth 30-40 cm;
- distance between horizontal shelves 25-30 cm;
- the length is determined either by the installation location or the number of shoes that need to be placed in a row.
The width of a pair of women's shoes is 22 cm, men's - 25 cm.
You need to cut out 2 side panels from the chipboard, which will serve as more than just support posts. You need to attach horizontal shelves and legs to them. Several shelves are also cut out - their number depends on the height of the shelf.
All elements are connected to each other with screws that are screwed in at an angle. You can use steel furniture corners - this option is more reliable.
Made of wood
A wooden shoe rack made from planks is a classic. She has many advantages:
- naturalness;
- environmental friendliness;
- practicality;
- long service life;
- can be painted or varnished;
- easy to repair;
- the material is inexpensive.
From laminate
This floor finishing material is good for making a DIY shoe storage shelf. It is better to choose thick models - they are stronger.
But to form a shelf you will need to make a wooden frame from a block with a cross-section of 40x40 mm.A frame structure is assembled according to the shape and dimensions of the future rack. Then it is covered with laminate on the outside.
You can make a shoe rack out of pure laminated panel, but the fastening will still be weak. So it is better to choose the frame option.
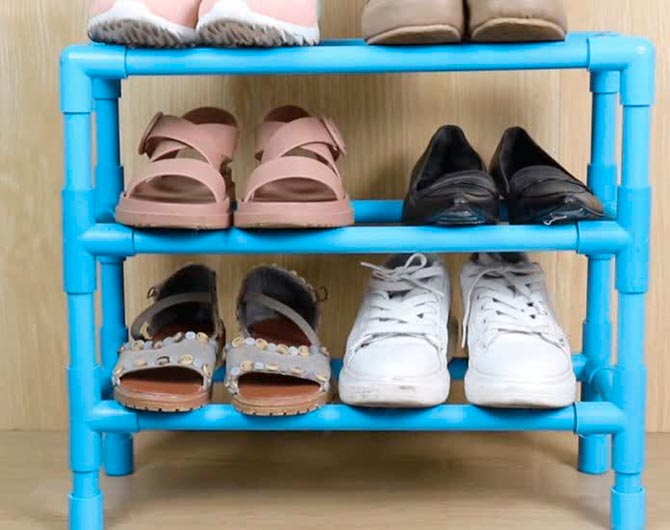
Made from PVC pipes
An original model that can be made if you know how to use a welding iron. The photo below shows one of the modifications. It uses the pipes themselves and plastic fittings: bends, tees and couplings. Here it is important to understand in what sequence to carry out the assembly. Everything else is simple.
Plastic is a material with a long service life. It is 100% environmentally friendly and moisture resistant. Its strength and load-bearing capacity are high. For manufacturing, you can use used pipes, which will reduce the cost of the shelf to almost zero.
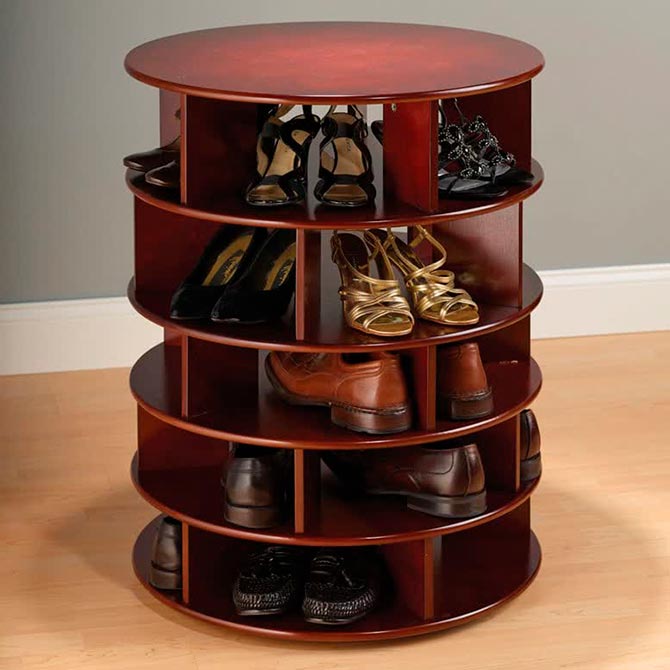
Round rotating cabinet
This is the most original and functional option for storing shoes. It can fit all your shoes, and at the same time they will be easy to find and take out. This is a cylindrical structure, delimited by floors by compartments where shoes are stored. Hence its simple production.
As a base, you need 2-3 pancakes cut from plywood, OSB or chipboard. Installed one on top of the other, they are fastened together by rectangular walls mounted on an edge. One wall runs transversely through the entire structure through the diameter. Others are also attached to it across, but through the center.
4 rollers are attached to the reverse side of the lower pancake. They are the ones who will create free rotation relative to the center of the shelf.
Shoe rack pouf/bench
This is an ordinary shelf for shoes, the top cover of which is formed into a soft bench. Foam rubber is laid on it and covered with furniture fabric or dermantine.
The shoe rack can be open or closed. Can be made from wood, chipboard and metal. The combined option is also appropriate in hallways.
This design has its advantages. The main advantage is the seat on which you can sit to put on or take off your shoes.
DIY corner cabinet
This model got its name because it is installed in the corner of the room. The design is compact, but functional. It takes up little space in the hallway, which makes it possible to place other pieces of furniture in the room, for example, a wardrobe.
One of the manufacturing options is a combined one: metal and plywood. The frame is made from the first one, the shelves are cut out of plywood sheets. They should be in the form of a circle segment (a quarter of the last). Fastening method: bolts and nuts or furniture screws.
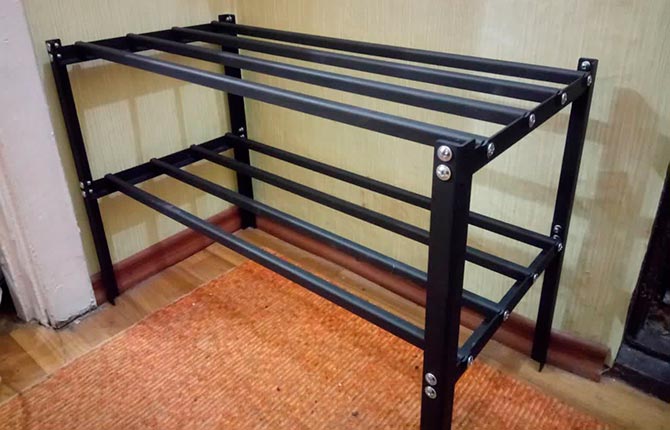
Made of metal
Metal shoe racks are the most durable and reliable. Their service life is practically unlimited. But the initial investment is large. One option is from a profile pipe.
First, determine the dimensions of the shelf. Make a sketch or drawing. Then blanks from pipes are cut, which are connected to each other strictly according to the sketch. Connection method: electric welding.
The joints are cleaned of deposits, metal drops, and carbon deposits. This shelf can be left without painting – it will fit perfectly into the interior of the room. But you can also paint it.

From plywood
This option is made in the same way as a chipboard shelf. But here everything depends on the thickness of the plywood sheet. If the parameter is up to 10 mm, then it is better to build a frame, as is the case with laminate. If the thickness is more than 12 mm, then you can connect furniture elements with self-tapping screws.
It is recommended to cut plywood with a jigsaw.The cut is smooth without chips, which is important when creating any furniture, including shoes.
This shelf does not need to be painted. Plywood has a natural texture. So the applied colorless varnish will only emphasize the natural beauty of the material.
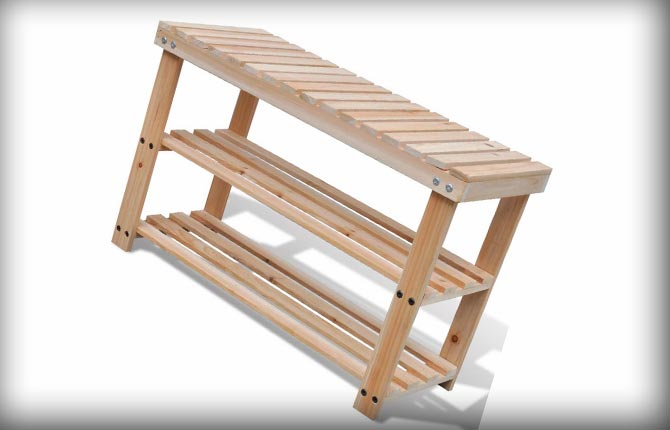
From wooden slats
Wooden blocks are a universal material. You can use them to make more than just shoe shelves. Even large pieces of furniture are easy to assemble from them.
The shelf will require 4 legs made of slats with a cross section of 40x40 mm or 30x50 mm, 6 crossbars made of the same material. As shelves, you can use slats of smaller thickness, for example, 25x40 or 25x50 mm.
First, 2 sidewalls are assembled: 2 racks and 3 crossbars. They are connected to each other by longitudinal slats. The result is a rack with no shelves. They are formed by slats laid on crossbars. You can use short material, then installation is carried out with emphasis on the longitudinal connecting elements.
From a metal profile
This is the same option as from a profile pipe. Only instead of the latter, corners and round pipes and a metal profile are used. Here you can also make the connection by electric welding, but there is an alternative - use metal screws.
You will have to drill holes for them. But this is a way out for those who do not know how to work with a welding machine.
From boxes
Those who like to make things with their own hands will find this model interesting. There is a minimum of costs and availability of material. Every family has shoe boxes. In all other respects, such shelves are inferior to others:
- strength is low;
- appearance leaves much to be desired;
- minimal functionality;
- short service life;
- There are also few manufacturing options.
One of the simplest options is to stack the boxes on top of each other. The lid of the box is placed upside down. There's a box on it on the edge. On top is another lid from a smaller box. It has its own box on its edge. And so on in a row and up.
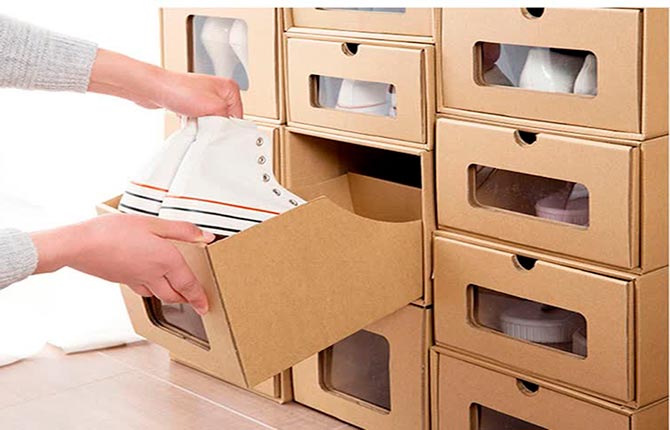
You can use other than shoe boxes. A shelf made from larger cardboard containers will work well. The photo below shows one of the options. To do this, you need a box with a retractable inner part.
Although you can do all this with your own hands. Cut out the end of the container and insert a smaller cardboard into it. The place for pulling is cut out and covered with transparent plastic film. It makes it possible to see what shoes are located in this box.
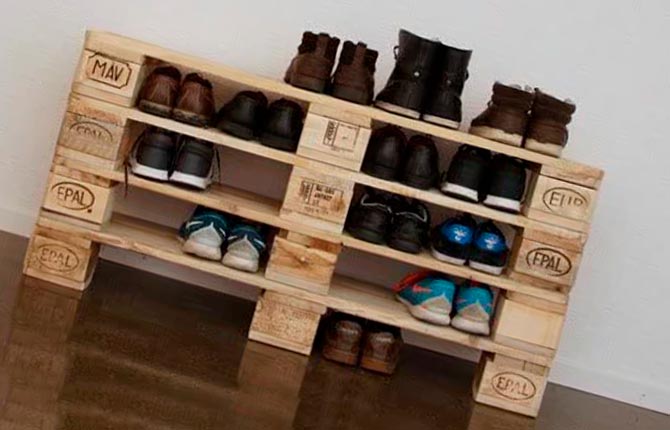
From wooden boxes and pallets
Wooden pallets are a universal product. Intended for transporting and storing various goods, pallets turned out to be an excellent material for constructing loft-style furniture. They are used to make chairs, stools, tables, swings, etc. They make amazing shoe racks.
The simplest design is to stack the pallets on top of each other without fastening them together. Their width is large - 80, 100 and 120 cm. From one you can get 2, 3 or more shelves. You need to choose the depth and cut to the required size. Almost the entire manufacturing process comes down to one operation - cutting with a saw.
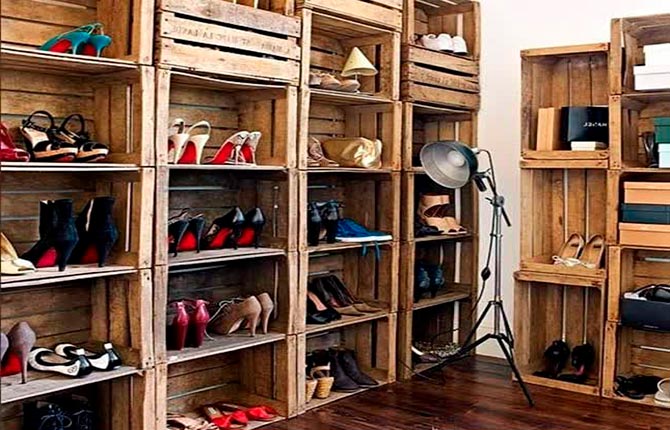
Same thing with boxes. These are almost ready-made shelves for the garden. They are wide, but it is not difficult to reduce them by 2 times. Just one partition, and the box turns into a two-level vertical structure for shoes. It must be attached to the wall, and exactly the same ones should be hung next to it: on the side, below, on top. Floor structures will also look good.
There are a lot of available materials and finished products from which you can make shoe shelves with your own hands. You need imagination, desire and diligence, as well as the ability to use simple construction tools. Some materials do not even need to be processed - they will easily fit into the interior of the hallway.
Who has already tried to make a floor or hanging shoe rack with their own hands? What materials were used for this? What's easy to use as a base for a shoe rack? We are waiting for your comments.


I took two wooden apple boxes from the dacha. I inserted a piece of rectangular plywood inside, making three shelves. I made three of these boxes. He placed two on the floor, and one in the middle between them he placed on them. The result was a multi-tiered shelf. It has been standing in the hallway at the dacha for three years now. It surprises guests, but is popular. The most important thing is that I didn’t paint it with anything, it still stands in its original form.
I am a welder myself, I live in a private house. There is also a workshop on the site. I can make whatever I want out of metal. Almost all my furniture is metal. The shoe rack is also made of metal profiles. I chose the style, sizes, and made it myself. Painted it black, it matches the finish of the floor and walls in the hallway. I think it's metal. The furniture is the best, it cannot be compared with wooden furniture. I'm just in love with metal.