DIY wooden floor clothes hanger: creative ideas + assembly instructions
Organizing space is one of the most important conditions for comfort and coziness for any room.Today, buyers can choose the necessary furniture in showrooms or online stores, but sometimes you still want to give free rein to your imagination and make something of your own, unique, don’t you? For example, it is quite simple and quick to make a wooden floor clothes hanger with your own hands, but it looks like an original product made by a professional.
We will tell you how to make it and what materials you will need for this in our article. We will also provide photos of the best models of wooden hangers that you can make yourself.
The content of the article:
Original ideas for hanger racks
To create a floor hanger (rack), you only need a basic set of tools and available materials, selected according to size. If we talk about design, then there is a lot to roam here: there are a huge number of examples suitable for various types of interior. From modern to cozy classic, a floor rack will declutter while serving as a great decoration.
Light wood tones add warmth and light to a room, making it feel much cozier, especially when combined with the greenery of indoor plants. If you need to achieve a similar effect, you don’t need to worry about painting the hanger or using stain, just sand the wood and varnish it.

Adherents of minimalism arrange their home accordingly: they select calm colors and shapes of furniture, paying special attention to its functionality.
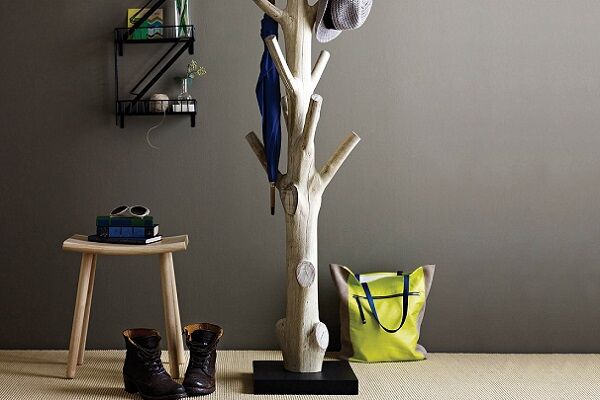
In this case, a stable hanger made from a trunk/branch of a real tree or one stylized as one is perfect. It is convenient to choose the number of branch hooks according to the size of your wardrobe, so that there is enough space for all jackets and coats.
Such a clothes rack can be made from a round wooden rod and stand, or you can use a dry branch of a real tree, having previously cleared it of bark and treated it with varnish.

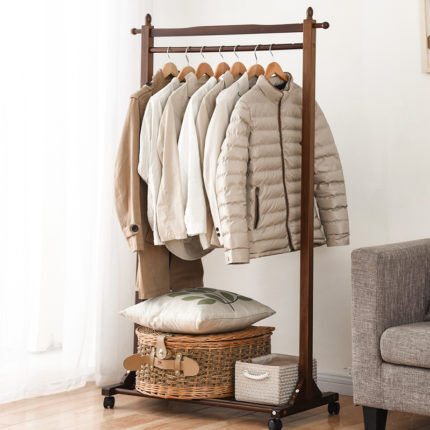
Such floor hangers are quite lightweight, so if necessary, it will not be difficult to move them from place to place. Replacing self-tapping screws on wooden dowels (tenons), you will receive a mobile structure that can be disassembled and stored folded until required.
Even lighter in weight floor PVC pipe hanger - even a beginner can handle its assembly. The main thing is that it fits harmoniously into the interior of the room.
Many people are interested in wood carving, why not hone their skills in practice? To decorate a floor hanger, a regular chisel is suitable, and some additional parts (for example, wooden ball tips) can be purchased separately.
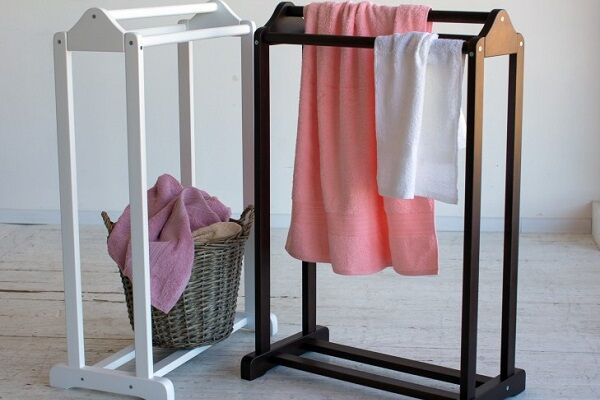
Is there enough free space in the hallway? Don't stop at just the clothes hanger. Sanded wooden slats using self-tapping screws and fastening spikes (dowels) are assembled into convenient organizers, where you can store anything you want.
Such products are durable and practical, provide ease of cleaning and, with their angular shapes, add texture to the surrounding space.
Original models of a simple and functional floor hanger are in the following photo selection.
When you don’t have time to go to a hardware store and choose materials, pieces of furniture that have lost their presentation will come to the rescue - it’s worth breathing new life into them, which environmentally friendly and profitable.

Do you have a broken chair lying around in the closet that people always forget to throw out? Is a wooden ladder, inconvenient to use, still standing in the garage, leaning against the wall? Trim off the excess parts and apply a fresh coat of paint - your vintage hanger is ready!
Stages of creating a floor hanger
There are a huge number of different variations of sketches that you can improve and change if you wish. Let’s dwell on one of them and consider in detail the stages of assembling a floor hanger at home.
Step #1 - tools and materials
First, let's take a look at the list of materials and necessary tools for creating a clothes hanger in a discreet Scandinavian style:
- Four wooden slats 2000 mm long.
- Wooden or metal rod.
- Two slats 1500 mm long.
- Screwdriver, wooden dowels (round dowels) and a feather drill with a diameter of 10 mm
- Sandpaper and glue.
Instead of sandpaper you can use an angle grinder with grinding wheel.
It is recommended to perform all actions with gloves to protect the skin of your hands from mechanical damage.
Step #2 - marking parts
On each two-meter rail it is necessary to measure 200 mm from the top edge. The hole for the rod will be located at this location. Bottom edge of the rail is filed at an angle so that the hanger rests firmly on the floor.
We place the slats on top of each other in pairs so that the marks match.

For structural strength, each pair of slats should be connected to each other dowels (spikes) or self-tapping screws.
Then, at a distance of 500 mm from the bottom edge of each long slats, as well as on the cuts of slats 1500 mm long, we drill holes corresponding to the diameter of the existing mounting spikes.


Step #3 - assembly of the structure
Let's start assembling. First, insert the rod into the prepared holes.

We connect the slats with crossbars, thanks to which the hanger will not wobble in different directions. To prevent the legs from scratching the floor, you should glue pieces of foam rubber or felt on them.
Eco-friendly The floor hanger is ready for use!

Advantages of a homemade hanger
Not everyone will immediately want to pick up a jigsaw and go to carpentry.It’s long, it’s tedious, there’s sawdust everywhere... And yet, there are many more advantages to making a floor hanger with your own hands than it seems at first glance.
Firstly, it is essential cheaperthan buying in a store. Yes, when you are your own designer and builder, everything is much cheaper.
Each buyer overpays at least for the brand, production and advertising costs. You can do without all this by purchasing building materials at cost and spending a little of your time instead of money.
Secondly, uhlogical. Products made from wood create a favorable soft microclimate in the house. They are non-toxic biodegradable and are perfectly recyclable.

Third, durable. Yesterday it was a wooden chair, today it is a functional hanger, and tomorrow it will become a frame for a cat. scratching posts. Thanks to the durability of the material, the product will live more than one, or even three, lives before it is sent for recycling.
When designing something as simple as a floor hanger, you can select components with the expectation that they will definitely be useful in the future.
Did you enjoy creating original pieces of furniture with your own hands? Then we recommend that you read the instructions for making furniture from pallets.
Read on the website - how to make flower shelves with your own hands.
Conclusions and useful video on the topic
Making a simple Scandinavian-style hanger shelf:
Floor hanger made of wood: instructions for cutting, processing parts on a machine and assembling the finished structure:
This floor hanger can be made even by a person who does not have special equipment or wood processing skills. Master class on assembling a simple hanger:
By creating household items with your own hands, you gain invaluable experience and emotions, turning an apartment or country house into a unique place with its own history, and it is likely that in the process you will discover a new talent in yourself! Start with a floor coat rack, an essential part of any living space. Whether it will be a simple counter or an intricate structure the size of a dressing room is up to you.
A clothes hanger made of wood will fit perfectly into the surrounding space, eliminating the need to purchase bulky wardrobes or put all your clothes in a lump on an old chair.
Would you like to tell us about making a wooden hanger yourself? Share your experience with our readers - the feedback block is located below this publication. Also here you can add original photos of your hanger, ask questions of interest to our experts and other site visitors, and take part in the discussion.


