Do-it-yourself mold for paving slabs - manufacturing tips
To make the coating pattern original, a template mold is made independently.Before making a mold for paving slabs, a detailed drawing is created. It indicates the dimensional parameters of the products and the type of material used. During the production process, a pre-prepared drawing is strictly adhered to.
The content of the article:
Materials used
On an industrial scale, molds for paving slabs are made from various materials. Products made of plastic, metal and silicone are in demand. They have a long service life and are resistant to mechanical damage.
In domestic conditions the following are used:
- metal;
- wood;
- gypsum mixture;
- plastic.
When selecting a material, the degree of its water absorption is taken into account. If liquid quickly leaves the solution, its strength characteristics will deteriorate. The inner surface must be made smooth. This makes it easier to remove the product after the solution has hardened.
Wood products
The formwork is made of boards, beams, particle boards, etc. Before assembly, the parts are treated with varnish or paint. This will make the surface smooth and extend the life of the wood. The production of formwork is carried out in the following order:
- Creating a drawing. Before you make your own mold for paving slabs, make a detailed drawing. It takes into account the design and dimensions of the formwork. At this stage, you should choose the right shape. After manufacturing, the tile elements should fit well together.
- Selection of wood. For single use, formwork is assembled from wood of any species. To carry out a large volume of work, solid wood is selected.It is less susceptible to mechanical damage. This increases the service life of the formwork.
- Preparing parts. The beams or boards are cut into pieces of the required length. The wood is sanded and painted. This removes unevenness on internal surfaces.
- Assembly. The parts are fastened according to the specified parameters. Metal corners and threaded fasteners are used for connections. For repeated use and to facilitate the process of removing tiles, the formwork is made collapsible.
After assembly, the formwork is checked for compliance with the dimensions specified in the drawing. In this case, the dimensional parameters inside the print are taken into account.
Advantages and disadvantages of plastic paving slabs. About this in our article link.
Gypsum mixtures
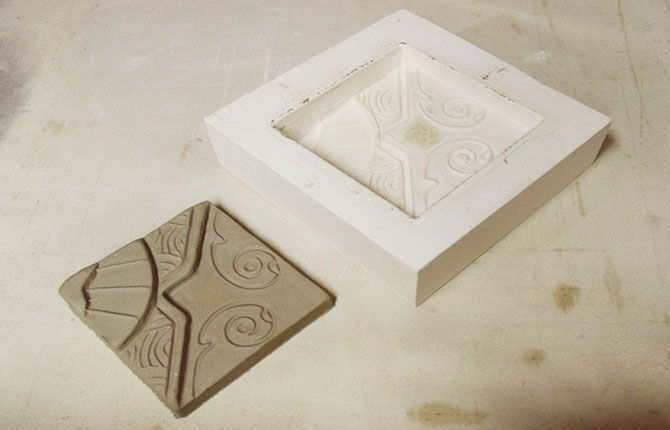
In some cases, gypsum mortar is used. It is flexible and hardens quickly. Using a gypsum mixture, you can make paving slabs with any pattern.

The disadvantage of products of this type is fragility. Under mechanical stress, the edges of the template crumble. This requires periodically producing new parts. To make an impression from a plaster solution, follow the following step-by-step instructions:
- Select a container. You can use a wooden sheathing installed on a smooth surface.
- The internal surfaces are lubricated with oil. It is applied by spray. This eliminates the possibility of leaks. Lubricant is applied to facilitate unmolding.
- Dilute the gypsum mixture with water. The solution is prepared before pouring.
- Place a prepared form with a pattern in a container.
- Cover the contents of the container with the solution. The layer thickness must be at least 10 mm.
- Wait until it hardens completely.You must wait 60-90 minutes for hardening.
- Dismantle the finished template for paving slabs.
After manufacturing, the template is inspected for holes and damage. For ease of use, the sharp outer edges are cut off and ground.
You can make an impression after pouring. To do this, you will have to wait until the gypsum mixture becomes viscous.
Plastic templates
The imprint for paving slabs made of polymer materials is resistant to mechanical damage and has a long service life. Plastic parts have a smooth inner surface. The unmolding process is effortless.
You can make a template for paving slabs from liquid plastic. Manufacturers supply it in the form of 2 components - the main mass and the hardener. After hardening, a durable material is obtained that is resistant to mechanical stress.
The walls of the plastic template do not absorb moisture, which has a positive effect on the strength characteristics of hardened concrete. The forms are made in the following order:
- Prepare a container with smooth internal surfaces. Its dimensions should be at least 20 mm larger than the future form for paving slabs. This will make the walls of the resulting product strong and resistant to damage.
- A print with the required design is placed on the bottom of the container.
- A lubricant is applied to the surface.
- Mix liquid plastic with hardener. Different manufacturers have different methods of preparing the mixture and proportions. Before cooking, you should study the instructions in detail.
- The resulting composition is poured into a vessel. The liquid level should be at least 1 cm above the print.
- Wait until the plastic has completely hardened.
- Dismantle the finished form.Inspect it for damage and cut off sharp edges.
After this, the plastic mold for paving slabs is ready for use. Templates of this type have a long service life. They can be made to produce paving slabs for commercial purposes.
During the preparation of liquid plastic, harmful substances are released. It is necessary to take care of normal ventilation of the room and use personal protective equipment, including a respirator.
Metal molds
Templates made of metal are resistant to mechanical stress and serve for a long time. To protect the metal from corrosion when interacting with a damp environment, the surfaces of paving slab molds are coated with varnish or paint.

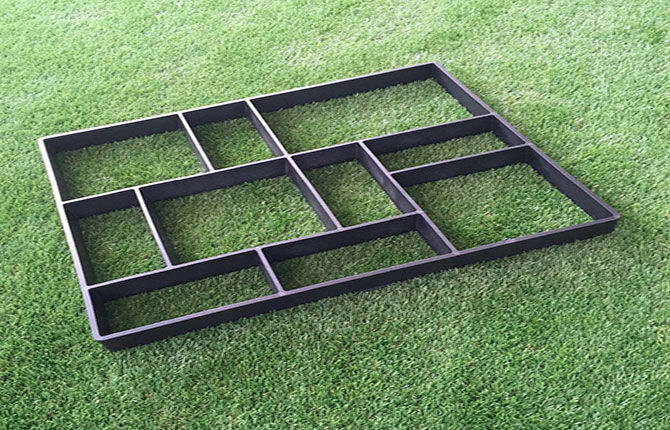
To make templates, profile pipes, corners, strips, etc. are suitable. The parts are connected by welding of any type. To facilitate the unmolding process, the products are made collapsible. To do this, install hinges and connecting elements.
To make a metal mold, you need:
- Create a detailed drawing with dimensional parameters. During the assembly process, strictly adhere to the drawing.
- Select material. Select metal parts without cracks, holes or other damage to the surface.
- Cut pieces to the required length. The evenness of the corners is ensured by using a miter box.
- Clean parts from corrosion. The workpieces are cleaned of rust and polished. Small abrasive particles are removed with a jet of compressed air.
- Mark the places where hinges and connecting elements are attached.
- Connect the workpieces by welding. To weld parts, you will need specialized equipment and experience in carrying out this type of work. If they are not available, you can contact a qualified welder.To avoid injuries and burns, personal protective equipment should be used.
- Install hinges and connecting elements.
After this, the internal dimensions of the mold are checked for compliance with the drawing. The correct ratio of sides and angles will allow you to easily join individual elements of paving slabs in the future.
Tips for production and operation
By creating the mold yourself, you can make an original product design. Following several rules makes it easier to stamp paving slabs:
- Make carrying handles. The template is equipped with handles. This simplifies the removal of finished products.
- Use several templates at the same time. This speeds up work and allows you to get a larger volume of products in the same time.
- Make sure the side surfaces are even. The walls of the template can be shifted outward. If you tilt them inward, after the concrete has hardened, it will be impossible to remove the tiles without disassembling the mold.
- Use a vibrating table. To remove air bubbles from a solution, use vibrating table. This increases the strength of concrete.
- Lubricate internal surfaces before each pour.
A person independently determines the material from which he wants to make a template. For long-term operation, molds made of materials resistant to mechanical damage are used. Taking into account several rules, it will be possible to facilitate the process of making paving slabs.
Tell us in the comments why you decided to make a mold for paving slabs yourself. Bookmark this article to return to it later.
Video on the topic: Do-it-yourself mold for paving slabs


