Installation and installation of a gas tank for a private house: the procedure for designing and carrying out installation work
The gas supply of a residential building determines a certain level of comfort for the inhabitants of the home. Country houses equipped with a centralized gas supply are considered more comfortable.
For property owners who are unable to connect to a centralized network, there is an alternative. This is the installation of a gas holder - a structure designed to provide an autonomous system with gas. Let's figure out together the procedure for designing and installing gas tanks for the home.
The content of the article:
What is a gas tank?
The technical classification of a household gas holder design defines it as a liquefied gas storage device. Thus, a household gas holder is represented as a vessel intended for filling and storing liquefied gas.
Of course, for such purposes a tank is used that meets the requirements for such installations. In addition, gas tanks for liquefied gas are equipped with a full range of automatic means to ensure safety during the operation of dangerous vessels.

This naturally suggests an explanation: workers and employees of special organizations are called upon to install, put into operation and carry out periodic monitoring of the gas tank. This is roughly comparable to the case of everyday life when a gas boiler or gas water heater is installed in the house.
Well, in addition to the information: gas tanks are usually filled with a liquefied mixture of propane butane.These are low molecular weight hydrocarbons, a characteristic feature of which is an easy transition from a liquid to a gaseous state. The frequency of the gas tank refilling process, as a rule, is no more than 1-2 times per calendar year.
We also recommend reading the article in which we examined in detail the cost of installing a gas tank on the site. Read more - read Further.
Tank installation options
Variations in the installation of gas tanks are limited in two ways:
- Surface installation.
- Installation underground.
For the first installation option, a characteristic condition is installation in places on the territory of a private farm, where the sun's rays penetrate to a small extent. A section of the territory is also selected that is, if possible, as protected as possible from the influence of external natural factors (strong wind, landslides, soil movements, etc.).
There are no specific requirements for the tank capacity. The volume of the gas tank is completely determined by the consumer needs and wishes of the owners of the country house.

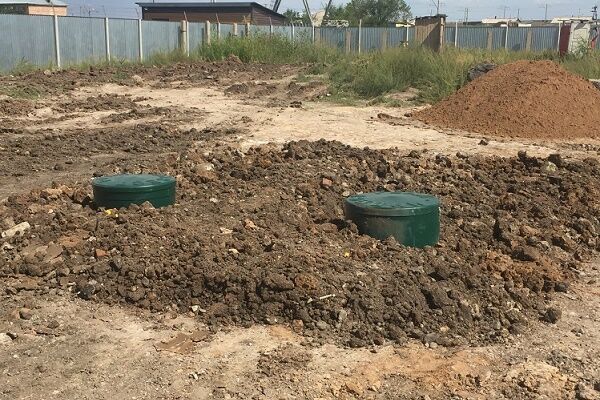
Gas tanks of underground installation are mounted below the ground surface level. The tanks are deepened to a depth when the upper level of the vessel is at the deepening point at least 0.6 m from the ground surface level.
Only the filler neck of the tank remains at the same level with the ground surface or slightly higher. Under such deepening conditions, possible freezing of the tank in winter is excluded, plus the gas tank is reliably protected from possible mechanical influences.
Regardless of the type of installation, location of gas tanks on a domestic site it is allowed to be no closer than 10 meters from residential buildings and various technical communications.
The design for installing a tank for liquefied gas must provide easy, convenient approaches/entrances for gas refilling and maintenance. The presence of any utility lines in the immediate vicinity of the structure is not permitted.
The main design parameter for installation in a private household is the volume of the gas tank. According to the standards, the calculation is carried out with an emphasis on the square meter of usable area of the home. The average gas consumption figure for areas with a temperate climate does not exceed 35 m3 at 1 m2. From here you can calculate the approximate volume of the tank.

A more accurate volume figure is obtained if the calculation is based on the gas consumption of the heating boiler. Here, the rated power of the heating equipment is simply taken from the passport information and multiplied by the required gas consumption. Then the annual fuel requirement is calculated.
When performing calculations, you should take into account the fact that gas tanks are filled with liquid gas to no more than 85% of the tank volume.
Carrying out installation work
The lion's share of installations of household gas tanks is traditionally carried out underground. This installation is considered more acceptable from a safety point of view, plus a hidden gas holder does not spoil the landscape view.

Also, taking into account the rather harsh climatic conditions of the middle zone, the installation of gas tanks in the underground version is given more preference. This way there are fewer problems with maintaining the device in working condition in low winter temperatures.
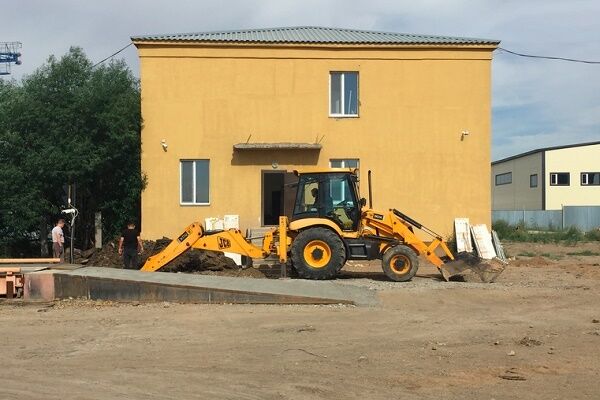
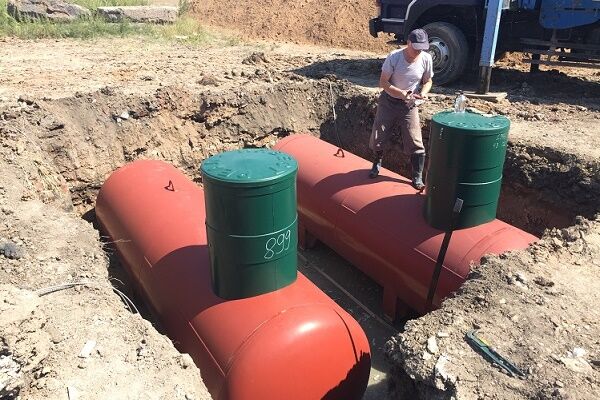
The following photo gallery will clearly demonstrate the stages of underground installation work and the sequence of their implementation:
How is a buried tank installed?
Having chosen a place on the territory of a private farm that meets all the requirements, they organize work on marking the site, installing and excavating soil. The dimensions of the future pit that should be used for the gas tank are determined based on the documentation of the tank.
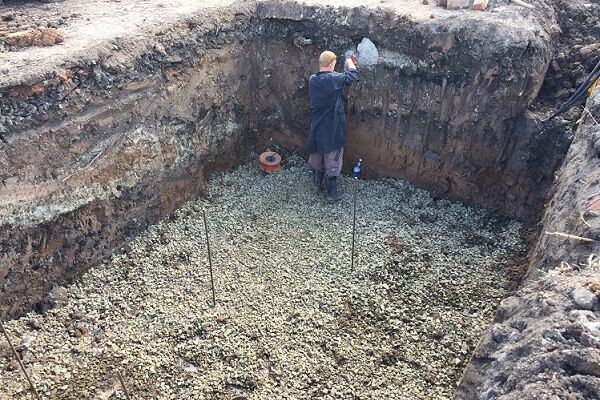
The prepared pit is additionally prepared for loading the container:
- strengthen the bottom part;
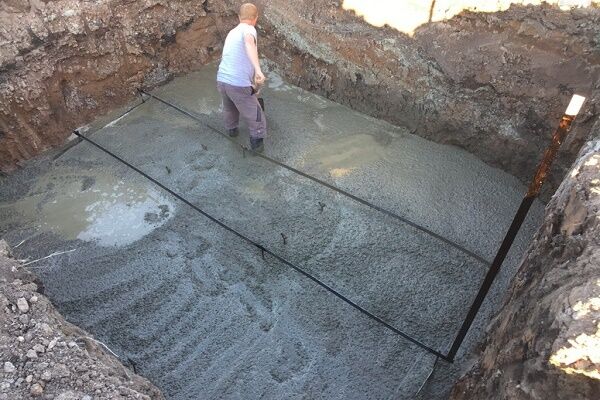
- they place a frame for the foundation with anchor fasteners at the bottom of the pit;
- fill the frame with concrete, including the bases of the anchor studs.
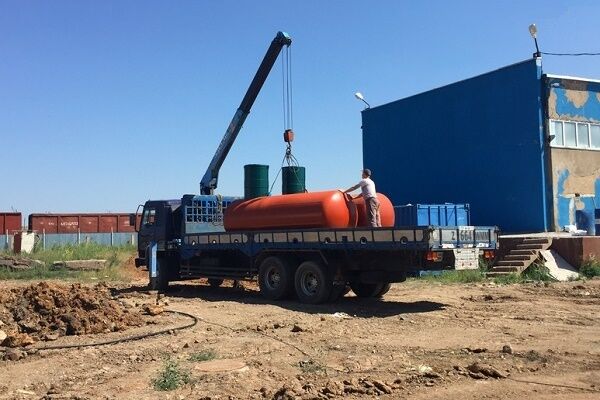
After the concrete pour has hardened, installation of the tank begins. For massive gas tanks, crane rental may be required. Small gas tanks are lowered into the pit using winches or similar tools.

The container lowered into the pit is placed on the anchor studs of the foundation, leveled horizontally using pads under the feet, and secured. To fasten tanks that are designed without support legs, metal tapes or cables are used.
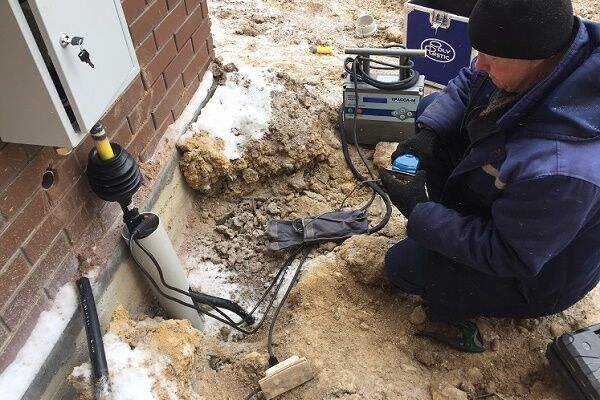
Electrochemical protection of gas tanks
At the next stage of gas tank installation, work is carried out to install corrosion protection. Conventional protection methods are not suitable here. We need high-quality electrochemical technology.
As a rule, one of two electrochemical protection methods is used:
- Active.
- Protective.
Active electrochemical protection is often used on tanks manufactured at Russian enterprises. This protection option is most effective for metal susceptible to corrosion (in particular, 09G2S steel). It is from this type of metal that Russian-made gas tanks are made.

Cathode protection is carried out by an electrical circuit, the power consumption of which is 0.75 - 0.90 kW.This is a rather expensive station for private households, but no other solution has yet been invented.
An alternative to an active protection station is a sacrificial anode/cathode system. This design also has its drawbacks, but it saves the consumer from energy costs. Used in conjunction with imported tanks. The principle of operation of such a system is based on the “interception” of active corrosion by a metal with a high electronegative potential (for example, aluminum).

For both methods of electrochemical protection, appropriate calculations are required with an emphasis on the type of container, its overall dimensions and other factors. Calculations determine the installation location of the electrochemical protector or the power of active cathodic protection. At the design stage of the gas tank installation, this point must be taken into account.
Tread systems seem more attractive from a cost-saving point of view. But they cannot be applied to all types of tanks.
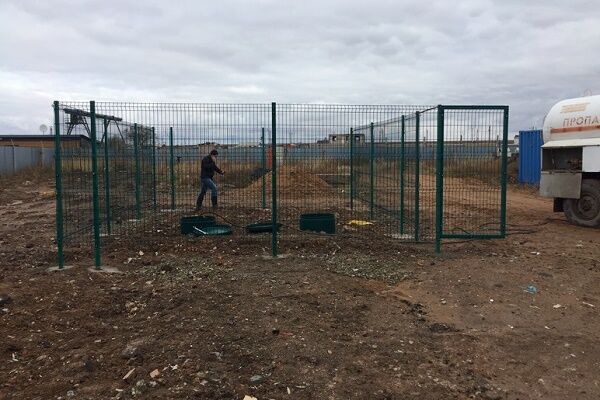
Grounding and lightning protection
The functions of grounding gas tanks, in fact, can be taken over by electrochemical protection systems. However, a household gas tank must be protected individually from lightning in any case.
In relation to the installation of the installation, the following actions are possible:
- Making a ground loop.
- Installation and deepening of the contour around the perimeter of the pit to a depth of at least 1.8 m.
- If necessary (for moving soils), strengthen the contour with reinforcing elements.
Detailed instructions on how to make a ground loop with your own hands can be found in this material.
Ultimately, all installation elements included in the gas distribution device system must be combined into a common grounding loop, thereby ensuring comprehensive protection (in accordance with PB 12-609-03). The common circuit resistance value is allowed at 10 ohms and no more.

The lightning rod is installed at a distance of at least 12 m from the boundary of the gas tank pit and connected to the ground loop. The height of the lightning rod mast should be no less than 7 m.
Completion of the gas tank system
After completing all installation activities for installing the gas tank, the system must be checked for leaks. Pressure testing can be carried out with compressed air. The test pressure value is taken from the calculation of the working pressure of the tank (in the passport), increased by one and a half times. To build up test pressure, an air compressor is connected to the container.

The pressure build-up should be carried out in a smooth phase mode. In this case, it is necessary to monitor the pressure level using pressure gauges. One pressure gauge is placed directly on the compressor outlet fitting, the second on the upper side of the tank body.
After reaching a pressure level corresponding to the test value, stop the compressor, turn off the valve on the air supply line and leave the system for 5-6 hours. Then check the pressure drop. If the drop is greater than 0.5 - 0.8 ATI, the system has a leak. A drop below these values indicates satisfactory sealing.

Having completed the pressure testing, they begin to backfill the pit with the reservoir. Backfilling is carried out with fine river sand to a level of 0.3-0.5 m below the ground level. After filling the entire area of the pit with sand, the embankment is carefully compacted or allowed to settle for 1-2 days.
The installation of a gas storage and consumption tank is not considered complete unless the following work is completed:
Then the remaining upper area of the pit is filled with loose soil up to the surface level of the entire area. The last stage is pressure testing of the gas supply line to the building. If the pressure test is completed normally, the installation can be considered complete.
Conclusions and useful video on the topic
Briefly and succinctly about autonomous gas supply to private households:
Judging by the description of the design and installation process, it is quite possible to provide a private home with an autonomous gas station with little effort and at a cost acceptable to the family budget. And quite a few owners of suburban real estate, remote from centralized gas communications, use this opportunity. The result is obvious - convenience and increased living comfort.
Do you have practical experience in using and installing gas tanks? Or want to ask a question about the topic of the article? Please leave comments, ask questions, and share your experience in the block below the article.


