Built-in sockets in the countertop: varieties, features + tips for selection and installation
A modern person in the kitchen uses all kinds of household appliances that require constant and periodic power supply. Therefore, when using several devices at the same time, quite often you have to connect them one by one to the outlet. This makes the cooking process much more difficult, don’t you agree?
To solve this problem with little expense, you can install built-in sockets in the countertop. Such connectors do not take up much space, provide simultaneous connection of several household appliances and allow you to hide all the wires in the kitchen set.
But how to choose and install such a device? This is exactly what we will talk about in detail in this material - we will look at the types of built-in units available on the market, and dwell on the features of their design. We will also provide recommendations for the operation and independent installation of such sockets, supplementing the material with thematic photos and visual videos.
The content of the article:
Features of built-in socket blocks
Any built-in socket is, first of all, an electrical connector that is used to power household appliances. Functionally, the built-in connector is no different from standard overhead sockets and extension cords. It does not have any additional characteristics. The popularity of the connector is due to its decorative and practical value.
The built-in network unit allows you to connect several household appliances at once. This makes it possible to get by in the kitchen while preparing food without carrying it and not constantly looking for free sockets on the apron. At the same time, the device when not working is hidden from prying eyes and inaccessible to children.
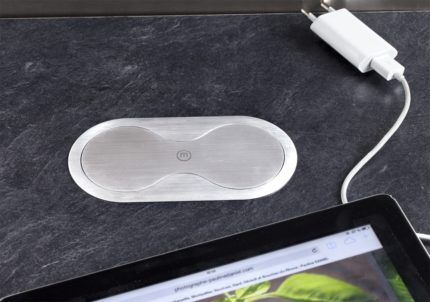
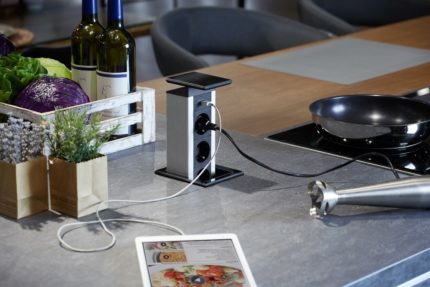
Built-in sockets are modern extension cords, analogues of surge protectors, which have begun to look more stylish and ergonomic. They expand design possibilities and allow you to decorate your kitchen in any style.
Built-in network units help hide wires under the countertop, regardless of their number. These sockets are compact and elegant in appearance. They help to rationally use the work space and are able to elevate any interior.
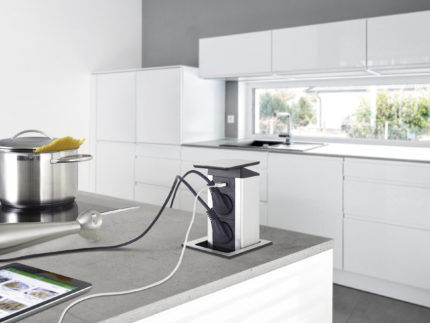
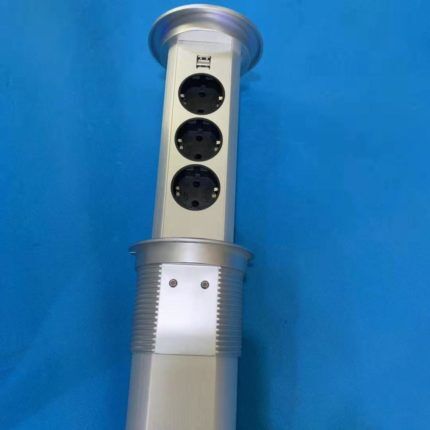
Built-in sockets can be horizontal or vertical. Vertical network blocks have the form of cylinders, along the entire length of which there are sockets for plugs. When not in use, they are recessed into the tabletop. Vertical retractable sockets are considered the most popular and widespread on the market.
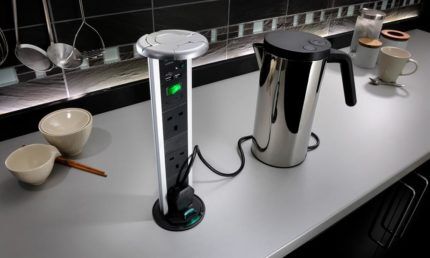
Horizontal socket blocks are placed in round, square or rectangular boxes. They are often equipped with multiple power connectors. Due to their design features, they can be stationary or rotary. They have many working sockets, but are poorly suited for connecting plugs with wires located on the side rather than directly.
Types of built-in network blocks
All sockets built into kitchen countertops can be divided into stationary, retractable and rotary.
Type #1 - stationary sockets
Stationary blocks are mounted in the specified plane without the possibility of changing position. They are protected from the ingress of crumbs, water and various debris by lids. To plug the device into the socket, you only need to remove this cover.
Such connectors are simple and do not require any complex manipulations during operation.
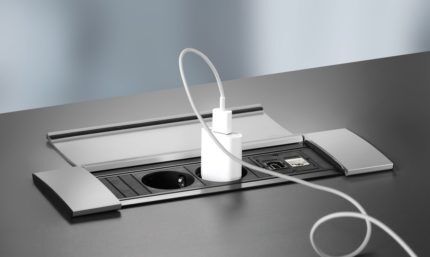
The main disadvantage of stationary built-in sockets is that they take up a lot of space on the desktop.
The surface of the covers is not suitable for functional use. You can’t put anything on it, and therefore you have to use only the unoccupied part of the tabletop.
Type #2 - retractable models
Due to the unsuitability of the covers of stationary models for operation, retractable sockets are more popular. Their surface can merge with the tabletop - when not in use, the cover of the power supply unit protrudes above the surface of the headset by literally 1-2 mm. Because of this, the kitchen looks more tidy and tidy.
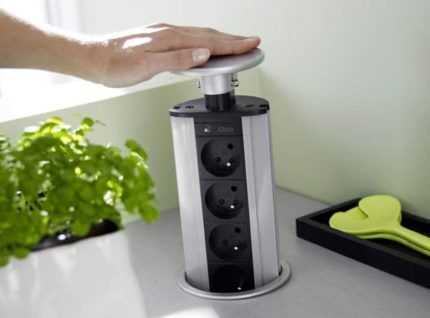
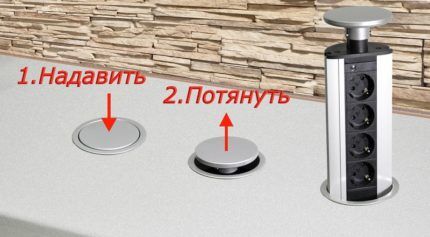
To pull out the socket, you need to press the cover or the button next to it. After this, the retractable mechanism will work. It will push the network unit out of the tabletop completely or partially by 10-20 mm.
After this, the block must be pulled out by hand and fixed at the desired height. Many models are equipped with special buttons that allow you to secure the desired result.
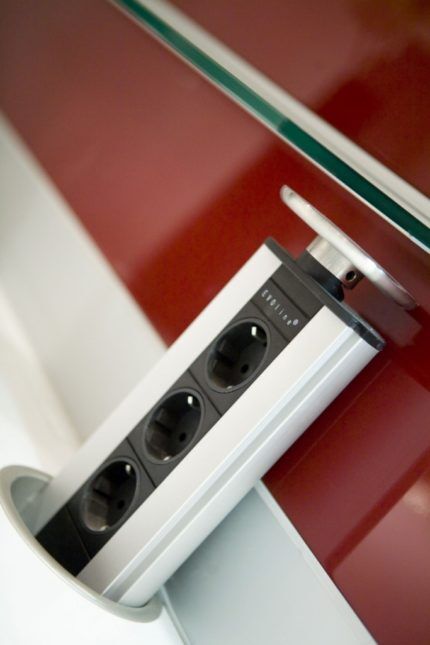
A retractable socket is a specific connector. It performs the functions of a standard electrical connector, but has a number of features.
It should not be used for household appliances that must always be connected to the network:
- refrigerators;
- air conditioners;
- freezers;
- electric stoves (to connect them you need power socket);
- other.
The whole point of this connector is that it is hidden from prying eyes.
The built-in retractable socket is needed for short-term connection to the network of several electrical devices. These may include coffee makers, kettles, toasters, steamers and other appliances that do not require constant connection to the power supply. When the equipment is turned off, the power supply unit can be recessed into the countertop.
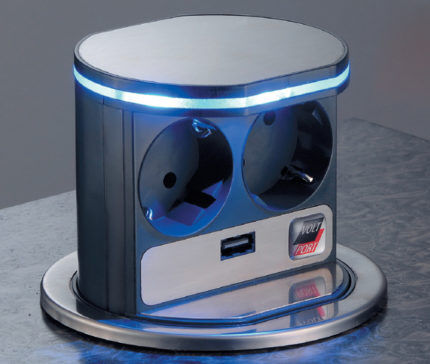
Due to the design features, the retractable socket cannot be placed on an area of the countertop under which there are drawers or water pipes.
It is a fairly fragile structure and can quickly become loose with frequent use. To increase the possible service life of the network unit when connecting or removing the plug from the socket, you should hold the device with your hand.
We looked at retractable sockets for countertops in more detail in next article.
View #3 - rotary blocks
Rotating sockets are able to change their position in space. They are installed in the required position without loss of functionality. The angle of inclination depends on the characteristics of the selected model and can reach a value of 180 degrees. The values of this parameter are indicated on the product packaging.
To use such an outlet, you just need to press its cover or button located nearby on the countertop or wall.
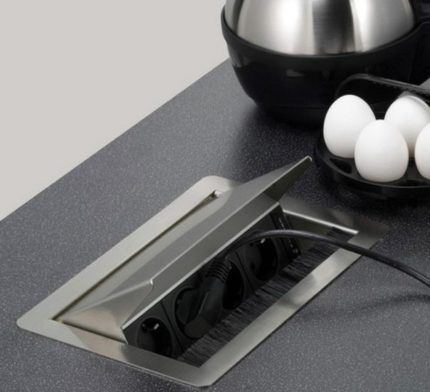
Such network blocks belong to horizontal structures. When using them, there may be some difficulties when connecting devices with L-shaped plugs.
Advantages of hidden sockets
Built-in sockets are ergonomic devices that allow you to get rid of unnecessary wires in the kitchen. They are absolutely safe for the user, easy to maintain and suitable for use in rooms with high humidity. Due to the absence of freely accessible wires from network units, overall electrical safety is increased.
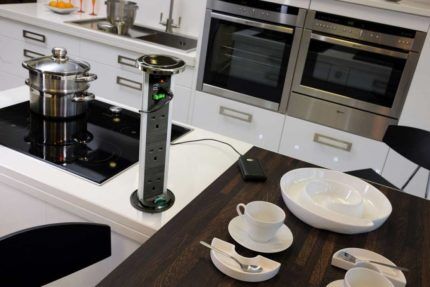
Children or pets will not be able to reach the cord. Hidden structures are generally well protected from children. This especially applies to models equipped with an electromechanical (push-button) opening mechanism.
Modern models of network blocks are multifunctional. They can be easily integrated into systems like "Smart home".
The devices are equipped with:
- USB and HDMI connectors;
- servo drives controlled by a special touch switch;
- remote control module from the console;
- backlight, etc.
Sockets built into the countertop can be installed after the renovation and installation of the kitchen unit has been completed. They work like an extension cord, and therefore their installation does not require changing the wiring. Thanks to their impressive high-tech design, such network units easily fit into any designer interior.
Step-by-step installation instructions
For ease of installation, most recessed sockets are manufactured with a plug. Thanks to this, you can install them yourself.
To install the block you need:
- Prepare the necessary tools: a screwdriver, a drill, a milling cutter with a suitable attachment, a jigsaw with a wood file, a meter or a regular ruler, a Phillips screwdriver, construction glue, a file, a simple pencil.
- Determine the location of the outlet and clear it of unnecessary objects. The distance from a fixed outlet to a built-in one is determined by the length of the latter’s cord.
- Make the necessary calculations in accordance with the dimensions of the purchased network unit.
- Mark the outline of the hole with a simple pencil.
- Using a drill or hammer drill, make a hole in the tabletop according to the measurements. You can drill it with a margin of a few millimeters so that the device quickly falls into place.
- Sand any unevenness.
- Clean the drilling area from sawdust and dust.
- Remove the socket body by unscrewing the screws on the front part, leaving only the socket box.
- Turn off the power supply in the apartment/house for safety reasons.
- Wear thick rubber gloves.
- Take out the block and secure it in the hole using the elements included with the connector.
- Drill blind holes in the tabletop to attach the socket lugs.
- Secure the socket box using the lower screw fasteners. If necessary, you can use glue or construction clamps.
- Insert the sockets into the socket box and fasten them with screws. In this case, you can add silicone around the perimeter of the countertop to increase the sealing of the network unit. This will provide additional protection for the device in case of a water spill.
- Treat the cut ends of the slab with a water-repellent agent at the installation site of the block.
- Secure the wires of the network unit inside the furniture (for this you can additionally use a special corrugation for wires).
- Make a small hole on the back or side wall of the headset and pull the cord from the unit through it.
- Connect the device to the network and check its functionality.
The built-in socket should be installed at a distance from the sink and stoves (minimum distance - 60 cm). You also need to take care of grounding. The entire work of installing the socket takes from 10 minutes to an hour (depending on experience and the availability of the necessary tools).
Rules for selecting embedded blocks
A wide range of built-in sockets makes it difficult to choose the right device - there is a great temptation to buy a device based on completely incorrect conclusions. For example, choose the cheapest device.
But price cannot become the main selection criterion. To purchase the most suitable network unit, it is more advisable to first determine its purpose and features of further operation, and then look at the technical characteristics of the network unit.
When choosing, you should consider a number of parameters:
- Number of required ports and sockets (connectors). It is determined by how many household appliances will be connected to the network at the same time. Standard built-in network blocks contain 2-6 sockets arranged symmetrically.
- Socket block power. You need to estimate in advance the total power that will be needed when connecting all the equipment at the same time, and choose a device with a double power reserve. If you correctly calculate the permissible load, you can avoid network overvoltage.
- Degree of protection of the device from dirt and moisture. Modern embedded network units are protected from any external influences. For the kitchen, it is best to choose sockets with a degree of protection IP44 according to the international classification. In accordance with it, protection is provided against water splashes and dust with a diameter of up to 1 mm. Usually IP degree of protection indicated on the product packaging.
- Device size. The installed unit should not interfere with cooking or any other manipulations in the kitchen.
- Device design style. The built-in socket must fully comply with the design of the set and the entire kitchen as a whole. In this case, the network unit will not be conspicuous and will become a stylish addition to the interior.
The network block must be of high quality. When purchasing it, you should pay attention to the reliability of materials, fasteners and build quality.
In the long term, it is worth choosing sockets from well-known European brands. Cheap Chinese-made devices will quickly break down and become unusable. Models from the brands Simon, Kondator, GTV and Evoline have proven themselves best.
Conclusions and useful video on the topic
More detailed information about choosing a location for mounting the socket and about installing the network unit itself can be found in the following video:
The built-in socket is an ergonomic and multifunctional device. Such a network unit can be easily integrated into any interior. You just need to carefully consider its location relative to the main electrical appliances in the kitchen, taking into account maximum ease of use.
Following the step-by-step instructions, you can build a socket into the countertop with your own hands. The recommendations given in the video and article are relevant for network blocks of any brand. They can be used to install built-in sockets in the kitchen.
If you have already installed smart plugs in your kitchen and are actively using them, we and other visitors to our site would be happy to hear about your experience. Please share your impressions of use - the comment form is located below.Also here you can add original photos of your built-in socket, talk about what difficulties you encountered during installation and how you were able to overcome them.


