Do-it-yourself Russian stoves with a stove bench: construction manuals with diagrams and procedures
Modern private houses rarely resemble old village huts; more often, another name is more suitable for them - a cottage.However, even now many owners of estates, especially country ones, follow traditions and consider Russian stoves with a stove bench as useful and functional heating and cooking structures.
We will tell you what a stove with a trestle bed or bed is like. Let's consider the technical side of the issue, together with you we will understand the design features. Independent home craftsmen will find in the article we presented a detailed description of the structure with diagrams and procedures.
The content of the article:
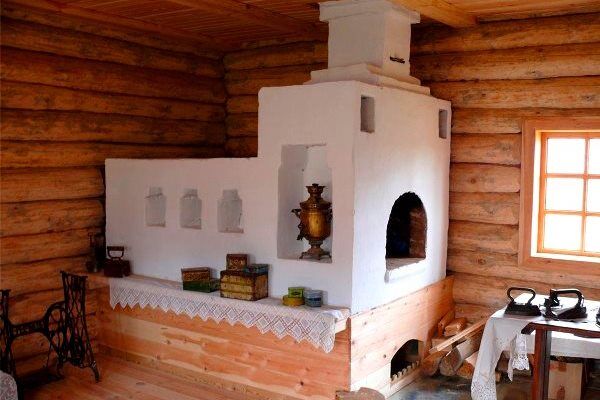
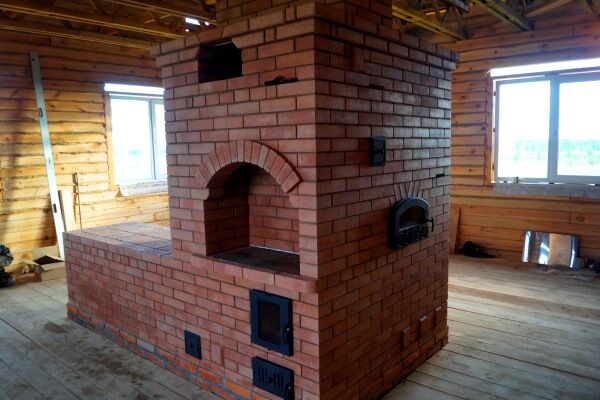
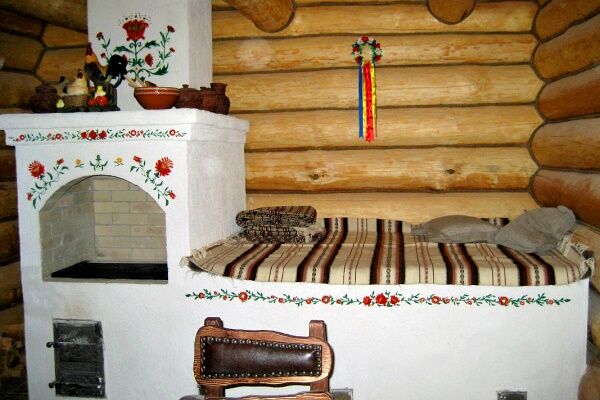
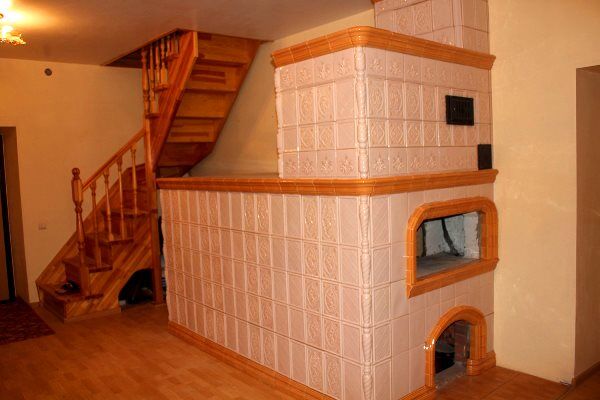
Stove with a stove bench - Russian classic
It is impossible to imagine a Russian stove without a stove bench - it seems somehow too compact, modern and unusual. But the structure on which Emelya moved fully corresponds to the Russian person’s idea of a classic village stove.
Today, large and comfortable structures on which you can “warm your bones” are varied in both shape and design. Here are a few samples that you can make yourself if you wish:
This variety of design is dictated by the desire of the owners to decorate the interior and make it unique.
Brief description of the design
Many people do not know how to properly build a Russian stove with a stove bench, because they do not know either the basic elements or the details of the masonry.

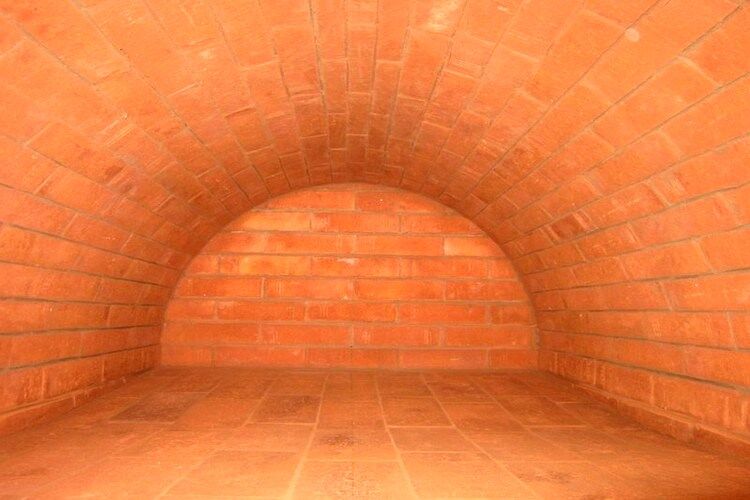
Crucible - the main, large chamber, which serves both for stacking firewood and for baking pies. The upper part of the furnace - the arch - heats up and transfers heat to the stove bench.
In front of the crucible is pole – a small compartment where it is convenient to place baking sheets and pots. Here they also carry out manipulations to place firewood on the blade. Sometimes there is a small niche under the pole - undercoat.
Estuary - a hole leading to the furnace.
Under - an important part of the furnace, its lower plane, slightly inclined towards the mouth. The smoothest polished oven surface.
Podpeche - a niche under the stove, which is used for drying logs, storing large utensils, grips, shovels, brooms.
Overpipe - a chamber between the furnace and the pipe, located above the hearth.
View – a damper that closes the chimney after the wood burns out.
Bed – a large horizontal surface for resting or drying.
Samovarnik - the hole into which the samovar pipe was previously inserted.

If additional heating of the house or outbuildings (veranda) is required, a hot water boiler is built into the furnace body and the wiring is made to the required rooms.
Pros and cons of the structure
The Russian stove has many advantages over modern heating devices, which is why it is still popular, especially in country houses and dachas.
Advantages of the structure:
- efficiency - if you build a complex furnace, the efficiency reaches 70-80%;
- low cost of materials and work of stove makers;
- some models are heated not only with wood, but also with other types of solid fuel;
- multifunctionality - heating, cooking, relaxation included;
- requires attention once a day;
- Dry heat from bricks has a beneficial effect on health.
If construction rules are followed, safety is guaranteed.

But there are also disadvantages due to which building owners refuse to install a stove. Fuel must be prepared in advance, dried and selected. Modern electric and solid fuel boilers operate more efficiently, take up less space and do not require constant attention.
A Russian stove can only be installed in a separate private house; it is not suitable for heating apartment buildings, much less multi-storey buildings.

Disadvantages include regular cleaning of the stove from ash and soot.
Do-it-yourself stove with a stove bench
We offer three design options that you can make yourself. Of course, you will need to study a lot of thematic information, learn how to correctly make calculations, and do masonry.
Option 1 – with trestle bed and shield
A trestle bed is conventionally called a low couch, which you can climb onto directly from the floor. This stove is convenient because you don’t need to climb steps or stairs, so both older people and children can sit on the warm bricks on their own.

The stove is used for year-round operation. One of the elements - the summer valve - is not always used; sometimes the hole is simply blocked. The main valve located in the pipe is made short.
To prevent the handle of the valve from extending beyond the outer part of the facade, it is “recessed” into the masonry, that is, a small recess is made along the edges for ease of grip.

A 1.02 m wide heating shield is located above the stove. To maintain these dimensions, brick projections are made along the edges of the cooking horizontal. You can increase the number of gas ducts on the shield to 5 pieces, but then they will have to be rotated above the stove.

The dimensions of the trestle bed do not matter; they can be chosen arbitrarily, focusing on the area of the room and the purpose of use. One solution is a trestle bed on brick pillars. The 12 cm wide holes between the posts serve to release heat to the outside. The advantage of this design is material savings, the disadvantage is faster cooling of the upper part of the bed.
To increase heat transfer, a solid foundation is installed. On wooden floors, under the gas ducts, heat protection is placed - an asbestos sheet. It reduces heat transfer into the foundation and prevents the risk of accidental fire.
If you do not take into account materials for the foundation and pipes, you will need:
- red brick – 655 pcs.
- fireclay refractory brick – 15 pcs.
- metal door 140*140 mm – 7 pcs.
- metal door 250*210 mm – 1 pc.
- plate 710*410 mm – 1 pc.
- oven drawer 450*365*300 mm – 1 pc.
- valve 210*120 mm – 1 pc.
- grate – 255*175 mm – 1 pc.
- iron sheet 750*500 mm – 1 pc.
The furnace is laid in the traditional way, using sand-clay mortar. The order looks like this:


If the furnace is fired with coal, refractory fireclay bricks do not have to be used for laying the entire structure. Usually it is needed in those places of the firebox where coal is placed. In this case, the firebox is made in the form of a funnel and placed 1 row below the door.
When heating with coal, 1 brick is placed across the door, and when heating with wood, it is simply removed so that the flame is closer to the hob.
You can take care of possible repairs in advance and line the firebox with bricks installed on the edge. Heat transfer can be increased by increasing the wall thickness from 12 cm to 19 cm.
Option 2 – classic stove with a stove bench
The dimensions of the structure vary, but usually for a village hut a stove with dimensions of 1.5 * 2 m was built. The hearth was raised relatively low - to a height of 0.45 m from the floor level, and the stove bench was located almost under the ceiling - at a height of 1.8 m.
For ease of maintenance (cooking, baking bread), the underfloor area was placed at table height, that is, approximately 0.7-0.8 m above the floor
The stove is designed to heat a room of 30 m² and has the following heating properties:
- heat transfer with 1 firebox – 2100 kcal/h;
- heat transfer with 2 fireboxes – 3000 kcal/h.
If the design of the furnace was planned to be massive and bulky, then the foundation was made accordingly. For its construction, large stones, fragments of bricks, and processed pine or oak logs were taken.
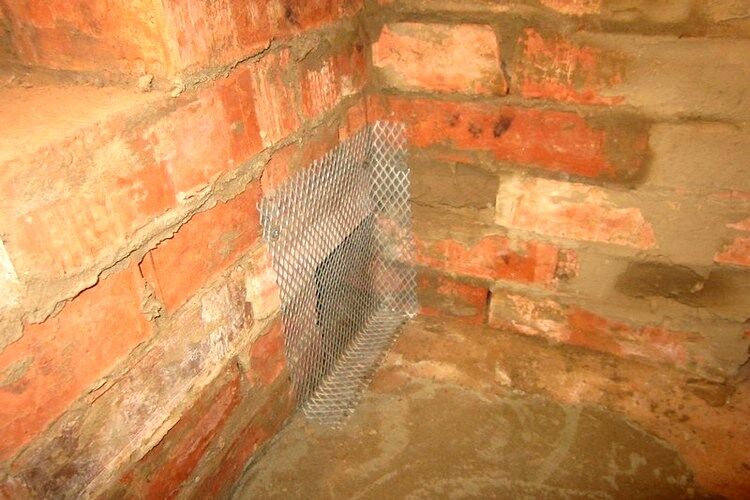
One of the main conditions for building a foundation is autonomy. It is always built separately from the foundation of the house, and all elements are insulated with asbestos pads or metal sheets to prevent fire.

Construction can be done independently or to order, by the hands of experienced craftsmen. In the second case, the simplest design will cost from 150 thousand rubles. Exclusive options with additional elements or exquisite cladding will be more expensive.
You won’t be able to save money by doing all the masonry yourself; you will still have to consult with specialists and work under the supervision of an experienced stove maker. Any heating structure is always an object that poses a danger, so it is better to enlist professional support and do everything according to the rules.
The basis of the furnace is a strong foundation, for which it is better to use high-quality material to avoid subsidence and cracks. Before installing the base, a double layer of insulating material is placed in a previously prepared trench.
Traditionally, the foundation was laid lower than the freezing level of the soil, and in no case was connected to the foundation of the house.
For construction you will need:
- red brick - about 1.4-1.6 thousand pieces, depending on the size of the couch;
- sand - at least 70 buckets;
- clay - at least 60 buckets;
- samovar 130*130 mm;
- valve 300*150 mm;
- damper 430*340 mm.
Additional elements are also possible if the design is planned to be modernized.

There are many procedures for laying a stove with a stove bench, here is one of the simplest:

1 row – bricks are laid in a continuous layer using foundation mortar.
2,3,4 rows – are located like a well, and one should not forget about the additional space for oven devices – the oven. The suture bandaging system is actively used.
5-6 rows - starting from this level the vault is built. To erect the masonry, formwork is made, and support heels for the bricks are prepared separately.
7-8 rows – form a vault that closes on the 8th row, also using the suture ligation technique.
9-10 rows – laid out in 1 brick.
11 row – final for the “cold stove”. The well is backfilled to form a slight slope.
12 row – form the flooring of the hearth from a special brick - hearth brick.The seams are not sealed, but covered with sand, then the entire surface is sanded.
Rows 13-16 - laying the furnace - a large combustion section. The walls are built with ¾ bricks, height – 190 mm. To install locks, bricks are cut at an angle of 45°. Apply ligation of sutures without binding the material.
17 row – the mouth and back wall are finished. A frame is erected for the construction of the roof of the cooking chamber. The heels are pulled off and the brick is placed on its side. After preparation, the roof of the cooking chamber is erected.
18 row - building a wall. The space between the side elements and the cooking chamber is filled with a backfill of clay, sand, and broken bricks.
Row 19 – hemispherical, covers the opening above the pole.
20 row – the walls of the structure are leveled, the hole above the pole is reduced. The over-pipe is laid out evenly, without steps - for this purpose the corners are cut off. A ceiling is installed under the channel for the samovar.
21 row – the same as row 19.
22 row – the masonry ends above the vault. The bars for mounting the samovar are cut off to ensure the free movement of gases inside the pipe. They lay out the soot chamber.
Rows 23-32 – construction of a re-pipe. Install the valve and finish the chimney (2 bricks 260*260 mm).
Then the channel is laid out. To install the damper, you will need a 25*25 mm corner with a thickness of 3 mm. It can be replaced with a strip or sheet. To make the valve convenient to use, 1-2 handles are welded to it.
It is recommended to make the damper from a metal sheet - roofing steel. Its shape should correspond to the hole of the hearth leading into the crucible.

The frame is pre-made and mounted into the masonry of the mouth, secured with mortar or anchoring. It performs the function of formwork during the construction of an arch.
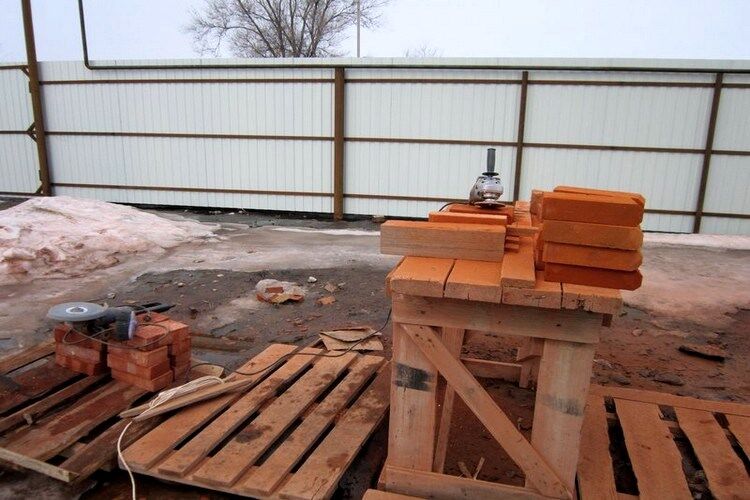
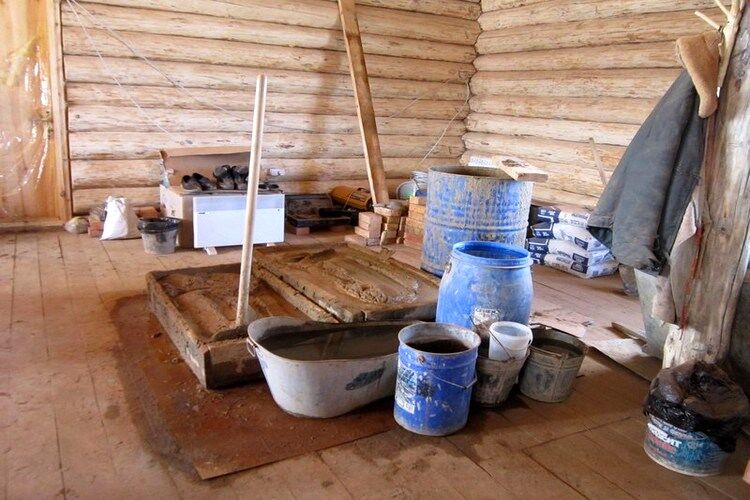
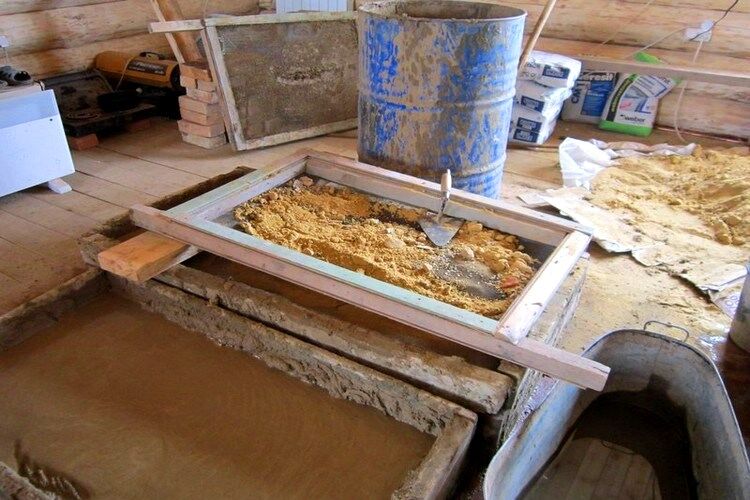
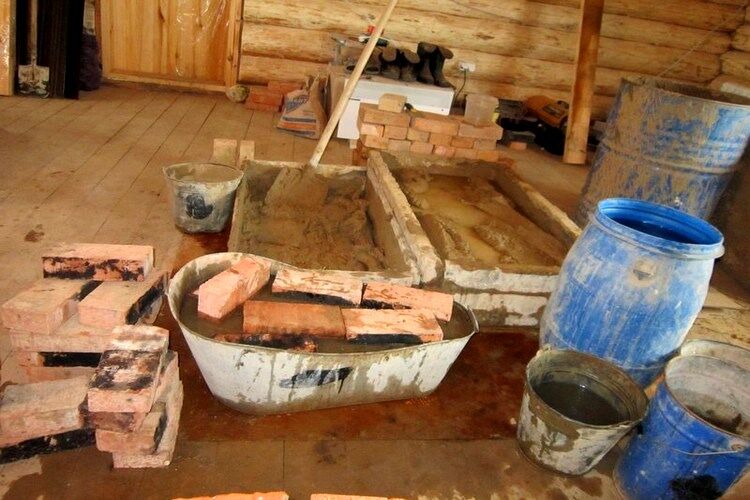
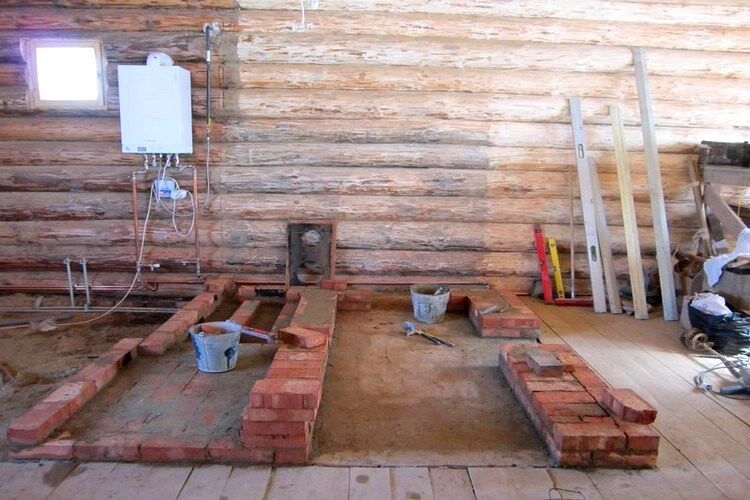
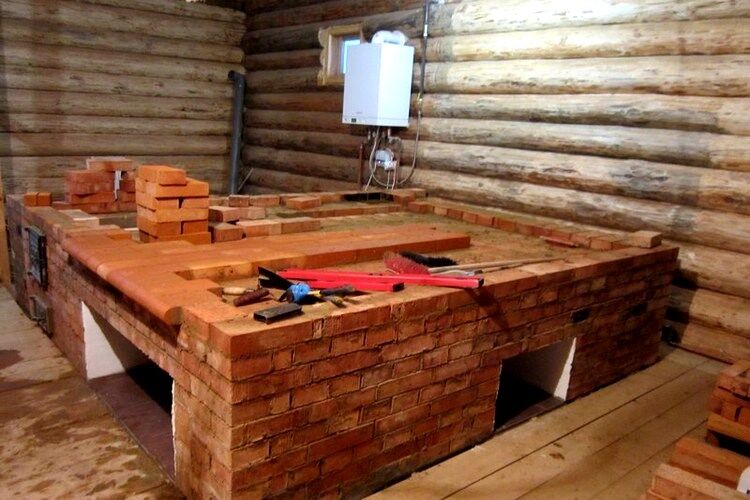
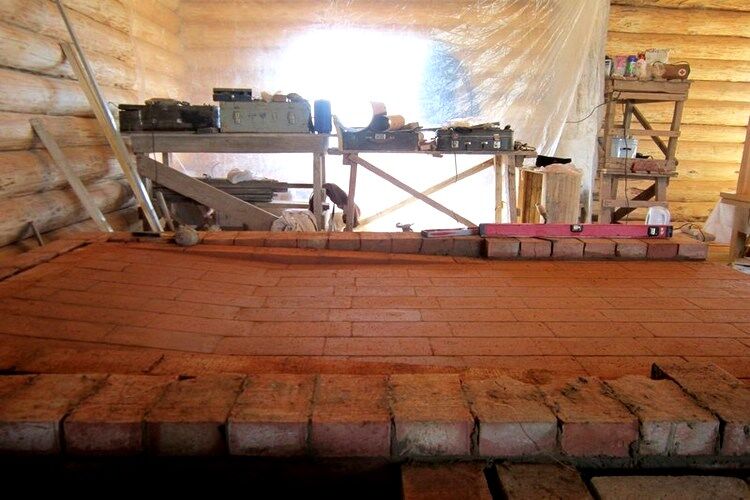
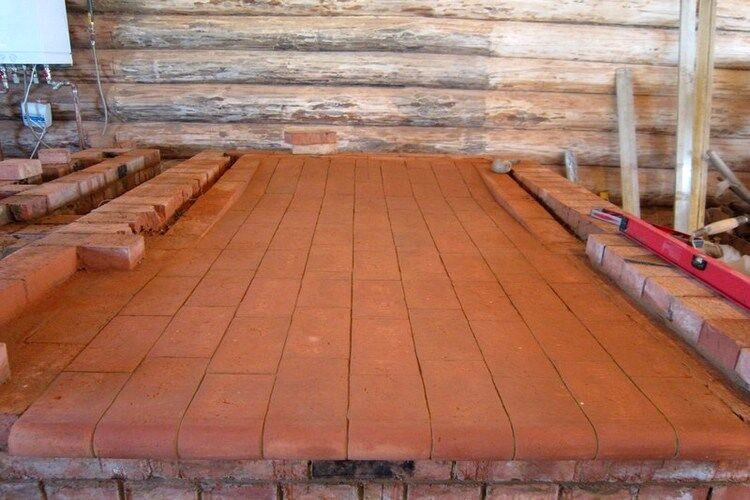
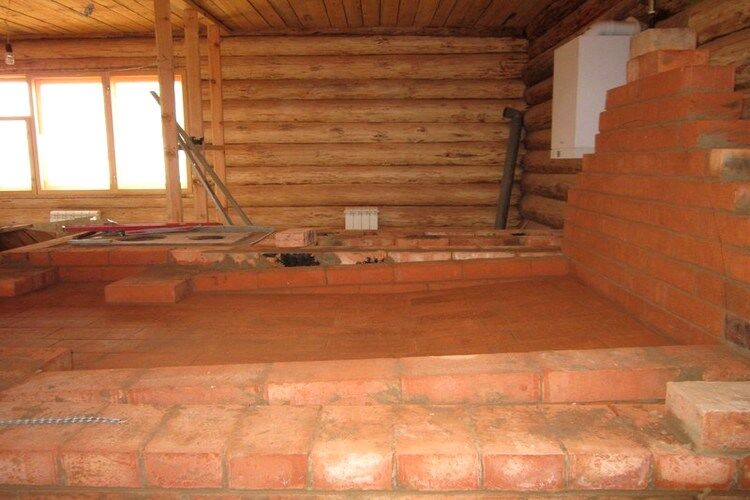
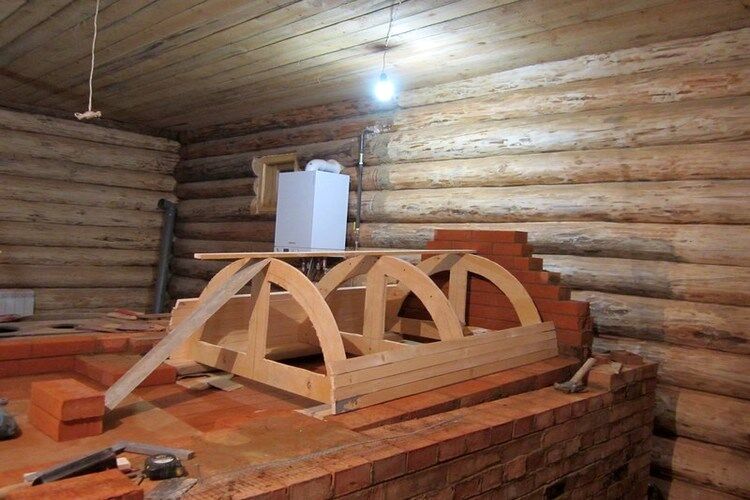
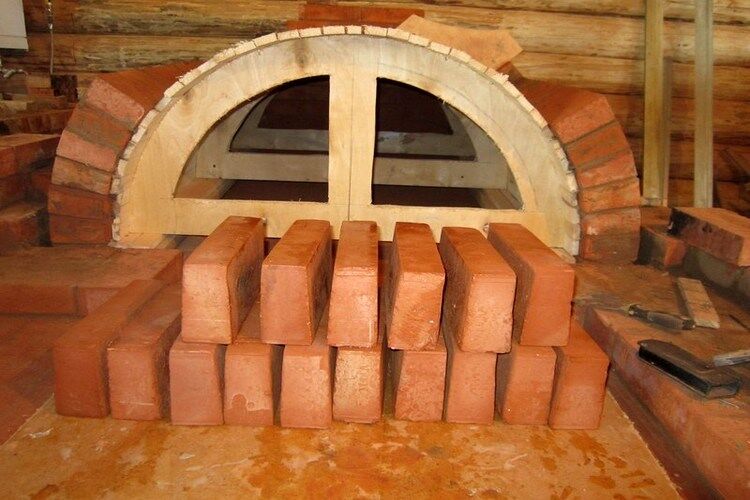
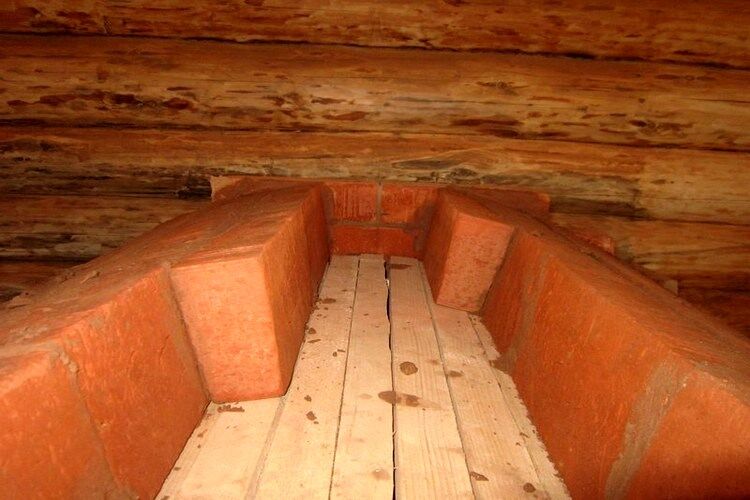
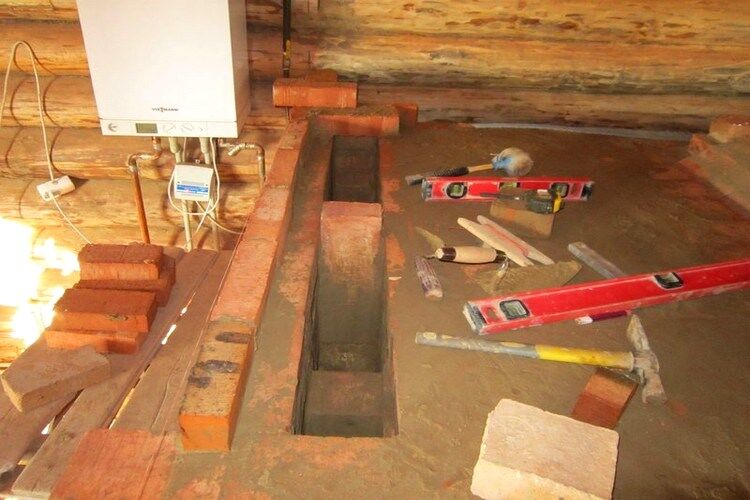
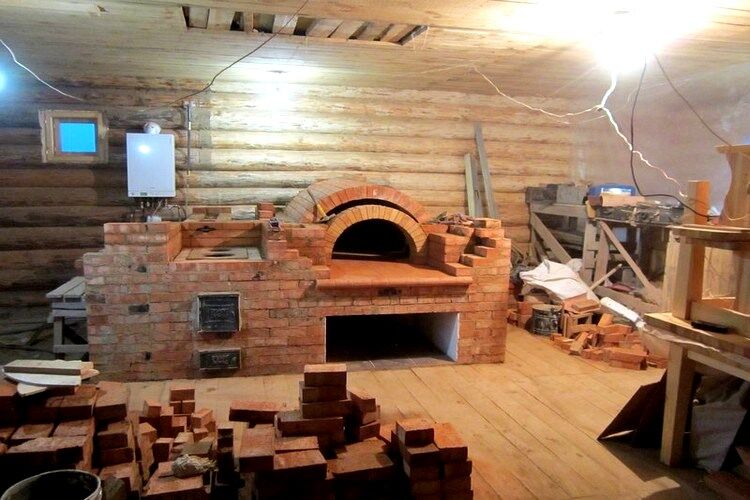
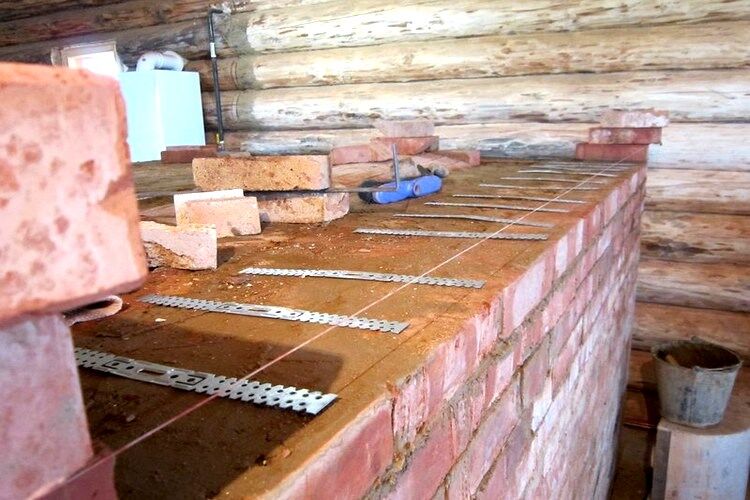
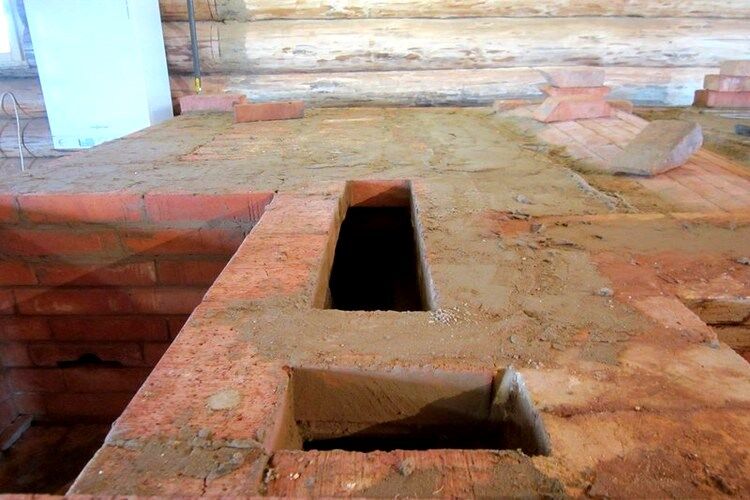
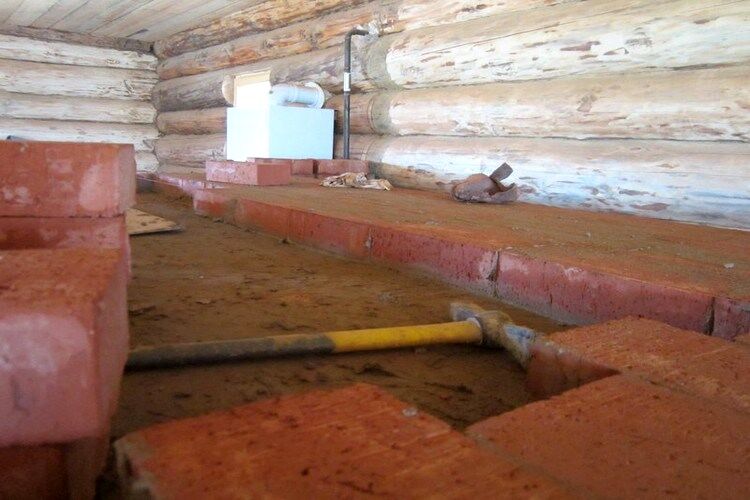
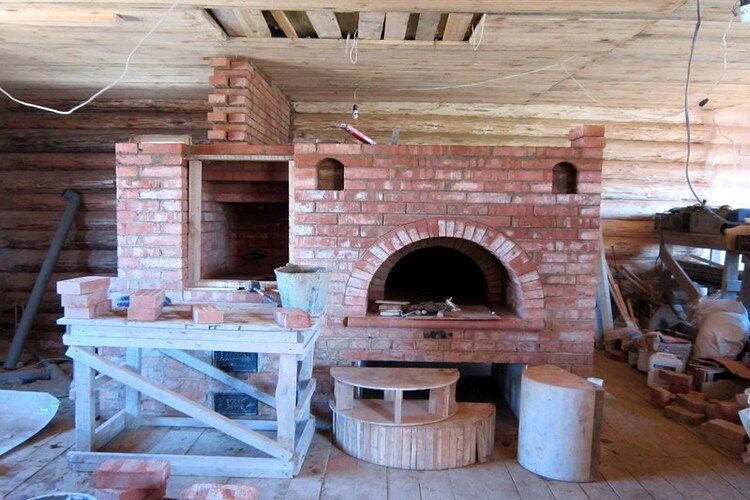
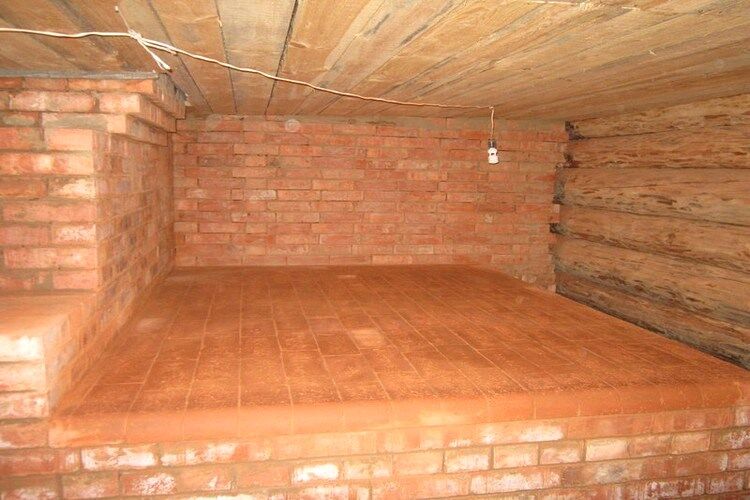
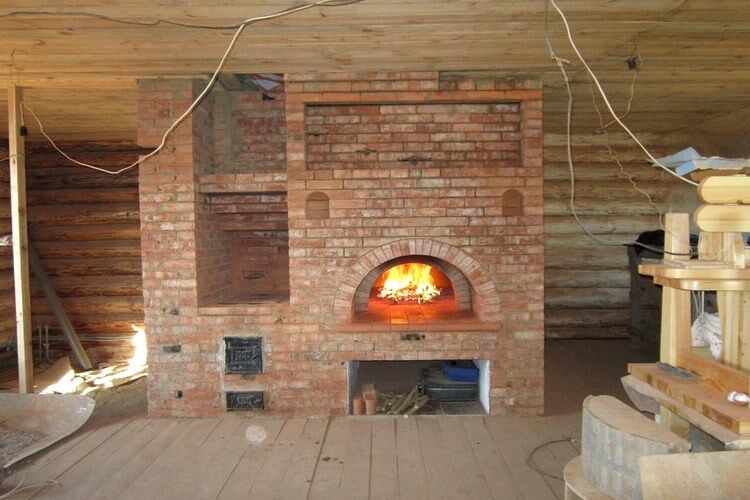
Option 3 – photo gallery of self-construction
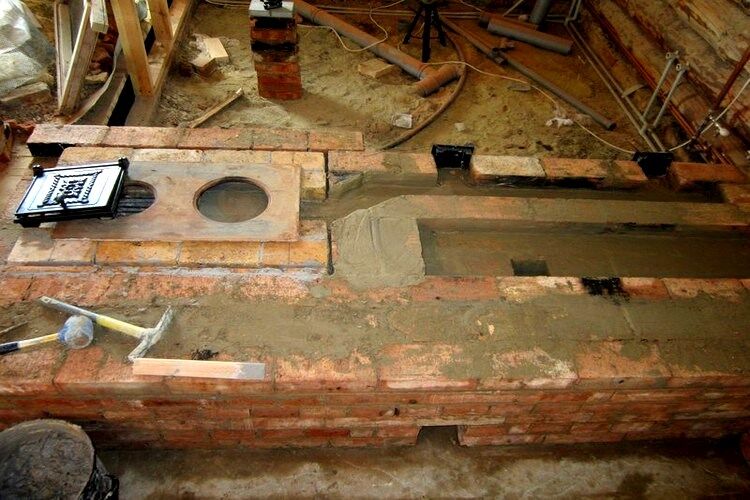
For heating a large house, the best option is a stove with a stove, a stove bench, a cooking chamber and two fireboxes.

The air ducts are located under the heating shield, which enhances heat transfer and is located on the stove with a stove. The thickness of the back wall is 28 cm, of which 12.5 mm is sand backfill.
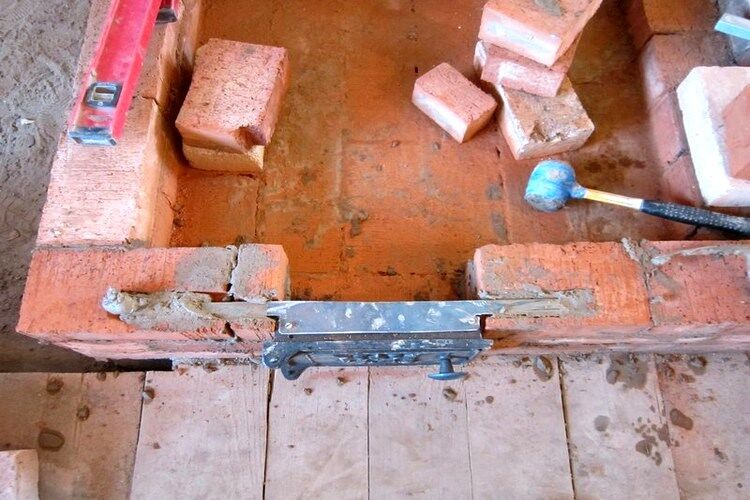
As a solution, use a mixture of clay (local), which must first be soaked and strained. The sand also needs to be sifted to eliminate debris and large inclusions. The main material for masonry is red brick, which first undergoes strict selection and is then soaked in water. The process is long and tedious, but the result is excellent.
Cutting brick may require a tile saw or a special wet stone cutting machine.
To reduce heat loss, a deflector is installed on the pipe. Gypsum plaster for finishing does not retain heat. The oven was dried for 10 days.
First steps:
The author did not provide the order of this stove, but there is a photo demonstrating the nuances of the masonry and arrangement of the stove elements. We offer step-by-step pictures with the wizard’s recommendations.
You can experiment with different oven segments and change them as you wish. The main thing is not to change the key details and the order of laying.
Each stage of work requires a different amount of time - some elements are erected quickly, others require the solution to dry. If the masonry is not working well, it is better to redo it right away than to subsequently disassemble the entire stove.
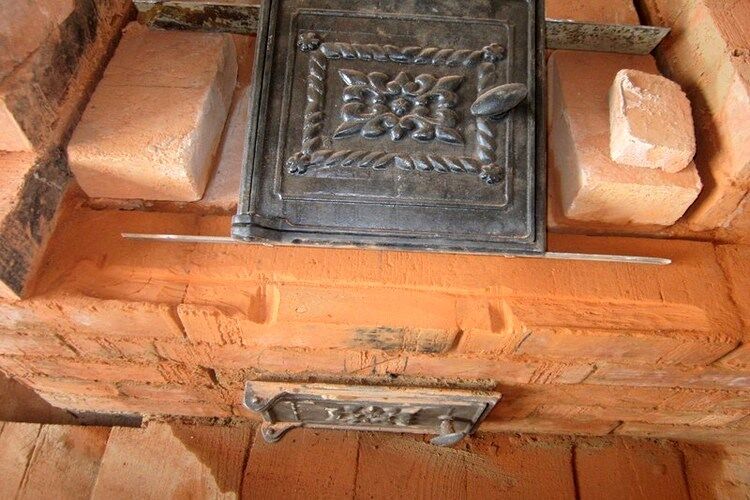
After completing the laying of a Russian stove with a stove bench, the last stage remains - the exterior design. The traditional method of cladding is plastering with a gypsum mixture, which is leveled and then dried or decorated with painting, tiles, etc.

As you can see, some knowledge of the basics of stove making and engineering skills can lead to a wonderful result - building a stove with your own hands. By the way, the structure was erected by one person.
Conclusions and useful video on the topic
The procedure for constructing a structure with a bench and flood chamber:
Review of a furnace built using traditional technologies:
Review of the Kuznetsov stove with a stove bench:
The presence of a stove bench next to a Russian stove does not indicate the complexity of its design, so you can start building a useful and even fashionable structure yourself. However, do not forget to carefully study the topic, delve into the nuances of masonry and enlist the support of a specialist - an experienced stove master.
Would you like to talk about how you built a Russian stove in your country house or dacha? Do you know technological subtleties that will be useful to site visitors? Please write comments in the block below, ask questions, publish photographs on the topic of the article.


