DIY mini Russian stove: specifics and procedures for building a compact stove
The advantages of the Russian stove can be listed for a long time: it warms, feeds, and provides a warm bed for sleeping.But in a small house there is not always enough space to accommodate a bulky structure. Master stove makers came up with a smaller copy - a mini Russian stove built with their own hands is not inferior in function to a full-fledged design.
For those wishing to try their hand at the stove business, we suggest considering one of the options for constructing a mini-stove with procedures and a description of the technologies. If you enlist the help of an experienced craftsman, you can independently build a beautiful, efficient, useful heating unit that will last for decades.
The content of the article:
Distinctive features of the Russian mini-oven
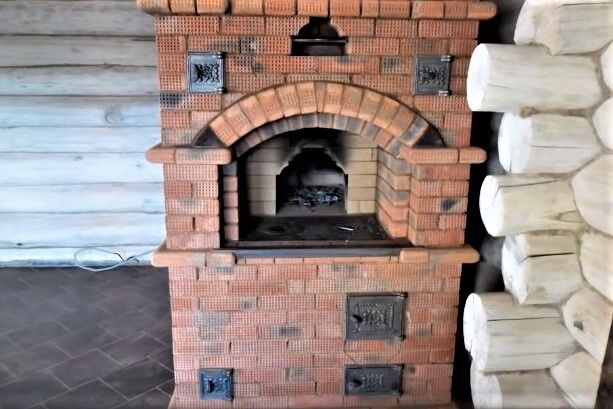
Fundamentally, a miniature stove is no different from an ordinary Russian stove - it has a similar design, the same functions, the same design. The main distinguishing feature is the size: it takes up significantly less space on the floor due to the fact that the stove and furnace are arranged and located next to each other.
The floor area occupied by the structure is usually no more than 1 m x 1.3 m, but other options are possible, slightly larger or smaller. The height of the structure is the same as usual: the main part at the top smoothly transforms into a cross-pipe and ends with a pipe going into the ceiling.
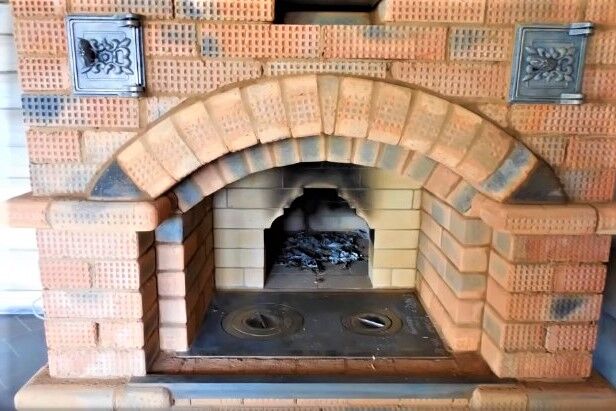
Both the large cooking chamber and the stove are actively used for cooking. A small firebox heats up quickly enough, so it is used in the summer when heating the entire house is not needed.You can easily place 2-3 pots at once on the burners, and if a large oven is heated, you can bake bread.

The stove also stays hot for a long time, so it can be used for reheating or just keeping breakfast or lunch warm.
A special feature of the compact stove is the preservation of two fireboxes, which are used with the same activity. But they are often located on two opposite sides - in this case, a free approach will be required from both the front and the back.

It must be remembered that a mini-copy does not differ in the level of danger from a large Russian stove, so during construction it is also necessary to insulate the foundation and nearby surfaces susceptible to fire. Walls, wooden floor areas, and the edges of openings in the ceiling are sheathed with metal or asbestos sheets.

DIY construction technology
In everyday life, there are many options for mini-structures that go by different names. They are often simply called Russian stoves or “housekeepers”. If you plan to independently build a heating structure, then it is better to focus on the construction of a Russian mini-stove - it is produced both easier and faster.
The first two stages are universal and suitable for the construction of any Russian stove. Starting from the 3rd stage, we present developed by A. Emshanov – an excellent example of a compact and multifunctional mini-stove.
Stage #1 – preparing tools
Even the simplest masonry requires a special stove maker's tool. Despite the apparent primitiveness of the devices, each of them has a clear purpose. We list the main tools that are best prepared in advance.
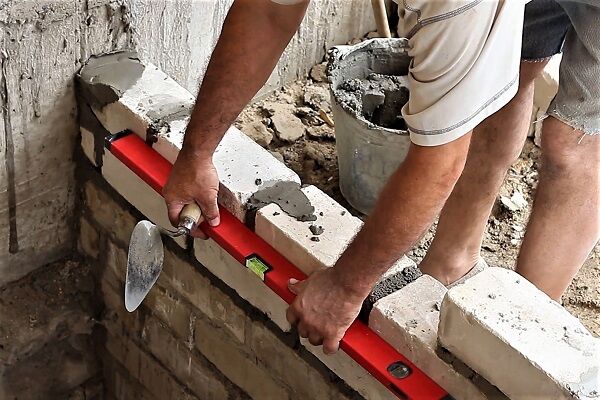
Rule – a wooden crossbar with smooth edges 1-2 m long, with the help of which the straightness of the masonry is checked. If divisions are applied to one of the sides, the rule can replace a ruler (meter).
Square performs its direct function - serves to check the corners of the furnace and foundation.
Roulette or folding meter useful for measuring any distances between oven elements and individual parts.
In addition to the tools listed above, you may need:
- wash brush for grouting;
- plumb line to check the vertical;
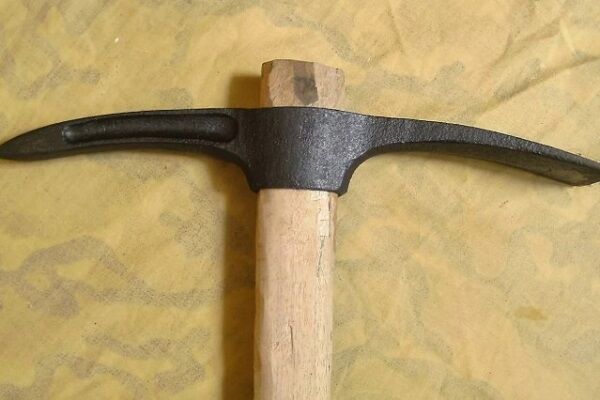
- rasp for processing tiles;
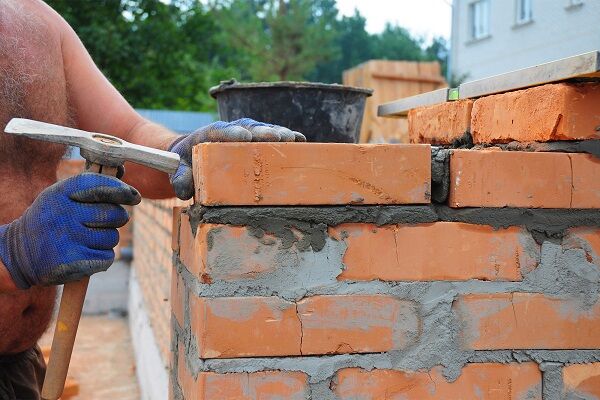
- jointing for finishing the seams of stove masonry.
Also useful are containers for mortar, a special tool or machine for cutting bricks, benches, scaffolds or pallets.
Stage #2 – selection of materials
Materials and metal furnace elements are selected depending on the type and design of the furnace. The main thing is to take into account the technical characteristics, otherwise the stove will crack after the first fire.

In places of direct heating, metal parts are not used, which also expand during combustion and destroy the brickwork.
The ban applies to any combustible materials, as well as those that, when heated, melt, deform and begin to emit smoke hazardous to health.
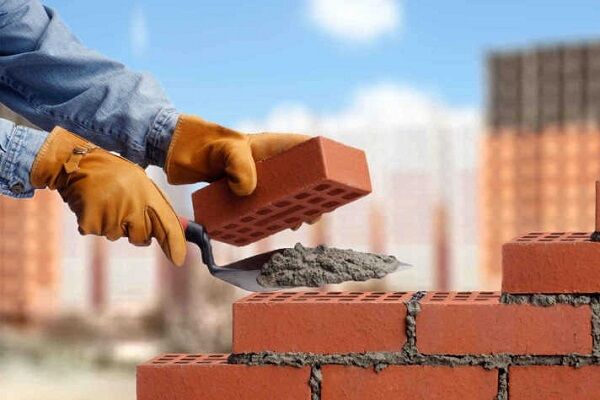
It is recommended to use high-quality materials of natural and artificial origin. The first group includes rubble stone and cobblestones, the second - brick.

You can also use old brick left over from dismantled stoves. Before laying, it is sorted, cleaned of mortar, and then plastered.
Each element must have smooth edges, without chips or cracks. The mass of 1 cubic meter of brick, which includes 480 pieces, is about 1700 kg. When using a mortar, the amount of brick varies depending on the thickness of the layer.
For the mini-oven, the order of which is located below, two types of bricks were used: red stove and fireclay. The second is necessary for laying the inner “core”, which withstands the maximum temperature load.
Solutions are different: containing clay, cement, limestone, gypsum, etc.

Clay solutions are prepared according to the formula 1:1, that is, one part of clay to one part of sand. Other options are also possible: 1:1.5, 1:2, 1:2.5.
The solution is mixed using well, tap or rain water. One of its main qualities is plasticity. The composition should be thick enough, but easy to apply. After drying, it should not form cracks.
Stage #3 – ordering the Emshanov mini-oven
The author of the diagram and order of the mini-oven is Alexey Emshanov. Its development is reminiscent of the Russian stove by Ya. Porfiryev, but is distinguished by more efficient and uniform heating of the side walls.
A couple of years after construction, the stove showed excellent results:
- fast and uniform heating;
- stable traction with a pipe with a cross-section of 20 cm and a height of 5 m;
- no cracking in the absence of lining of the second firebox;
- 2 hours after kindling, the oven temperature is 40-45°C, after 4 hours – from 55-80°C.
If the stove is installed in a room with a volume of about 100 m³, it will warm up to a temperature of 30-35°C. The amount of firewood burned daily is 10-15 kg.

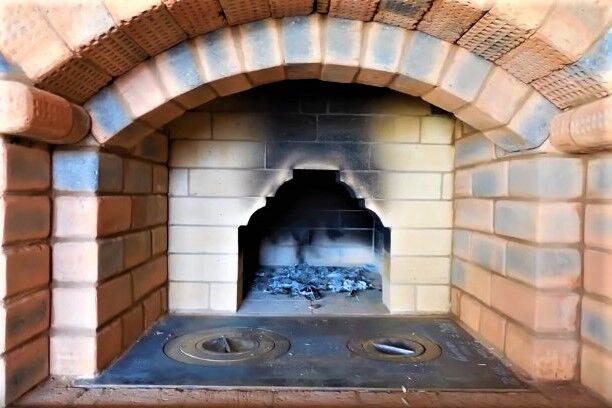
Thanks to the black inclusions, the stove looks attractive and does not require additional cladding, although if desired, it can be covered with plaster and painted.

Lining is used in the masonry: fireclay brick ShB-5 is used for the firebox, and a firebrick ShB-6 is used for one of the caps.
Let's take a closer look at the order of the Russian mini-stove.

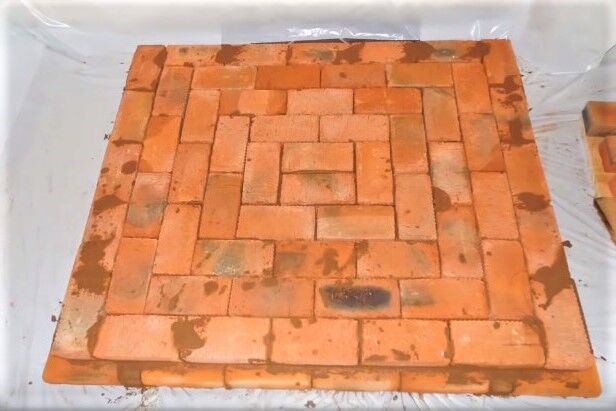
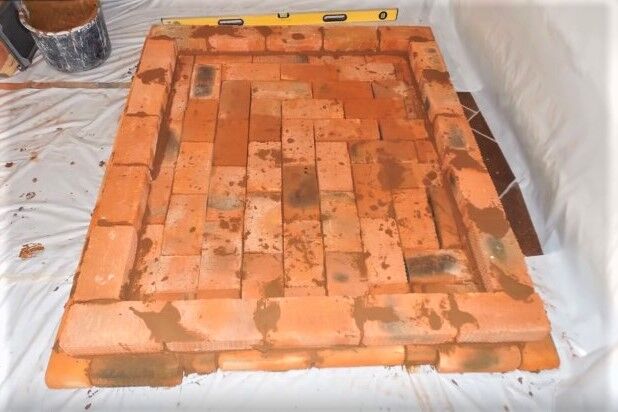
1 row - solid masonry. The side bricks along the outer edge have curves, which looks aesthetically pleasing and neat.
2nd row – also solid masonry, with a total area slightly less than the base. Dimensions: 6 bricks by 6.5 bricks.
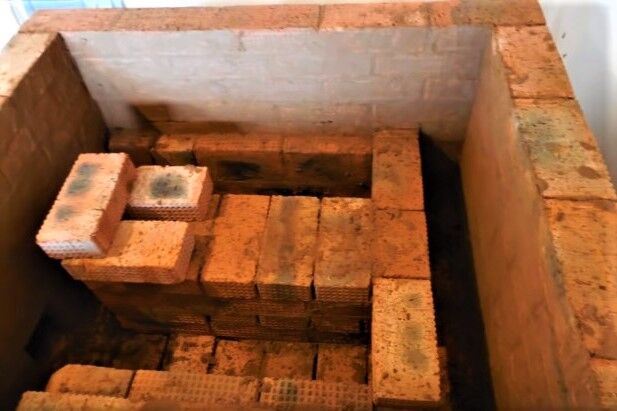
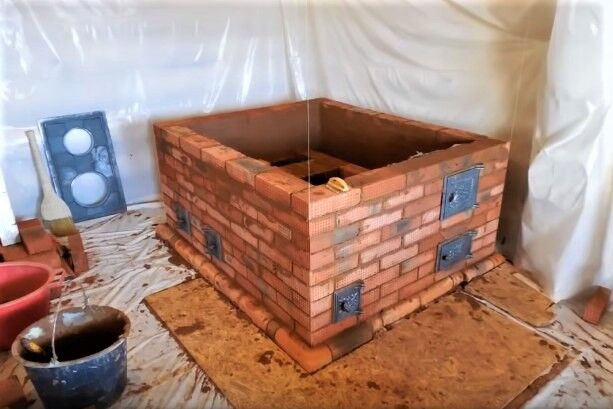
3rd row – start of construction of the ash chamber. Installation of three cleaning doors 14x14 cm and one blower door 25(28)x14 cm.
4 row – continuation of the construction of chambers, fixing the doors.
5 row – overlap of the two lower channels to form two caps on opposite sides. The channel at the rear wall of the oven is approximately 2 times larger than the channel located in the center - for better heating of the rear part.
The first row of fireclay bricks is laid out here - this is for the flooding. The rear cap is lined with a flange.
6 row – the overlap of the lower channels ends, the rest is a continuation of the previous row. The second row of fireclay bricks must be laid out, forming a funnel with bevels - it is here, on the grate, that the coals will fall for combustion.
Installation of grate RD-6. Gaps of about 5 mm wide should be left along the edges for free expansion when heated.Continuation of the lining of the cap.
7 row – masonry of the external contour, where the door of the combustion chamber DT-3 or DT-4 is installed and fixed in a stainless steel box. The laying of the side walls of the firebox begins with fireclay bricks installed on the edge. The lining of the cap flange continues.
8 row – masonry, as in the 7th row. The wide cap is narrowed - to do this, the brick is cut at an angle of 45° and placed with the wide side up and the bevel down.

9 row - the overlap of a wide hood, which simultaneously serves as the basis for the arch of a Russian stove. The 4th row of fireclay masonry is made with ligation of the previous row.
10 row – covering the fire door with a lintel made of half bricks, inside of which a pin is inserted. The bricks are tightened using nuts and washers.
11 row – ligation of the previous row, alignment along the installed jumper, the height of which is about 14 cm. Laying the 5th row of the firebox with fireclay bricks to form an outlet for flue gases. Usually this output is called “higho”, and its peculiarity is the strongest thermal load.
For reinforcement, 2 rows of bricks are laid out, which over time can be replaced through a cast iron slab.
12 row – looks like a protrusion, repeats the shape of the first row. The brick is rounded on both sides and looks aesthetically pleasing and attractive. The internal jumper of the firebox is a plate ШБ-94 or ШБ-96. It is laid “dry”, without mortar, and covered with basalt cardboard 2-3 mm thick.
Do not forget that between the two firebox masonry layers - red and fireclay bricks - the distance is 5-8 mm.The gap is necessary for the free expansion of fireclay during strong heating.
The floor is also lined with fireclay bricks. The edge of the firebox is overlapped on top of the tiles; basalt cardboard or kaolin wool is used at the joints. Hailo takes on a finished appearance, the cross-sectional area is about 30 cm².
Installation of a 2-burner cast iron stove 71x41 cm and a protective 5 cm metal corner on the edge of the brickwork opposite the stove.
13 row – laying the outer contour and the 7th row of fireclay bricks. Along the edges of the cast-iron slab, 2 halves of a sawn fireclay slab (94 or 96) are laid; they are connected with mortar only at the edges. In the lower part there are 5-7 mm grooves for the free movement of the cast iron plate.
14 row – bandaging the previous row, laying the cooking chamber, lining the hood.
15 row – repeat the 13th row. Preparation of the foundation for the construction of the furnace roof and its erection. The arch must be made strictly along the radius.
To strengthen the walls, lay perforated galvanized metal strip through 1-2 rows. Thanks to this, the side parts will be able to maintain tension during overheating.
16 row – repeat the 14th row of the outer contour. Fireclay masonry is erected around the vault.

17 row – laying the mouth of a Russian stove with fireclay bricks, narrowing the upper part. Instead of the traditional arched design, a figured one is used. It is simple to perform and protects the mouth from flooding. To prevent the bricks from moving apart, use perforated tape.
18 row – another “belt” – a protrusion made of rounded bricks along the outer contour.At the joints of red and fireclay bricks, it is necessary to lay 3-mm basalt cardboard or kaolin wool to maintain a tightness between the outer red “shell” and the inner fireclay “core”.
Row 19 – installation of an entrance arch made of bricks placed on edge. Inside, the same arch is made of fireclay bricks. To strengthen the structure, a pin is placed inside it, secured on both sides with nuts. The internal arch protects the external one from overheating, since the cast-iron stove heats up to 500°C during combustion.
20-22 row - continuation of the masonry of the previous row. To preserve heat, a thick layer of kaolin wool - 50-60 cm - is laid over the vault, and covered with a slab of refractory concrete or simple reinforced concrete.
Starting from row 22, you can only use red bricks.
23 row – narrowing of the smoke collector on 3 sides at an angle of 22 or 45 degrees. As a result, the dimensions of the smoke collector should be reduced to a section of 25x25 cm. Continuation of the lining of the side channel.
24 row – covering the fireproof plate above the furnace roof and continuing to narrow the smoke collector.

25 row – narrowing of the smoke collector. Laying the internal contour around a horizontal surface (mini-bed or dryer) “dry” to ensure expansion and protection from microcracks. Later it can be covered with ceramic tiles. Design of side channels.
26 row – overlap of both caps in the front part. The smoke collector narrowed to the final size - 25x25 cm. Installation of 3 valves: a Russian stove, a summer passage and a winter passage.
27 row – overlap of valves and caps.
28 row – another “belt” of rounded brick. Three smoke exhaust channels are connected into one chamber.
Row 29 – masonry of the main smoke collector 25 cm wide.
30 row – installation of a cleaning door to clean the smoke collector.
31 row – narrowing the smoke collector, preparing it for closure.
32 row – closing the cleaning door, bandaging the entire smoke collector completely. A hole of 25x25 cm remains.
33 row – along the contour of the front part – a “belt” of rounded bricks, re-ligation of the smoke collector, start of laying the pipe.
34-35 row and then - laying a pipe about 1 m high.
After passing through the ceiling, a sandwich chimney with a cross section of 20 cm is installed. The diameter is small, so it can withstand a weight of no more than 1 ton. This must be taken into account when selecting a chimney - for a brick chimney, a height of more than 2 m is undesirable.
It is better to move a heavy pipe to the side. If it is planned to be located in the center, then it cannot be raised above 1.5 m. Ideally, you need to install another valve right in the pipe, under the ceiling. However, it is often neglected due to its height - reaching the pipe is really problematic.
Nuances of construction technology
The construction of a furnace is subject to certain rules, which are not recommended to be violated. Simply put, it is necessary to strictly follow the order, without retreating even half a brick to the side. Let's consider some of the nuances of design and masonry.
The quality of the masonry can be judged by the first fireboxes, which are used to dry the furnace. Good draft, the correct direction of movement of flue gases, opening doors and valves without effort, sufficient heating of the walls and mini-beds indicate the correct execution of actions and compliance with technology standards.
Conclusions and useful video on the topic
Compact stove with one combustion chamber:
Review of "Housekeeper":
One of the advantages of a mini-stove is the absence of complex internal channels, due to which it is built very quickly.Its design is simple and understandable, so you simply can’t think of a better option for your first experience in building a Russian stove!
Please write comments in the block below, post photos related to the topic of the article, and ask questions. Tell us about how you built a Russian stove in your dacha or country house. Share useful information that will be useful to site visitors.


On the one hand, a smaller Russian stove might be suitable in a situation where the house is small. On the other hand, a stove bench is one of the undoubted advantages and a distinctive feature of a Russian stove, but it is not provided for in this design. That is, such a mini-stove is deprived of most of the charm of a traditional Russian stove. And in terms of efficiency, you can find more successful designs.
With such dimensions it will not be a bed, but complete nonsense, you won’t really lie down. Either finish building it or it will turn into a garbage dump. And the heating element on top is very good. The heating area increases, especially if the stove is installed wisely so that several rooms are heated from one stove.
I liked it, just what I needed for my gazebo, with respect and gratitude, Andrey.