How to lay facing bricks: methods, tools, step-by-step instructions
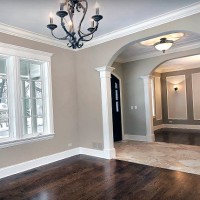
The use of cladding for the walls of a house has long become a standard.Moreover, for most modern wall materials, such as aerated concrete or foam concrete, masonry with facing bricks has become almost mandatory. This is one of the most difficult and at the same time effective ways to make a home truly beautiful and durable.
The content of the article:
We prepare tools and materials
For laying facing bricks, the same set of devices, tools and auxiliary equipment is used as for rough bricks.
Standard set of tools:
- Trowel (trowel).
- A wooden square with a right angle and legs of 50-70 cm. Used to check the corners after laying the facing stone.
- A construction hammer with a hardened chisel for chipping (beating) bricks to size.
- Jointing for seams. A curved steel cylinder (sector) on the handle is needed to give the seams the desired profile.
- Building level.
- Scoop measure. Used to remove masonry mortar from a bucket. With its help, you can always collect the same amount of masonry mixture.
- Tension cords or mooring.
- Plumb line and rule. The first is a weight, usually on a fishing line or thin nylon thread (non-stretchable). The second is a plank, wooden or aluminum, it doesn’t matter, the main thing is that it’s level. Use it to check the plane of the wall.
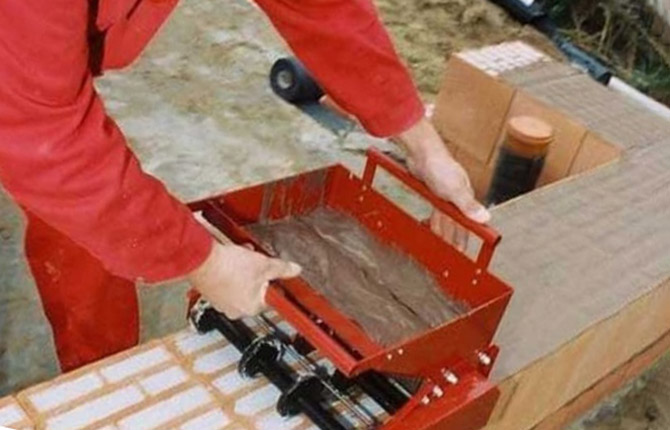
4-5 kg of masonry mortar is loaded into the hopper, after which the dispenser passes along the wall, leaving behind a layer of the required thickness. An assistant lays out the facing brick, and the master levels the material with his own hands and, if necessary, settles it. The process of laying cladding is accelerated, but the method is not suitable for all types of facing ceramic bricks.
The cuvette method of applying the solution is used mainly for wall stones and fired clay blocks.
Special devices for masonry
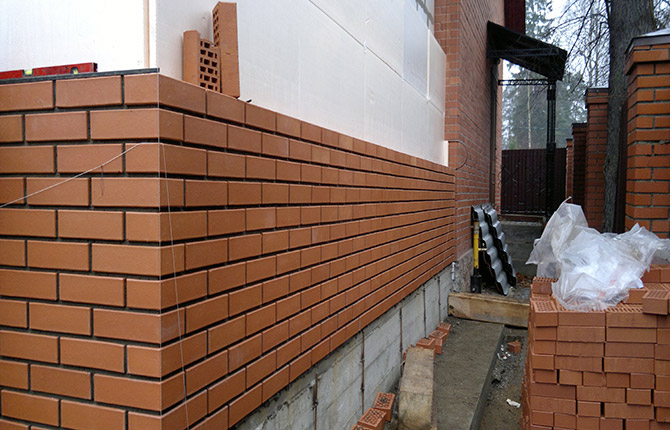
The main difficulty in laying facing bricks is that you need to lay the stones in a row as accurately as possible. Maintain the plane of the wall, the protrusion, the width of the vertical and horizontal seams.
Therefore, masons massively use additional equipment, for example, trihedral angles. A pair of metal corners are mounted on the corners, and mooring cords are stretched between them (like painting cords). The cord ensures the accuracy of laying facing bricks.
Another option is ordering corners. They are also attached in pairs vertically to the corners of the box, and cords are stretched between them. Unlike simple trihedrons, the planks have cuts with a pitch of 77 mm. That is, by rearranging the cord, you can simplify control of the seam thickness between rows. Although the horizon, protrusion and plane still have to be controlled after each facing brick is laid.
For accelerated laying, so-called installation templates are also used.In essence, it is a massive frame made of durable plastic. Thanks to it, you can accurately maintain the width of the seams, without “collapse” of the plane or the formation of an outer protrusion. All that is required is to apply masonry mortar and lay the facing brick inside the frame, as in the video.
Most masons prefer to use simpler tools to control the quality of masonry. A master's standard kit usually includes several rods (usually aluminum or steel) with a diameter of 8 mm or 10 mm, lengths of 15 mm, 40 mm and 60 mm. They are used to check the seam, as well as when laying out facing bricks in the first row of masonry.
But the building level, trowel and mason's hammer (pick) are considered truly indispensable.
Brick cladding technology
There are 2 important points in laying with facing material:
- The cladding can only be laid on a prepared base. Usually this is the basement part of the walls, laid out of ordinary brick under tiles, siding or plaster.
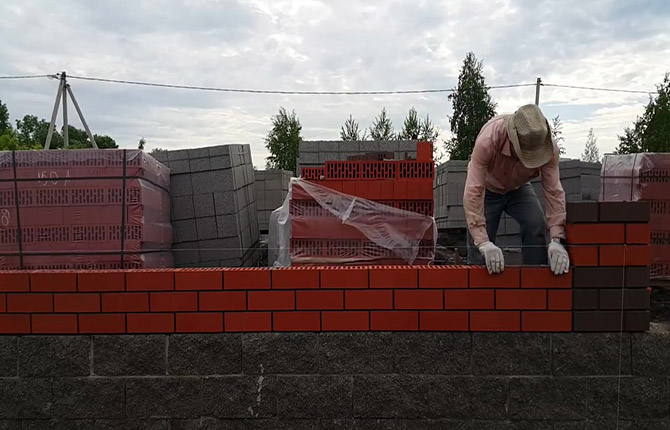
- In order for the rows of facing bricks to be even, the corners of the building are laid out first. Before moving on to the main laying of the rows, each corner is laid out on 4-5 single bricks.
3-4 rows of facing stone are laid on one wall, after which they move to the opposite side. The laid area should dry with slight shrinkage. This is done so that new rows of facing bricks do not deform the previously completed masonry.
Preparing the foundation
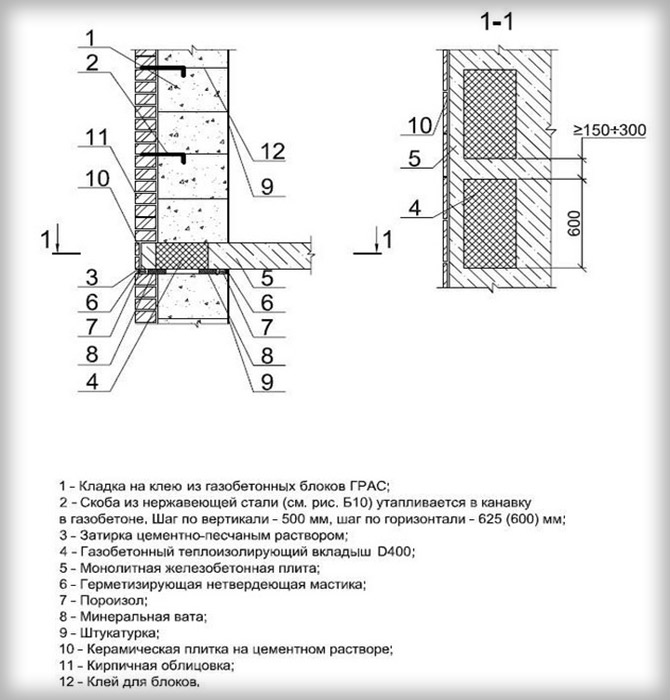
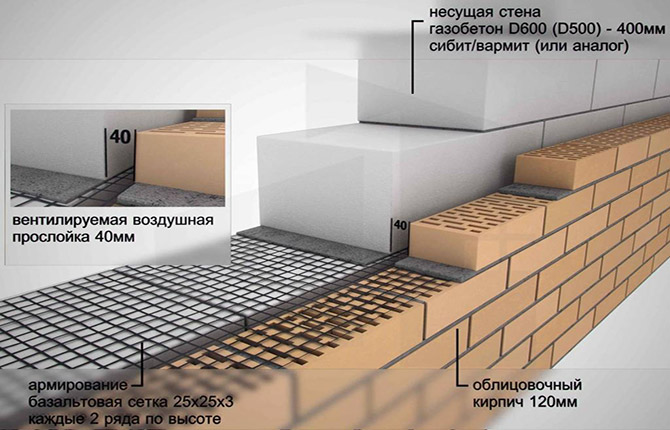
As a rule, facing bricks are laid on top of the walls of an already built house frame. What the internal masonry is made of does not yet matter much. The main thing is the basement of the building.There should be enough space on the ledge made of concrete or rubble stone to lay ½ facing brick. Usually there is a gap of 5-7 cm between the outer cladding and the old wall.
If the base is made of rubble stone, and no additional finishing is expected, then the facing brick is laid flush with the vertical surface of the rubble masonry. If the base is concrete, the place for the first row of facing masonry is selected so that the brick is laid with a release of 2-2.5 cm. The same technology is used if the laying of the main material of the walls and the facing is carried out simultaneously.
Another nuance - the laying of facing bricks is carried out on a layer of waterproofing. Usually this is a sheet of glass roofing material folded in half. To prepare, you need to lift (lift up the edge) of the roofing felt to gain access to the concrete. The area under the waterproofing is protected with a chisel and grinder from protruding “bumps” and “humps” so that the surface is even. Afterwards they are painted with mastic and the edge of the glass roofing material is bent back into place.
How to prepare the first row
The next stage is preparing the brick. The facing stone is usually of high quality, but for the first row you need to choose a material with ideal geometry. One facade wall 10-11 m wide will require approximately 40-45 pieces.
The material must be laid out sequentially in a chain, controlling the gap (vertical seam) using a template. At this stage, the problem of incomplete rows always arises. It is rare to fit a whole number of bricks into the first row.Usually there remains an unfilled gap, the size of which can be from ½ to a whole (often ¾ of the normal length) brick, or a very small piece, from ½ to ¼ the size.
For ordinary red brick, it is normal to cut or chip off a piece (half or quarter) to fill an empty gap in the masonry. In the case of facing stone, this cannot be done, since in the masonry it is necessary to maintain a symmetrical arrangement of all vertical seams. Otherwise it won't be pretty.
How to correctly adjust the dimensions of the first row of brickwork
If the size of the empty gap is less than ¼ of the length, then the “hole” in the row can be compensated by increasing the width of the seam. For example, for a gap of 60-70 mm and with 40 bricks in a row, the increase in the gap will be 5-7%. It will be invisible to the eye. That is, on a problem wall you just need to increase the vertical seam between the facing bricks.
But you need to cut all the facing bricks in this section of the masonry until the wall reaches the design height. The required amount of facing bricks can be cut in advance, or this can be done during the process of laying the front wall. The workpieces are cut on a tabletop machine with a diamond disc.
How to check the geometry of the future first row
When laying out the bottom row, it is important not only to calculate the amount of material, but also to adjust the gaps (vertical seams). It is also necessary to level and correctly plan the geometry of the future box made of facing bricks.
After the first (bottom) row has been laid out dry, you need to tighten the mooring cords (mooring) on all four sides. The line should run along the very edge of the brick. To secure the berth, 2 thick reinforcing rods are hammered into each corner of the base of the building's foundation. The result is a square or rectangular outline, surrounded by one piece of fishing line (mooring line).

On an open foundation, this procedure is carried out by adjusting the lengths of the diagonals. But if the building box is already standing, then this method is not available. Therefore, aligning angles at 90O performed using one of the corner triangles with legs 150 cm.
The rule states that an angle will be right if one leg is equal to 4 measures (120 cm), the other is 3 (90 cm), and the hypotenuse is 5 (150 cm). You have to adjust the position of the mooring until you get a triangle of the desired proportions.
It is imperative to align the corners on the first row of facing bricks, otherwise, after the walls are laid, the frame of the house will turn out crooked, and this will be clearly visible to the naked eye.
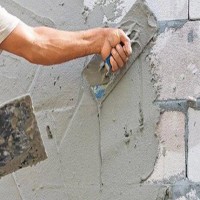
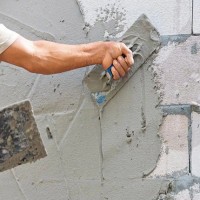
Preparation of the solution
The easiest way is to buy a ready-made mixture based on sand and cement. Some building materials manufacturing companies directly indicate on the packaging - a mixture for laying facing bricks.
The first thing you need to pay attention to is the brand of the solution. For cement-sand mixtures it can be from M25 to M150.For laying the facing material, a mixture of grade M50 is used. It can also be used to repair the base before laying out the first row.

Composition of the masonry mixture for facing bricks:
- Cement M300-M400, 1 bag weighing 50 kg.
- Washed sand, river sand, coarse grain - 16 ten-liter buckets.
- Clean water, tap or rain, 40 l.
The result is 230 liters of masonry mixture. If you calculate it per cube of solution, you will need 6-7 bags of cement, 96 liters of sand and 230 liters of water. For walls half a brick thick, the consumption of masonry mixture is from 100 liters to 160 liters of mortar per meter of masonry area. If we calculate the area of the wall made of facing bricks (thickness ½ stone), then the required flow rate will be 35 l/m2.
For the first row of facing bricks, the consumption will be 40-45 l/m2 walls.
It is better not to add any kind of modifiers or additives to the batch unless there is a sustainable practice of using them. It is better to immediately avoid lime, liquid soap, and various detergents. Facing bricks are made by semi-dry pressing, so after firing the clay becomes highly porous, like a sponge, and absorbs and “pulls out” all water-soluble additives from the solution. As a result, white and yellow spots form on the surface of the brick, which are not easy to remove.
Now you need to properly prepare the batch. If there is no concrete mixer, then use a large, 50-100 liter trough.Sand and cement are loaded first in small portions, everything is mixed dry with a shovel. Then add 50% water and moisten the mixture to ensure complete wetting.

The quality of the solution is checked by how the mark from the trowel spreads out in the trough. If the mixture floats, then you need to add a little dry grout (sand and cement thoroughly mixed dry), wait and test with a trowel again. Well, or add water.
A good quality mortar spreads onto the facing brick like cream onto a cake. It is plastic, but does not blur, adheres to voids and does not fall into holes.
Laying the bottom row
The first row is the most difficult to install. Even if the facing brick was laid in advance, adjusted in length so that the vertical seams looked absolutely symmetrical.
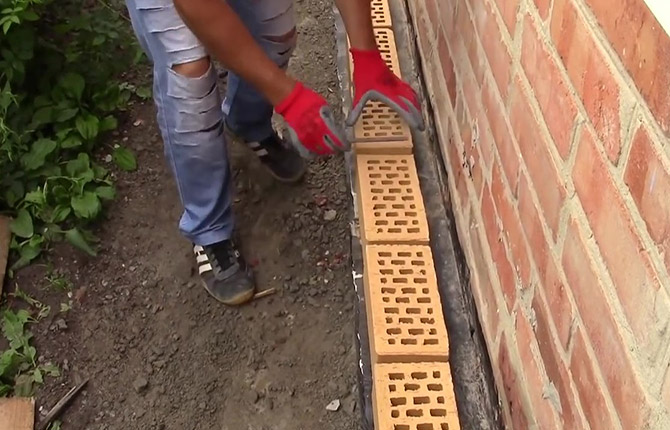
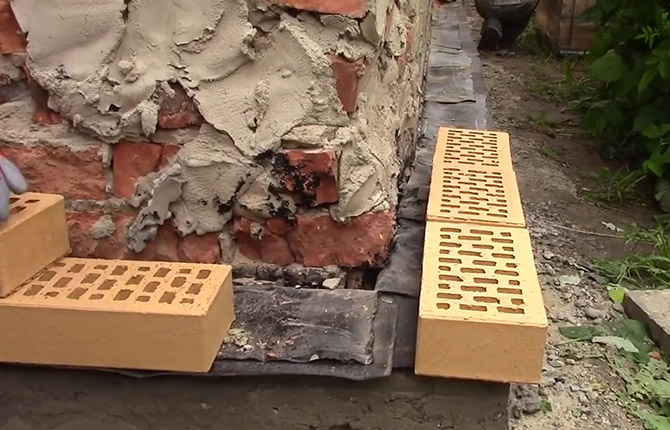
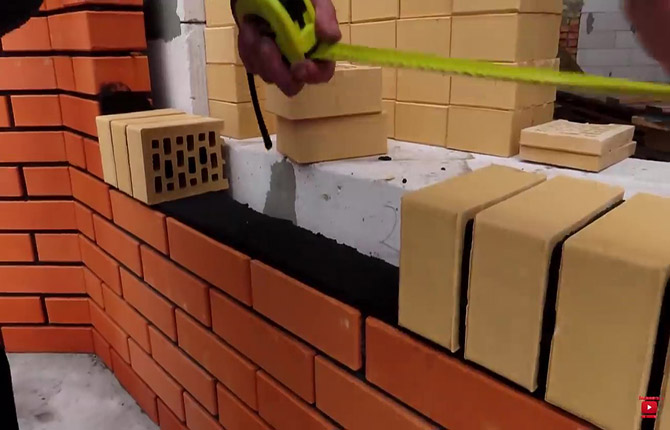
The bottom row is laid on waterproofing, under which there is a rather uneven surface of a concrete plinth. In addition, the first row is usually laid out with a release of 2-2.5 cm, that is, part of the material hangs over the vertical plane of the base.
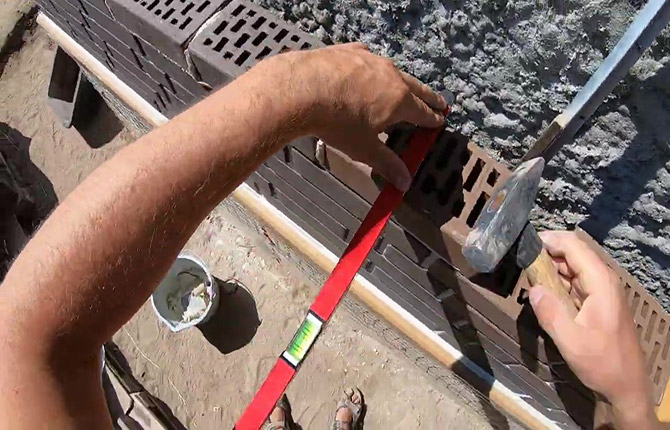
Therefore, under each brick you have to lay a little more mortar, stretch the mixture into a strip up to 60 cm long, and let it set a little before laying the cladding. Lay out 2-3 stones at once, without embedding the mixture into the vertical seams. Burnt clay absorbs water, so you need to quickly level the masonry horizontally, tapping the material with the handle of a trowel. And they immediately check the horizon, but in a direction transverse to the row.
Until the material sits firmly on the mortar and still retains mobility, you need to use a rod (gauge) to even out the gaps in the vertical seams and fill them with mortar. Once the first row has been laid out, at least a day must pass before work can continue.
During this time, you need to prepare cut-ins and transitions near the doorway, porch, fittings (taps and pipes) protruding from the walls of the house.
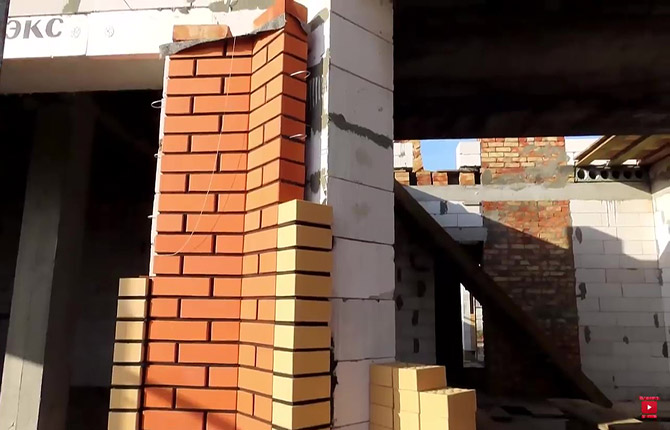
Laying the corners
The quality of the masonry of the entire cladding of the house depends on how correctly the corner areas are laid with facing bricks. In order to control how accurately the brick is laid, you need to prepare a bench or flooring, standing on which you can see the masonry from above and from the sides.
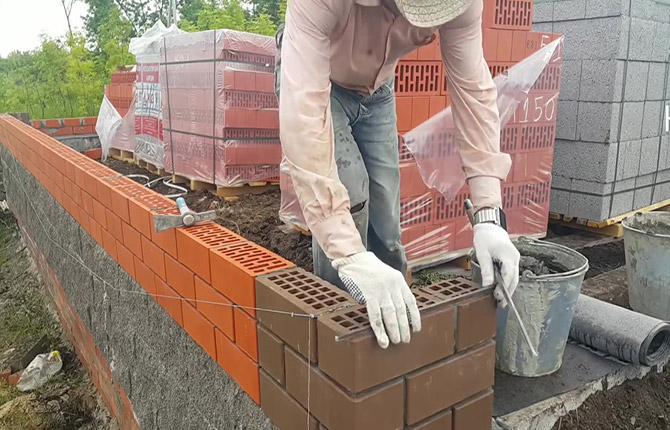
After leveling the layer, 2 steel wire staples are immediately laid to securely tie the corner to the masonry walls. In this case, this is a necessary measure, since under the previous row, instead of a whole stone, two halves were laid, and even lower - 2 whole bricks. That is, 3 vertical seams lined up in one line without dressing.
The laid material is upset by blows of the trowel handle, first on the upper plane, then on the outer side.In this case, you need to control the position of the cladding, looking from above, so that the outer edge of the stone is exactly opposite the metal rod.
Now you need to lay the second mating stone. A small amount of solution is applied to the end and laid out in a row. You should try to immediately lay the second facing brick of the corner to size, without horizontal padding. Otherwise, by hitting the outer end of the stone, you can easily “knock” the first brick out of place. It will move a couple of millimeters, you may not even notice it.
If you continue laying with padding, then as the number of rows increases, the corner of the facing brick will fall outward. The seams in the corners will increase and the corner area will become crooked after the work is completed.
Therefore, the second brick is laid, first touching the mortar with the far edge of the butt, and then, as if rolling, they rest the end (with the mortar spread) on the side of the first. It may not sit completely on the masonry mixture, so you need to lightly tap the trowel along the seam, as in the photo. This is the most difficult stage of laying a corner.
If you cannot lay the second brick correctly without padding, then you need to change the masonry pattern. Place the stone on a row without first applying mortar to the end. With one hand the facing brick is lowered onto the mortar, with the other hand the template is held so as not to “crush” the joint.
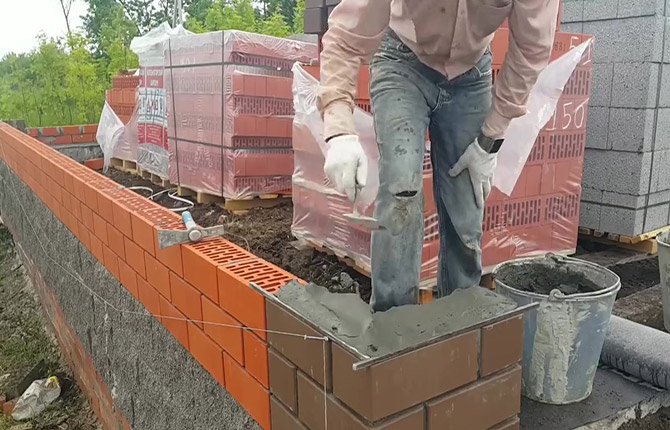
After a slight settlement (by blows of a trowel), the material will reliably “stick” to the row, and you can seal the empty seam with masonry mixture. This is done simply. Take a small amount of mixture onto a trowel, pour it onto the seam and fill the space with chopping movements.
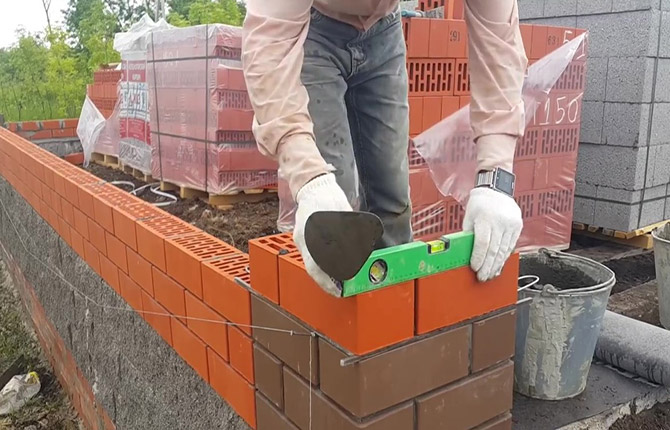
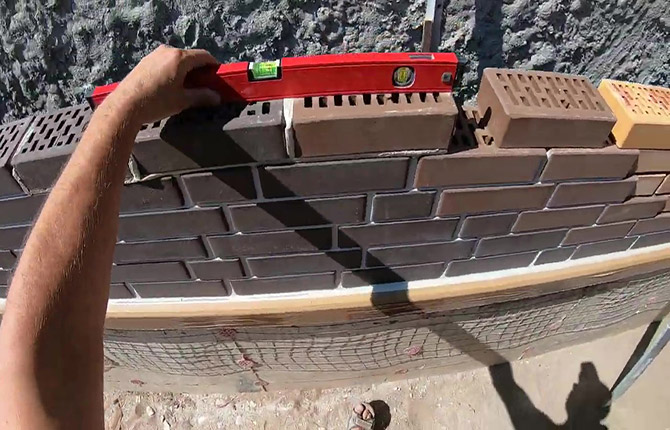
Now you need to check the horizon of both bricks at once, and at the same time check the vertical deviation of the facing material relative to the wall.
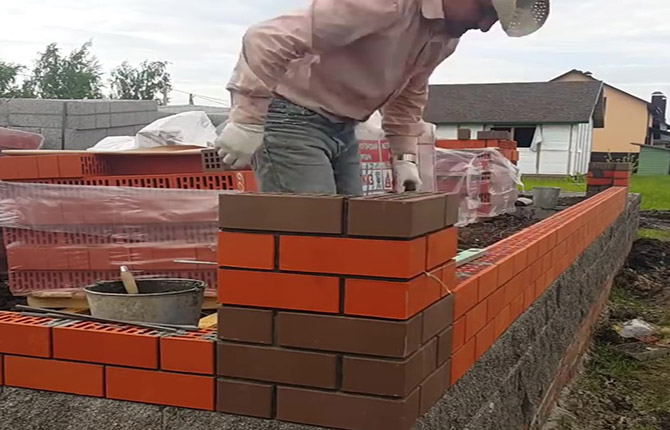
In this way, you should lay another 2-3 layers of the corner, always with bandaging of the seams. Then move on to the next corner zone. Once the two corners of the box are laid out, you can move on to laying the wall between them.
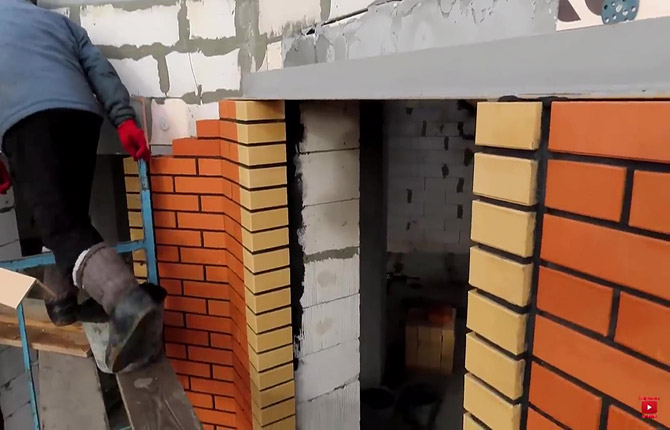
Wall covering
As a rule, wall masonry with facing bricks is easier to do than corner masonry. All that is needed is to maintain the thickness of the seams and constantly monitor the position of the bricks in the row.
Now you need to determine which stone to start laying with. If there is a whole stone on the bottom row in this place, then the new one should be continued as a half. For installation, apply a solution, a little mixture on the end of the half, and you can put it in place.
It is better to smear the excess and remove the remains. Otherwise, the excess will come out of the seam and harden on the facing brick as a huge lump or, even worse, spread out like a blot. If the solution is of good quality (and no other solution is suitable for facing bricks), then it may take several days to clean up its remains.
The layout of facing bricks in a row is somewhat different from how it was done in the corner. You should try not to put the half down, but to stick it in diagonally, pressing the stone simultaneously in the vertical and horizontal directions.After laying, the facing brick is tapped in the seam area, at the end and along the upper plane.
The position of the brick is checked using a building level, the horizontal direction is controlled and the vertical direction is controlled along the outer wall.
Before laying the next stone, the rod is moved along the row.
Usually the presence of half in the facing finish is an exceptional situation. Incomplete bricks in a row radically worsen the appearance of the cladding. Therefore, the halves are placed at corners, in the slopes of doors and windows, in complex structures where there is no other way to untie the row.
How to cut facing bricks correctly - according to technology, this should be done using a grinder and a diamond wheel. But these are cases when you need to cut very precisely. During the laying process, the facing is split in half.
To do this you need:
- Select a prick line (it is not necessary to prick in the middle).
- Hit the line on one face with a chisel from a construction hammer and do the same on the opposite face.
- Strike the line on the supporting surface.
As a rule, the material splits along the line of voids. Some craftsmen first knock out the lintels inside with a hammer, and only then split the facing brick.
Tying the cladding to the wall
The half-brick masonry is unstable. Therefore, the front wall is tied to the main frame of the building. The binding pattern depends on the type of material from which the house itself is built.
For example, wire-wrapped dowels can be used to secure facing bricks to old brickwork. The ends are spread apart and sealed into a masonry joint.
If the cladding is done with clinker, then the front wall is attached to the old brick wall using conventional galvanized strip hangers.
Laying the slopes
You can decorate door and window openings, turns or figured columns of the front wall using facing bricks of a special configuration. Such a stone has ready-made bevels and figured protrusions. You just need to lay the facing brick in the window opening.
Joining
This is a procedure for cleaning and adjusting inter-row seams using a special tool - jointing. Immediately after laying out the first 10 rows, the seams are cleaned of mortar residues and a special profile is formed. This breaking-in improves the appearance of the facing masonry.
Laying with facing bricks is a complex and labor-intensive procedure that requires experience and skills in working with various types of cladding. But a little experience can be gained when decorating porches, the entrance area of a house, and doorways. Professional work with cladding is possible only after 2-3 years of masonry practice.
Tell us about your experience in laying cladding - what installation features should you pay special attention to?


With horizontal seams everything is clear, but with vertical seams, you need to measure everything with a stick. This is not a job. For vertical ones, too, there seems to be a template in the form of the letter P. You put it on the laid brick, lay down a new one and your head doesn’t hurt about anything.
I have not seen any mason work with such a template; you check the vertical seam every time with a rod. There is no other way.