Do-it-yourself curtains for a balcony from the sun: instructions on how to create original curtains
Apartments with balconies facing south turn into a branch of the underworld on hot summer days.If you do not cover the windows with protection from the scorching sun, then only air conditionerturned on at maximum power. Operating such equipment “for wear and tear” is an extremely unprofitable option from a financial point of view, don’t you agree?
Do you want to protect yourself from scorching rays without damaging your interior or your wallet? An excellent solution would be to make solar curtains for your balcony with your own hands: you will be able to choose the most suitable material and will not spend much on its purchase.
But which curtain model to choose and how can it be made at home? We will help you deal with these issues - in our article we will talk about what types of curtains can be used on the balcony, how to choose the right type, color and texture of fabric, as well as what materials it is better to avoid.
We will also look at the best photo ideas for decorating balcony curtains, and provide step-by-step instructions for making curtains with your own hands. We will supplement the instructions with visual photos and videos.
The content of the article:
Types of curtains for balconies
A balcony is a special room in which not all types of curtains will look equally beautiful. The windows here are larger, and the frames often rest against the side walls.
You can find suitable options in the range of curtains, but before choosing a style, you need to pay attention to several important nuances:
- Material Density, which directly affects the throughput of curtains.The thicker the curtains, the less light will penetrate into the room. Dense fabrics are suitable for balconies whose windows face a busy street, brightly lit at night. However, this fabric is not suitable for tight spaces. On the windows in tiny balconies you need to hang thin curtains made of airy material, which will visually enlarge the space.
- Material color. It's very easy to choose here. If the windows face north, then the balcony needs to be filled with warmth, which means the shades should be warm: orange, yellow, peach, pink and, in rare cases, red. If there is enough sun in the room, then the excess light needs to be compensated with cool shades: blue, violet, green, cyan, lilac, mint.
- Pattern and geometry. To choose the right texture, you need to rely on the size of the room. Curtains with large prints are suitable for spacious balconies. Small patterns visually make the room larger. For cramped balconies, you can also choose a plain fabric. A vertical strip allows you to visually “raise” the ceiling, while a horizontal strip will make the room wider.
When you have already decided on the density of the material, color and pattern, you need to move on to the most important stage of selection - finding the ideal style. Today there are dozens of them.
The most popular option is classic straight curtains to the floor They are universal and suitable not only for the style of the same name. Classic curtains consist of light curtains and thick drapes.
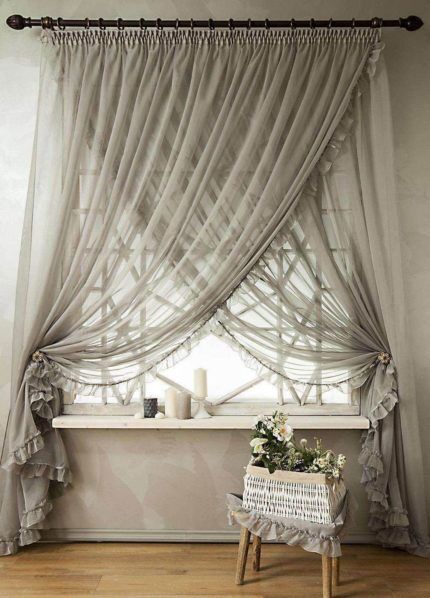
Cafe curtains fit much better. These are short curtains that cover only half of the window. The cornice for them is attached approximately in the middle of the opening. They provide poor protection from light, but they look very modern and impressive. This option is suitable for balcony windows facing north, where there is no need to protect from the scorching sun.
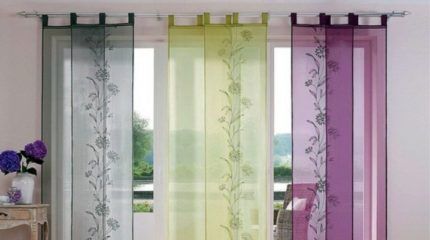
Japanese curtains ideal for balcony windows. Oriental style tends to be laconic, which is why curtains are designed as simply as possible. They most closely resemble modular screens, which are sometimes used to zone rooms.
Japanese curtains fit perfectly with the minimalist style, but can also fit into high-tech or eco.
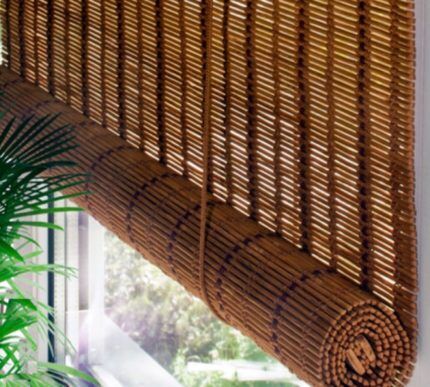
Roller blinds - a practical, popular option. They got their name because when the window is opened, the panels rise and roll up. This allows you to precisely adjust their length, which is very convenient in cases where the balcony faces the sunny side. Roller blinds are easy to install and are usually matched to the size of the glass units.
If you want to hang roller blinds on your balcony, we recommend that you read the step-by-step instructions instructions for their manufacture.
Roman curtains in design they are in many ways reminiscent of rolls, but when rolled they are assembled into an accordion due to rigid horizontal dies that are sewn into special pockets. This style is becoming increasingly popular not only because of its practicality. Roman blinds are easy to make yourself.
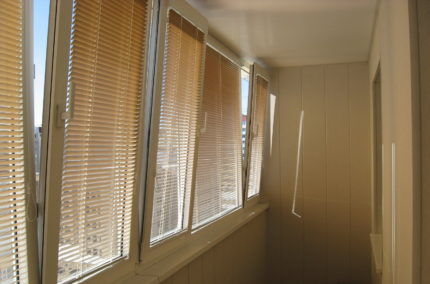
And the last common option for windows on the balcony is blinds. They can be horizontal and vertical. If such models evoke melancholy due to obsessive associations with office space, then you need to take a closer look at their rich assortment.
Stages of making a Roman blind
As we have already found out, Roman blinds are one of the best options for decorating windows on the balcony. They are unique because they combine the advantages of ordinary curtains and blinds. They are often made from fabric. The mechanism for lifting the blades is in many ways similar to the system that is used to lift the slats.
Stage #1 - preparatory work
Even before sewing, you need to carry out preparatory work. First you should purchase a block, rings and dies.
If there are old blinds in the closet that have not been used for ten years and were stored just in case, then it’s time to take them out, because this case has finally come. You can remove a lifting mechanism from the structure, which is ideal for Roman blinds.
The next stage is choosing a style
Roman blinds can be single or double layered.The second model will take much longer to complete. For them you can choose either dense or airy fabric.
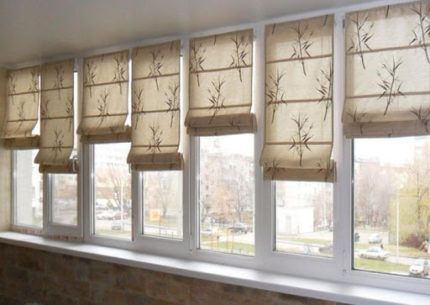
Roman blinds on the windows can be combined with curtains, but this option is more suitable for decorating rooms rather than balconies.
Choosing the type of fastening
The curtain rod for Roman blinds can be secured in two ways:
- Fastening inside a window opening. In this case, the dimensions of the canvas must correspond to the dimensions of the window, since they cannot protrude even a millimeter beyond the frame.
- Fastening the cornice over the window opening. This is a classic method in which you can choose any width and length of the canvas. It is suitable for cases where the frame or area under the window opening needs to be hidden due to defects or it is necessary to maintain access to the window sill even with the curtains closed, if, for example, something is constantly stored on it.
Before starting work, you need to select the number of dies - elements that support the horizontal folds of the canvas. To calculate the number of dies, it is best to use a convenient table.
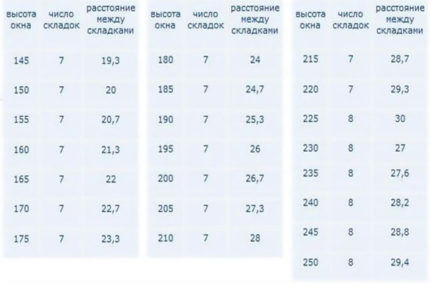
Stage #2 - cutting the canvas
Be sure to take into account one important nuance - the finished Roman curtain, after attaching the dies and the weighting bar, can no longer be machine washed, so it is better to wash, dry and iron the material in advance.
First you need to correctly calculate the dimensions of the canvas. To the original width you need to add 5 cm on each side, which will go to the side folds.15 cm is added to the length, of which 5 cm will go to the top hem, and 9 to the bottom.
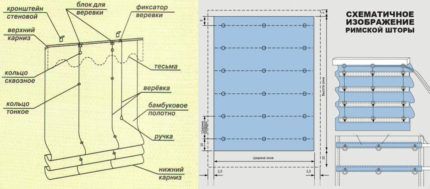
For the lining you need to take a piece that has the same width as the main fabric. With length, everything is more complicated, since here you will have to add not only allowances of 2 cm to the bottom and top hems, but also 2.5 cm to each folding die.
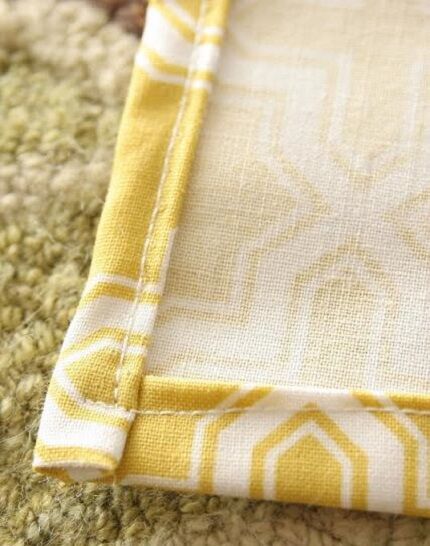
Now you need to prepare the fabric for the lining. All you need is a hot iron. The fabric needs to be ironed thoroughly and folded at 2 cm on the sides.
Stage #3 - making pockets and hems
After this, you need to arm yourself with chalk or a piece of dry soap and mark lines on the canvas in the places where the pockets for the dies will be located. All necessary calculations must be carried out in advance using our useful table. From each line you need to retreat 1.25 cm (this is the same 2.5 cm in total) in both directions.
Now we draw additional vertical lines and fold the fabric along the pocket line. For greater convenience, you can iron it again to fix it. After this, you need to stitch the pockets along additional lines (indents).
The procedure must be carried out with each pocket.
Stage #4 - sewing Velcro and lining
On the top edge you need to sew Velcro - a Velcro tape with micro-spines on it. Such contact strips are often used as fasteners on shoes and outerwear.
The main fabric and the lining must be connected using pins. Here it is easy to check whether everything was done correctly, since when applying the lining should be 4 cm wider (2 cm on each side).
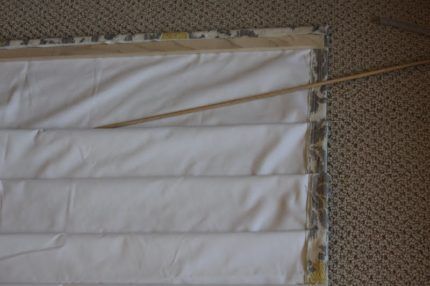
Now you need to sew the two fabrics together, but you cannot sew up the corner of the curtain through which the block will be inserted into the pocket. It is best to use a hidden seam.
Now you need to fold and sew a secret seam at the top of the curtain, where the Velcro tape is located.
Stage #5 - attaching the rings and adjusting
On the canvas it is necessary to mark the location of the rings. The optimal distance between them is no more than 40 cm. You need to retreat at least 10 cm from the edges. You need to sew rings to the Roman blinds, and insert dies into the pockets.
Where the rings will be attached, the lining must be sewn to the right side.
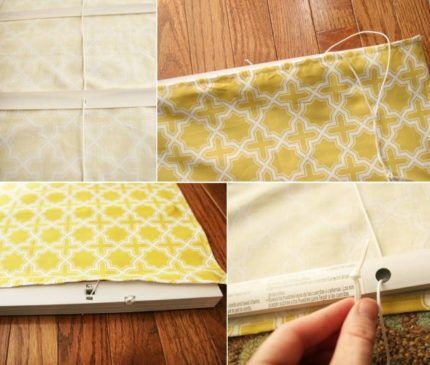
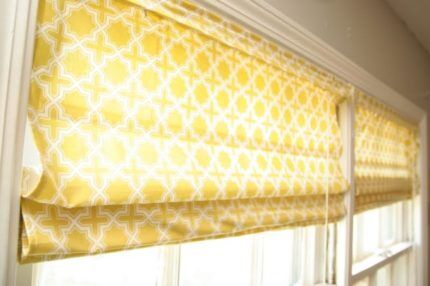
This is how, using two pieces of fabric, matching threads, rings, dies, weights and a sewing machine, you can make beautiful Roman blinds for your balcony window with your own hands.
If the story of sewing curtains does not appeal to you, then you can buy ready-made curtains in the store or consider the option window tinting on the balcony — the film will reliably protect from scorching rays.
Conclusions and useful video on the topic
A visual video tutorial on how to make a Roman blind with your own hands:
In this publication, we reviewed a detailed master class on sewing Roman blinds with your own hands, which even beginners who last held a needle in craft lessons at school can master. You can practice on simple models and get good at it. The cost of a homemade curtain is several times lower than a purchased one, and the result will pleasantly surprise you.
Do you have any questions about making curtains with your own hands? Or if you want to share your personal sewing experience, write comments in the block located below the article. Ask your questions to our experts and other site visitors, share original photos of your own made curtains for the balcony.


