What is the best way to cover a heating radiator: options for masking radiators
Unfortunately, the appearance of even the most modern heating devices does not always meet aesthetic requirements, and sometimes cannot fit perfectly into the interior of the room. The desire of the owners to eliminate this deficiency is quite natural.
Before closing the radiator, you should understand all the intricacies of the issue. Otherwise, home heating costs may increase significantly. In our material we will tell you how to do this without special financial costs and heat loss.
The content of the article:
Masking of radiators and the laws of heating engineering
The main task of any heating radiator consists of heating the room. The goal is achieved by combining or separately using two methods - infrared radiation and convection. Thanks to them, comfortable conditions are formed. Infrared radiation transfers heat to objects in the room, while convective radiation heats the air.
We can feel thermal energy if we place our hand in close proximity to the radiator. Convection ensures air circulation and uniform temperature distribution throughout the room. This is known from school physics courses - warm air, rising upward, displaces colder air.
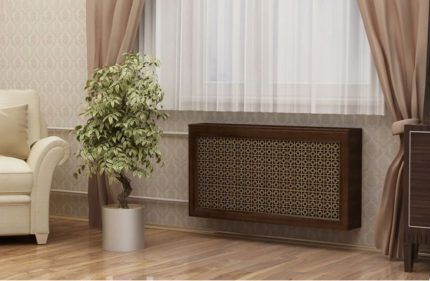
You need to understand that almost any way to hide pipes and radiators will lead to an inevitable loss of heating power. The simplest example is the use of a glass screen with artistic painting.
It would seem that the task of decorating the radiator was completed successfully, but the room immediately became noticeably colder. This all happened because glass almost completely neutralizes infrared radiation.
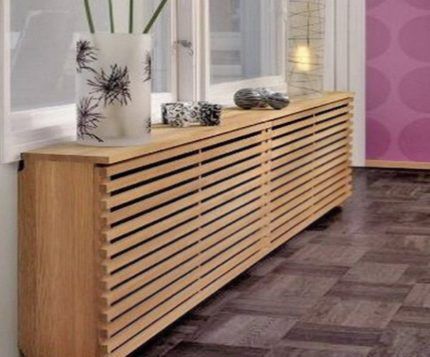
The deeper and more securely the radiator is hidden, the greater the losses will be.
This statement fully applies to blind screens that prevent both long-wave infrared radiation and short-wave convection.
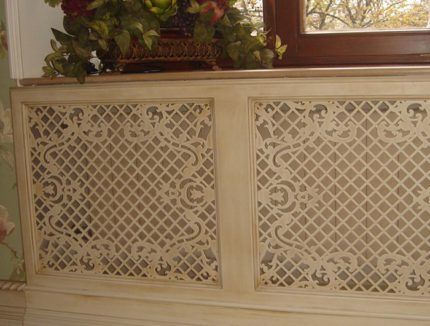
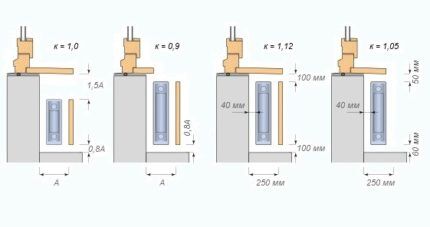
The same can be said about the blind boxes above the top of the radiator - they are an insurmountable barrier to the spread of warm air upward (the convection method does not work). The conclusion suggests itself - the larger the area of the holes in the lining, the smaller the heat loss will be.
This photo selection will present original ideas for decorating and camouflaging heating appliances:
Requirements for the decoration of heating radiators
The availability of pipes and radiators is another important point in choosing decor after the requirements of heating engineering. It is well known that the heating radiator, namely the connection with the pipe, is the weakest point. In addition, the radiator itself, due to improper installation and operation, or for a number of other reasons, may leak.
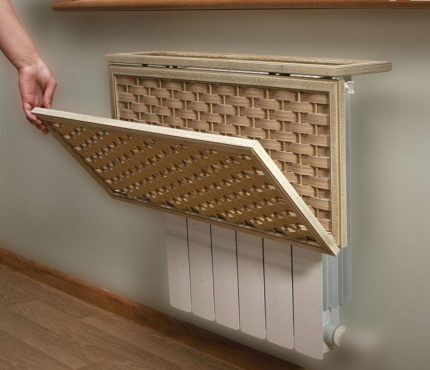
In emergency situations it may be necessary to remove radiator for repair or replacement. From a plumbing point of view, the cover or screen should not have a fixed attachment, ideally the use of attached screens.
Even if you decide to ignore the advice of a plumber, still listen to the gloss of reason, which suggests that any weak point in the system is the connection nodes. The presence of an inspection (plastic door) can significantly simplify the task of servicing the radiator and heating system in the future.
Methods for decorating heating radiators
There are a great many ways to close a heating radiator. Choosing the best option, although not easy, is quite possible. Let's start with the simplest and most accessible methods.
Option #1 - budget painting
From a designer's point of view, color combination is very important. Most often, a heating radiator is painted white, so it will be practically invisible on light-colored walls.
If the walls have a solid dark color, then there will be no problems here either. It will be enough to select heat-resistant paint of the desired color and complete the radiator painting. If you fail to perfectly match the tone, then there will be nothing to worry about; a difference of several tones against the general background seems almost unnoticeable.
If the wallpaper on the walls has a pattern, then the radiator needs to be made to match it. Most often, one or two walls have an ornament, and the rest are finished with wallpaper of various textures in the same tone.
In this case, it is necessary to cut strips from the remnants of all used wallpaper and stick them on the radiator. The thickness of the strips and alternation should be selected on the spot, experimentally, trying to fit the resulting pattern most harmoniously into the interior of the room.
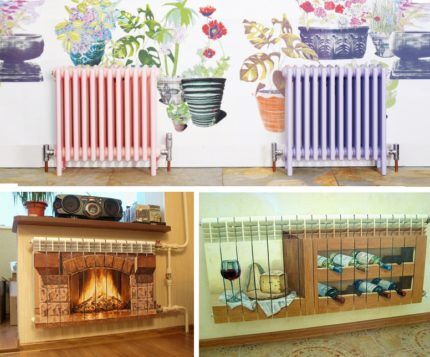
If we are talking about disguising heating radiators in a nursery, then you can give free rein to your imagination and paint them to match the surrounding interior. Ready-made stencils will come in handy if you have insufficient experience working with a brush. Don't forget to use only heat-resistant paints.
Option #2 - using fabric
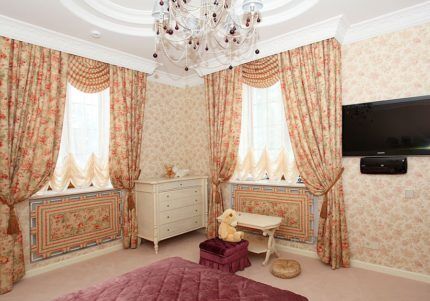
Another proven and very successful way to disguise a heating radiator is the “floor-length curtain”. Previously, this method was the simplest and most popular due to the fact that heavy blackout curtains were in fashion. Nowadays it is customary to use thick fabric, which is attached with Velcro to the wall or window sill.
It is best to attach the curtain from wall to wall; it will look great behind a light curtain. You can do the same by replacing curtains with vertical blinds.
Option #3 - hard screen device
One of the easiest ways to cover batteries is to use side screens. A variety of materials or whole combinations can be used to make them.
True, you need to take into account that the screen itself against the wall may look ridiculous, so you need to think through its appearance to the smallest detail and fit it correctly into the interior. It won’t be difficult to find ready-made screens in the store and use them to cover heating radiators.
The following types of screens are most widely used.
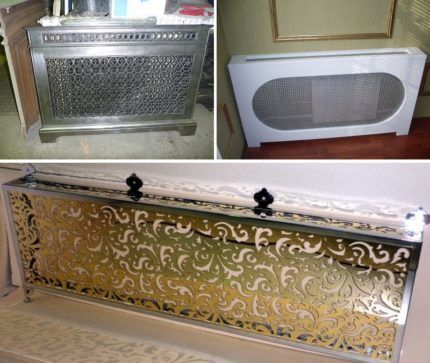
Metal screens for batteries
As a rule, stainless steel is used for its manufacture or the elements are chrome-plated. Such products are characterized by good thermal conductivity and durability.
Despite their relatively low cost and good functionality, their appearance leaves much to be desired. Without additional finishing, such screens are suitable for decorating a room in a high-tech style.
We bring to your attention the article - DIY plasterboard slopes.
Wooden radiator grille
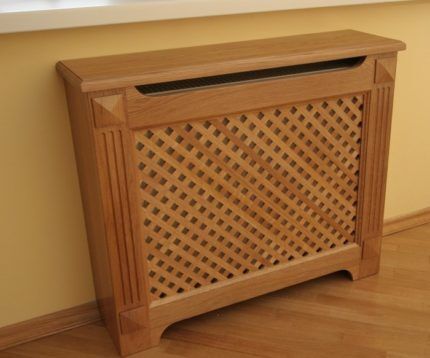
This option is considered the most win-win, since wood easily fits into the interior of almost any room. It is best not to purchase a ready-made standard screen, but to have it made to order. The appearance of the wooden screen should match the style and color of the furniture or be part of it.
The appearance of the wooden screen resembles a wicker lattice and looks impressive and stylish. A wooden grill is best suited for masking a battery located under a window. This design, with a sufficient number of holes, does not prevent the penetration of warm air and ensures good convection.
Decorative glass screen
Decorative glass will give the interior of any room a look of lightness and ease. Rooms with a glass screen made of decorative glass take on the appearance of well-groomed and complete. True, along with its spectacular appearance, such a screen also conceals a significant drawback.
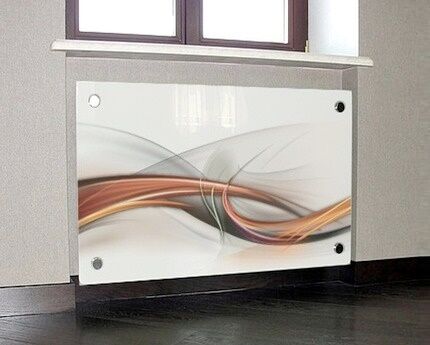
When using a glass screen, heat transfer is almost halved. Therefore, you have to choose between effectiveness and efficiency. If you approach the issue correctly, then it is best to use a screen made of decorative glass panels - this will achieve the appropriate hiding effect and ensure maximum thermal conductivity.
Drywall screen
If earlier we talked about screens as finished products, then you can make a screen from plasterboard yourself. A plasterboard screen is considered the most budget option. Anyone can do it, and fastening and subsequent finishing should not cause any particular difficulties.
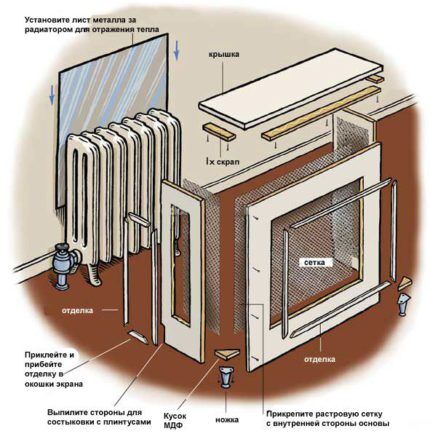
Since the option of constructing a screen made of plasterboard is considered the most universal, we will dwell on its design in more detail. To create and install the screen you will need the following tools and materials:
- Screwdriver
- Hammer
- Stationery knife
- Metal scissors
- Roulette
- Pencil
- Stapler
- Sandpaper, level
- Drywall sheet
- Profile CD and UD
- Lattice
Let's reveal a little secret - it is not recommended to use drywall without pre-treatment. This is due to the fact that this material does not have sufficient thermal conductivity. In addition, under the influence of heat it collapses and crumbles.
You can improve the situation by treating a sheet of drywall with PVA glue 2-3 times. Such treatment will not only effectively prevent drying out, but will also significantly increase thermal conductivity.
Work on constructing a plasterboard screen begins with the installation of the frame.To make it, you need to cut off the UD guide profiles and secure them with self-tapping screws to the floor and window sill. In order for the surface of the screen to coincide with the surface of the wall, the frame must be recessed to the thickness of the drywall plus the thickness of the finishing. Typically, this value is 13-14 mm.
Next, you will need to secure the CD profiles, taking into account that the distance between the vertical profiles should be slightly larger than the size of the grid. Armed with a pencil and tape measure, you need to mark the dimensions of the blanks on the sheet and cut them out using a stationery knife.
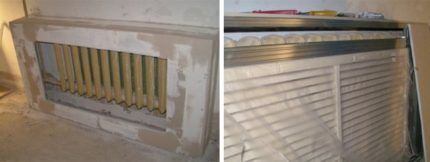
The cut pieces should be screwed to the frame using self-tapping screws. Fastening must be done very carefully, since if the heads of the screws are excessively deepened, the sheet of drywall may rupture. All that remains is to secure the grille and finish the screen.
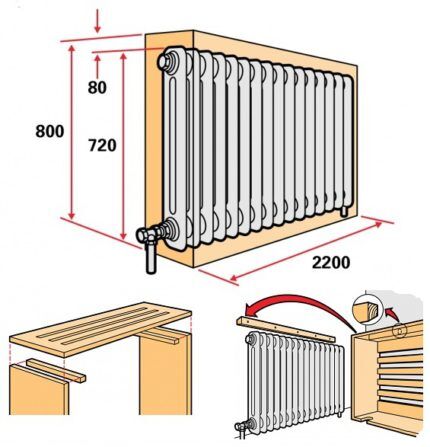
Option #4 - construction of battery boxes
Boxes that hide batteries are best installed when repairing or installing a heating system.
The following materials are suitable for making the box:
- Drywall. One of the most common materials. It is low cost, lightweight and easy to process. There are many ways to complete finishing using drywall. This material can be puttied and painted, covered with wallpaper and film, and decorated with stucco.
- MDF panels. Another budget option for decorative cladding.MDF is not afraid of sudden temperature changes and is not subject to drying out. Typically, the design of MDF panels imitates exotic or rare wood, which makes it easy to fit into the interior of the room.
- Plywood. This material is very light and easy to process. With its help you can quickly make a durable and lightweight screen for the radiator. Plywood is easy to cut and also decorated. Varnishing, painting, gluing film or wallpaper, or decorative plaster can be selected as finishing treatments.
- Laminated chipboard sheets. This material is more difficult to work with, although there are never any problems with fixing it.
- Wood. This material is supported by its environmental friendliness and naturalness. Using wooden blocks and slats, you can make a wonderful box without any work skills or special tools, which will help to perfectly cover not only the radiator, but also the heating pipes. At the same time, it is much easier to work with slats, especially when working in hard-to-reach places.
The box can become not just a decoration and disguise for a heating radiator, but also carry a functional or aesthetic load. If we consider the option with functionality, then you can, for example, use chipboard sheets and guides to make a cabinet the entire width of the room.
The optimal height of such a cabinet should correspond to the height of the window sill if the radiator is located under the window.
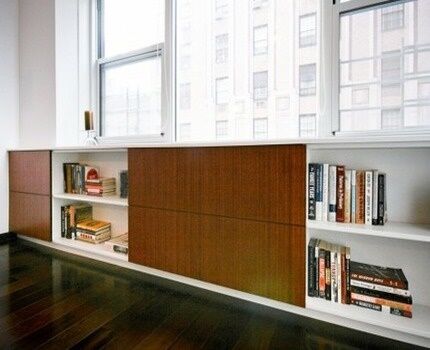
The aesthetic load of the box is more difficult to implement, but quite doable. A radiator located near the wall can be decorated as a fireplace.In this case, it is not necessary to use brickwork and install a forged lattice. You can do it much simpler and make a box from a cut sheet of plywood or fiberboard.
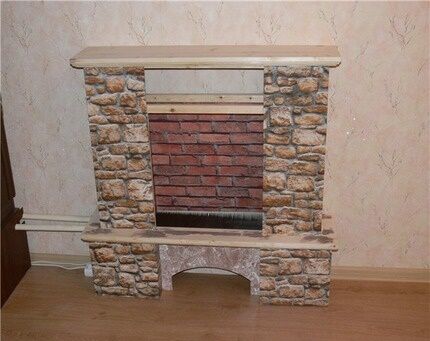
After securing the wooden slatted frame and installing the cut plywood sheets, all that remains is to cover the fireplace with film. You can go further and stick a painted flame or smoldering coals inside the fireplace; here everything depends on the flight of your imagination.
Option #5 - placing batteries in niches
One of the most labor-intensive methods of masking radiators and heating pipes is implemented at the stage of construction or major repairs. This method involves placing pipes and radiators not on the wall, but inside it.
Of course, this will inevitably lead to a reduction in the usable area of the room and an increase in heat loss, but there is no need to rack your brains about how to decorate radiators and heating pipes.
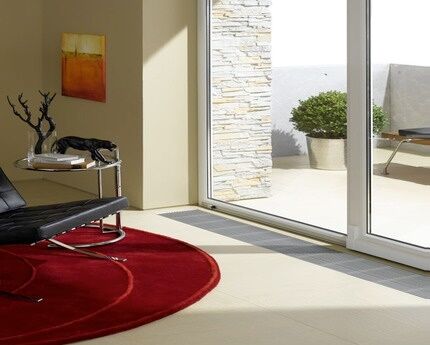
You can go even further and completely abandon radiators and pipes, replacing them with warm floors. If the heating efficiency is insufficient, then you can supplement the heating system with invisible convectors mounted in furniture, window sills, plinth, floor, etc.
Option #6 - installing radiators in the bathroom and kitchen
In the bathroom, it is best to hide radiators in some pieces of furniture. Wall cabinets are best suited for this. If for some reason it is not possible to hide the radiator in a cabinet, then it is better not to resort to making hanging boxes. They will look awkward on the wall. In this case, it is better to simply paint the radiator to match the walls.
As for placing the radiator on the floor, you can limit yourself to installing a screen. MDF and plastic are suitable for making a screen, it can also be glass and chromed metal - these materials combine well with the sterile cleanliness and shine of ceramic tiles.
In the kitchen, radiators are most often hidden under the window sill-countertop.This technique allows you not only to hide the radiator, but also to significantly increase the working surface. If we are talking about a small apartment, then this technique can be considered a significant bonus. Here it is already difficult to argue which aspect is more important - functional or aesthetic.
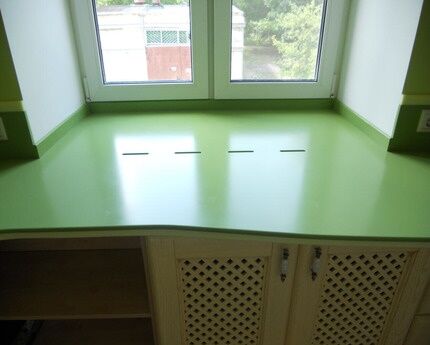
There is also the option of installing a folding table. In this case, the color of the countertop and the color of the walls should be the same. The disadvantage of this design is the impossibility of making the tabletop structure perforated. Having a gap between the countertop and the floor, as well as between the countertop and the window sill, will help ensure normal convection.
Conclusions and useful video on the topic
Video review of masking structures made of decorative glass:
The painting of a heating radiator is demonstrated in the video:
The video will introduce you to interesting options for decorating heating appliances, the manufacture of which you can do yourself:
When performing masking using any of the proposed methods, do not forget about the main functional task of the heating battery - heating and heat distribution. Incorrectly chosen material, installation and decoration scheme can increase heat loss several times.
Do you have questions or suggestions for masking radiators? Or maybe you built a screen for a heating battery with your own hands? Please leave your comments or additions to the material in the block below.


In general, in principle, it is not worth hiding and hiding batteries in poorly heated apartments; there is no need to even paint them often, because heat exchange in this case significantly worsens. But if the boiler room heats up hot, then you can hide the battery. I prefer to approach this matter without fanaticism; a simple screen will be enough. And it’s easy to remove to wipe off dust and there’s no need to be particularly fancy with the design.
Pretty good ideas for disguising batteries, but most don't even bother to hide them in any way, and some even highlight them. One option is decoupage and painting. Both are troublesome, but very beautiful. You can even paint it to match the color of the wallpaper, and in the children's room they paint it with special bright pictures to maintain the style. Everyone acts according to their wishes and capabilities.
Screens for radiators are only needed if the room has a special design and the radiator does not fit. For the majority of the population this is an unnecessary luxury. I think that in a typical apartment with a normal renovation, it is enough to simply paint the heating appliances in a suitable color. In our son’s room we have yellow walls with a green pattern, the curtains are also green, and we painted the radiator the same color. It turned out beautiful.
Some people cover radiators for beauty, but we had a completely different reason. I would even say more weighty. We have two twin boys who were just learning to walk and kept falling. And you can’t keep track of everything. I am alone with them on the farm all day long. I just had a phobia of these batteries. And the batteries are old, cast iron, good quality. A bump is the smallest problem they could bring.I had to cover it with a special decorative wooden box. And I attached silicone pads to the corners. It certainly looks beautiful, but the heat has decreased. But it makes me feel better that my head won’t get hurt. There are also hanging wooden screens, but I only recently noticed them. They look beautiful too.
Hello. The lump is indeed the smallest problem with old knee-type heating radiators for families with children. The EMERCOM control panel often receives reports of children stuck in radiators.
It is very difficult to independently remove a leg or arm caught in such a device without consequences, especially if the child begins to panic or this happened during the heating season. So, children are one of the most common reasons for deciding to install screens on cast iron radiators.
I still don’t understand what type of wood can be used to hide the batteries? How should it be processed? Will the heat transfer be high? How many holes should there be?
It is best to choose screens made of natural wood. Screens are usually made from high-quality material from valuable wood species, for example, oak, alder, beech. For a woman, it may be difficult to make them on her own, but for a man with tools and a day of free time, this is a very real task. In addition to the species listed above, aspen is also used, but this is for more experienced carpenters. Unfortunately, the price of such types of wood is quite high, so screens made of MDF and chipboard are most often chosen.
Regarding the technological openings through which heat will flow into the apartment, you now need to look at the number of sections, the temperature of the radiator and the area of the room. There are no requirements for the holes; they can have less of a technological appearance and more of a decorative one, and even occupy 40% of the frame area. An option that is considered a classic is 3-4 cm on the sides and a free allowance (depending on the type of radiator), from the wall to the screen, in order to create an optimal air cushion for the circulation of warm air masses.
Here are a few examples of implementations of wooden screens, combined into one photo for convenience.