Do-it-yourself well: detailed overview instructions for self-construction
If the water supply system of a suburban area cannot be connected to the public network, there is a need to install an individual source. To provide a beloved estate with drinking or technical water, a well is most often dug.
This is the most affordable development that does not require the use of an excavator or drilling rig for development.
Understanding construction technology, it is quite possible to build a well with your own hands and provide your home with drinking water. Agree, before starting work, it is necessary to study the theoretical aspect of the issue.
We will help you determine the optimal place to dig a well, and we will tell you in detail about geological surveys that you can carry out yourself. In addition, we will offer several options for arranging water intake points and describe step-by-step technologies for their implementation.
The content of the article:
Briefly about the occurrence of groundwater
The purpose of building a well on a suburban area is to open an aquifer capable of covering the family’s needs for drinking or industrial water. The first is used according to its name, the second is used for watering the area, cleaning and similar needs.
It is necessary to decide on the drinking and technical category at the planning stage of future production, because its depth and design depend on this. Categories differ according to the degree of pollution.
The chemical composition of process water contains more mineral impurities, odor and slight turbidity are allowed. Drinking water must be crystal clear, completely devoid of smell and taste.

Aquifers are layers of rock of equivalent composition and structure that contain groundwater. On a geological section, they appear as strips of arbitrary width, lying at an angle or relatively horizontally.
The upper boundary of the formation is called the roof, the lower is called the base. Depending on the thickness of the aquifer and the required amount of water, the well can only penetrate the roof, cross 70% of the formation, or be installed with its bottom on the base.
The roof of the aquifer, in turn, serves as the base of the overlying layer, and the base serves as the roof of the underlying layer.
There are two natural ways for water to appear in rock strata:
- Penetration of atmospheric precipitation into soils or the waters of nearby bodies of water. Water passes freely through permeable sediments, which include sand, pebbles, rubble and gravel. The process of seepage or penetration is called infiltration, and layers that allow water to pass through are called permeable layers.
- Moisture condensation in layers, sandwiched between two waterproof or otherwise waterproof layers.Clays, loams, semi-rocky and rocky rocks that do not have cracks do not allow water to pass through. The water lying between them can be under pressure: when opened, its level rises and sometimes gushes out.
Fractured rock and semi-rock varieties can accommodate water, but there is no pressure or it is weak. The chemical composition of fissure water will certainly be influenced by the host rocks. Limestones and marls will enrich it with lime, dolomites with magnesium, gypsum steamed with rock salt will be saturated with chloride and sulfate salts.

For those who want to know how to build a full-fledged well with their own hands, you should consider the following:
- Presence of impermeable rock above the aquifer eliminates the seepage of dirty wastewater into the formation. Water extracted from an aquicluded layer can be classified as drinking water.
- Lack of aquifer on top of the aquifer signals the prohibition of the use of water for drinking purposes. It is called perched water and is used exclusively for household needs.
If the owner of the site is interested in the technical category, it is quite enough to open or go deeper into the layer with perched water. The well shaft in such cases is much shorter than the drinking water shaft.
However, the mirror of the perched water can hardly be called stable. During dry summers and winters, the level in such mines is lower than during rainy autumn and spring periods. Water supplies will fluctuate accordingly.

To obtain a stable amount of water in the well, the perched water must pass and go deeper into the underlying aquifer. Usually there are several permeable and waterproof layers between it and the perched water. This means there is a possibility of reaching drinking water.
However, the trunk of such a well is much longer: it will take more material, time and labor effort to build it.
Drinking water must be tested by the local sanitary and epidemiological authority. Based on the analysis results, conclusions are drawn about its suitability. If necessary, cleaning measures are recommended.
Typical diagram of a shaft type well
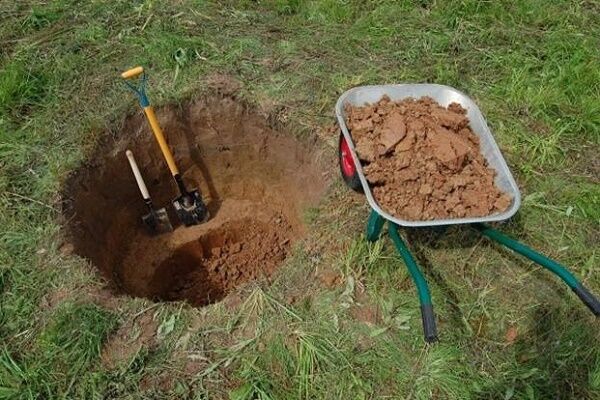
A shaft well is a common type of individual water supply source. It has the largest size in the opening, which allows an independent owner to form a working with a simple shovel directly in the mine. The excavation can be round, square, or less often rectangular.
The diameter or length of the wall of a square shaft usually varies from 0.8 to 1.2/1.5 m. Note that too much clearance does not guarantee an increase in flow rate. There is slightly more water in a wide well than in a narrow analogue. After all, the flow rate is determined by the capabilities of the water carrier, and not by the size of the mine. But the difference in construction costs is difficult not to notice.

Main structural components
They dig wells up to 30 m deep.It is easier and more reasonable to go through deeper excavations with a drilling rig. They do the same when constructing a well in rocky and semi-rocky rocks: drilling a shaft in them with your own hands is impossible or too difficult.
It makes sense to dig soils that can be mined with a shovel: sand, sandy loam, clay, loam.
Structural components of a mine well:
- Water intake part - the lower segment of the walls of the well, designed to receive groundwater. If the water carrier's supply is sufficient for family consumption, water flows exclusively through the bottom. If the flow rate of the formation is small, holes are made in the well walls buried in it for the lateral flow of water.
- Trunk - part of the well from the surface of the earth to the static level of well water. It can be wooden, monolithic concrete, assembled from reinforced concrete rings, stone, brick. The trunk must provide a tight seal that prevents the infiltration of sewage, atmospheric water, the penetration of chemicals and organic residues.
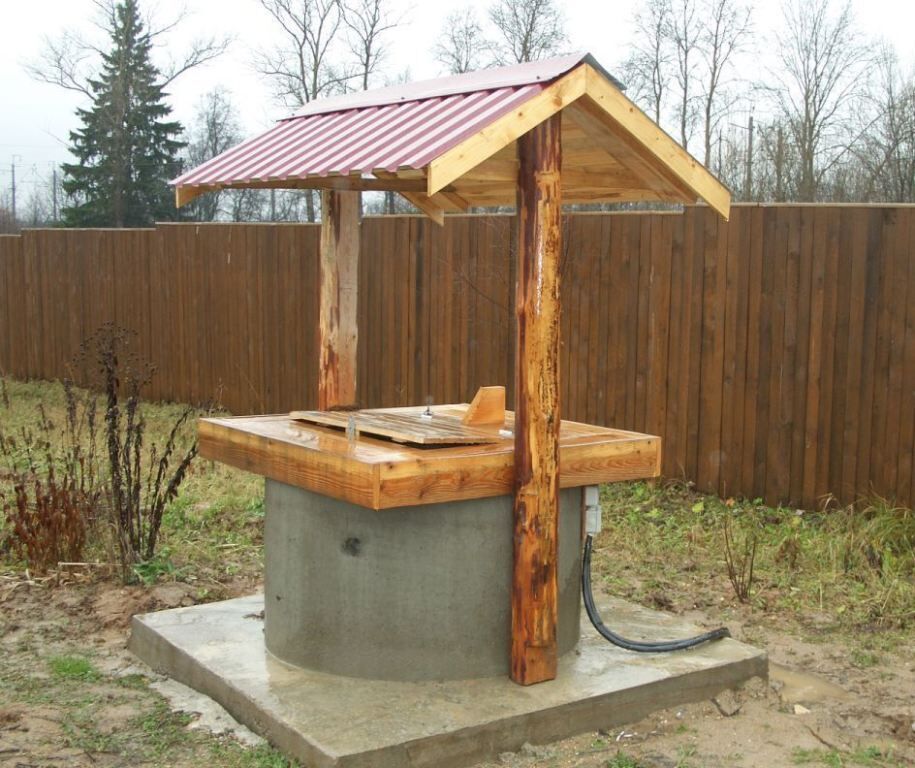
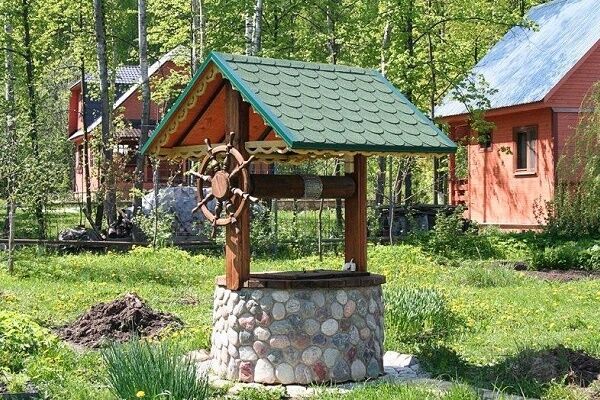
- Heading – an above-ground area that creates conditions for the safe use of a water supply source and prevents water pollution. It should rise above the surface by at least 60 cm. A comfortable height is considered to be 80–90 cm. The head should have a lid to protect the water from contamination and a device for lifting it with a bucket.
A clay castle is placed around the junction of the head with the top of the trunk, which acts as a barrier to soil water, atmospheric and domestic runoff from the earth's surface. This is a kind of rounded trench with a depth below the level of seasonal freezing of the soil, about 50 cm wide. The trench is filled with crumpled clay.
The backfill is compacted with diligence so that cracks do not appear in the drying clay. A blind area of reinforced concrete, rubble stone, brick, 1.0/1.5 m wide with a slope from the walls of the cap of 0.01, is built on top of the castle.

Classification by water receiving part
The degree of immersion of the water receiving part into the aquifer is a criterion for dividing wells into the following types:
- Imperfect. The imperfect type receiving segment is partially buried in the aquifer. The influx of water occurs through the bottom, if necessary through the side holes.
- Perfect. The water receiving part of the perfect type completely crosses the aquifer and is installed with its bottom on the roof of the aquifer located below. The influx of water occurs through the side holes in the walls.
- Perfect with a sump. Its structure is similar to the previous type. The difference is that the water intake area is buried in the aquifer in order to create a reservoir for water storage.
There is another way to construct a reservoir: the water intake part is arranged in the shape of a truncated cone, reminiscent of a tent. A cone-shaped underwater part is arranged if the thickness of the water carrier is more than 3 m; if it is smaller, it would be more rational to make a sump.

Optimal scheme for private owners
The choice of design for the underwater part of a mine well should be based on the real need for water supply.If you do not scoop out the excess, it will stagnate, which will lead to loss of drinking qualities and rotting. Therefore, imperfect wells without backup tanks are recommended for water supply to private households.
Long-term popular practice suggests: the water intake of an imperfect well should not be inserted into the aquifer by more than 0.7 of the thickness of the reservoir. If the recommended regulations are exceeded, the volume of incoming water decreases, which entails the need to form side holes in the walls of the well.
The bottom of a standard imperfect source is equipped with a three-layer bottom filter. First, 10 cm of sand is poured, then 15 cm of gravel or crushed stone with sand filler, after 15 cm of small pebbles, gravel or crushed stone larger in size than the previous filling.
If the water intake part of the well is buried in liquefied rock - quicksand, the bottom of the excavation is equipped with a boardwalk with holes and slots drilled for water intake.

Independent hydrogeological surveys
The approximate depth of the mine can be determined in advance. To do this, you need to go around the neighboring areas and find out at what level the water is in the nearby wells. You should ask whether the well was dug for technical or drinking purposes and whether the groundwater level in it is stable.
At the same time, it’s worth asking around whether it was difficult to develop the mine, and whether large boulders were encountered during digging.
The survey method is acceptable if the estate is located on flat terrain with slight hilliness.There, the layers of rocks lie almost horizontally, approximately repeating the shape of the natural relief.
The groundwater table is located approximately at the same level, because in permeable rocks the principle of communicating vessels operates. The difference in the length of the shaft can only be caused by differences in the elevations of the well mouths.
The depth of underground water in a mine planned for construction in a flat area can also be determined in advance using a neighbor’s well as a guide. To do this you will need an aneroid barometer.
The scale of this device is marked with divisions every 0.1 mm. The distance between divisions corresponds to 1 meter difference in elevation.
For example, measurements near an existing well showed a level of 634.7, and at the site of future production, the barometer needle stopped at 633.8. This means that groundwater will appear at a depth of 9 m.

The survey method does not work in regions with high occurrence of rocky and semi-rocky rocks. Especially if you have to extract fractured water, which spreads sporadically and sometimes flows into adjacent layers.
Surveys will not be of much help in areas with pronounced hilliness, where it is impossible to accurately represent the geological section without surveys. It is advisable for owners of plots in such areas to contact the local center for designing water supply and sewerage networks or a hydrogeological organization.
For more information on aquifer prospecting, see this article.
Where to install a water supply facility
Choosing a location for an individual water supply source is not very easy, especially if a small area is already occupied by impressive residential and commercial buildings.
With all the desire to save meters, when planning space for construction of a personal well With your own hands, it is recommended to adhere to the following rules:
- A drinking well should not be located near manure heaps, latrines, bathhouses, cesspools, barnyards and similar objects. There should be at least 20-25 m between the well and the source of probable contamination.
- There is no need to build a well on the slopes of river banks or ravines. Due to the decreasing flow of underground water, the flow rate will be significantly reduced.
- The minimum distance between the well and the foundation of a house or utility block must be at least 5 m. Water currents will be directed into the well, like into a reservoir formed in the ground, washing away the soil from under the foundations, particle by particle. The corner of the building located nearby will certainly sag.
Ponds with standing water are considered an undesirable neighborhood. Water will certainly infiltrate through permeable rocks, which is extremely dangerous for the drinking category.

It is prohibited to locate a well near sources of biological and chemical pollution, as well as on slopes, near ravines and on river banks.
Technologies for the construction of mine wells
The essence of constructing a well is to form walls that strengthen the shaft.
Depending on the material chosen for the construction of the well crepe, the work is carried out according to one of three proven schemes:
- Construction of walls from the bottom of a pre-dug shaft. The technology is most often used in the construction of brick and stone wells with a foundation resting on an aquifer. Due to the danger of collapses, the shaft walls are equipped with temporary fasteners.
- Building up walls on top of a trunk under construction with simultaneous lowering. The most common and safest method, which involves parallel construction and excavation. It is used in the construction of wells with walls made of concrete rings and well frames.
- Building walls from below with simultaneous penetration. The method is used in the installation of wooden fasteners in cases where the box is jammed. Then the size of the clearance is reduced and the elements are attached to the conditional bottom of the trunk.
An alternative to bottom extensions can be well drilling in the well shaft. It is also worth calling in drillers for help if, while digging, you come across a large boulder that is difficult to break with a hand chisel.

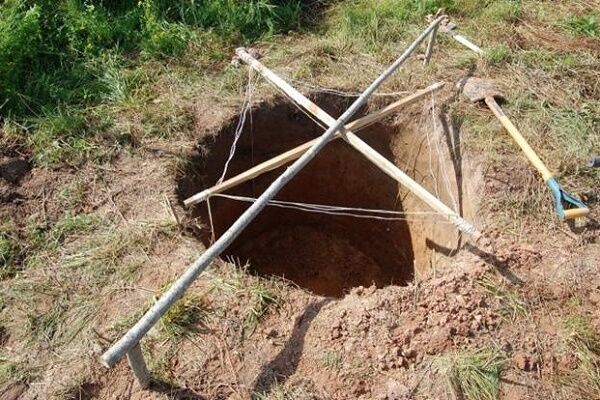
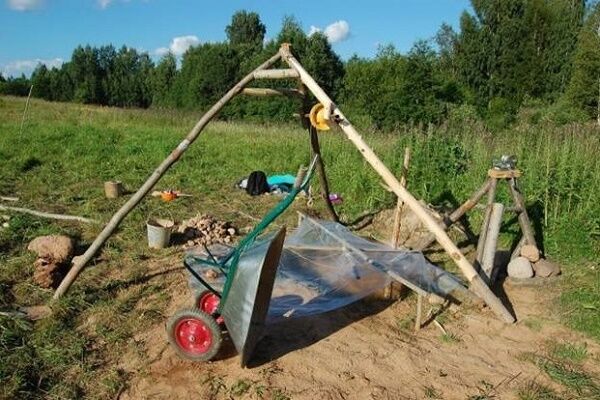
Three or more people must be involved in the construction of a shaft well. One works on the face, two insure on the ground.

Option #1 - construction of a well with a foundation
Construction begins with the construction of a concrete foundation. To do this, water is first drained from the work site. The soil is compacted and leveled, and a crushed stone cushion is placed on top.
The formwork for a well foundation is assembled on the ground surface, then compacted and installed on the prepared bottom.It is recommended to lay polyethylene inside the formwork, which will serve as waterproofing for the base.
For pouring, it is allowed to use a solution of cement with crushed stone without sand filler. Concreting is carried out in one step without interruptions.

After the concrete has hardened, markings are made:
- Round well marked by drawing the inner circle and marking the center.
- Rectangular well drawn by marking the internal and external edges of the walls. The longitudinal and perpendicular axes are marked.
The reinforcement is used horizontal and vertical. Horizontal clamps are placed in similar masonry joints outside the trunk. Vertical bars are installed through eight times the wall thickness. This should be the distance between all reinforcement elements.
The thickness of the masonry mortar for fastening the reinforcement should take into account the full coverage of the vertical rods with a margin of 2 cm. The margin in horizontal joints is 0.4 cm.
The walls of a well with rounded outlines are laid in butt rows. Depending on the depth of the excavation, they are placed in two, one and a half or one brick. They are built in tiers of about 1.2 m. Ligation is carried out by shifting the new row in relation to the laid row by a quarter of a brick.

Construction from the bottom is carried out by two people. The master lays the bricks, the apprentice prepares and serves the materials.Verticality and horizontality of rows are checked regularly using a level and plumb line. They work from suspended scaffolding. If the well is built with three bricks, it is allowed to carry out masonry from the walls.
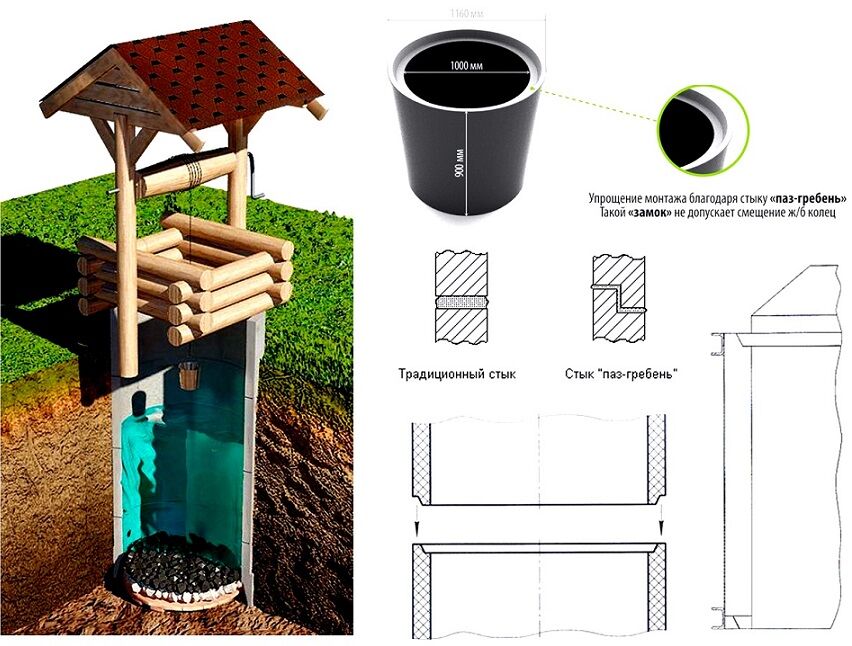
Option #2 - how to make a well from concrete rings
The most profitable, quick and easy to implement option is to use concrete rings factory-made, equipped with stepped or beveled seams at the end joints.
However make concrete rings you can do it yourself. To do this, you need to build formwork - two removable or collapsible rings. They are made from sheet metal or boards connected by a metal strip. Sometimes the formwork is given a slightly conical shape to make it easier to build homemade rings from top to bottom.
Consistent production of rings using this method is carried out directly on site. Reinforcement is placed around the perimeter of the formwork: at least 5 vertical rods. The distance between them is 25 cm. Horizontal reinforcement is placed every 20 cm, secured to the vertical parts with knitting wire.
To mix the solution, use cement of a grade not lower than M400, washed sand, crushed stone or gravel. The solution is allowed to harden for 2-3 days, after which the ring is immersed in the soil by digging under the bottom edge. Then the next element is made and installed on the previous one.
The result is a trunk with peculiar steps that allow the master to move up/down inside the well being built.
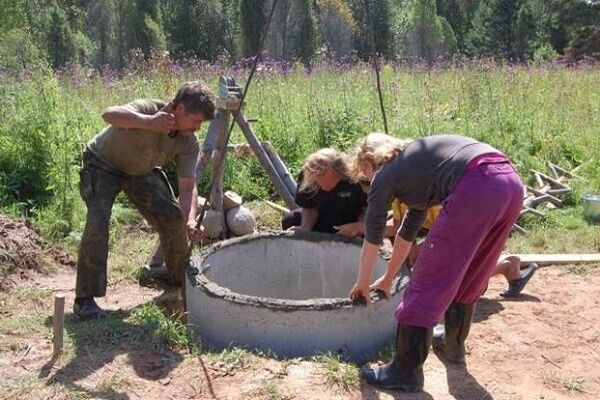
Construction of a barrel from factory reinforced concrete rings in stages:
- The trunk is marked, according to which the soil is selected to the height of the ring.
- The first reinforced concrete ring with a cutting bottom edge is installed in the shaft.
- A bitumen-impregnated or tarred cord Ø1 cm is laid along the upper joint along the fold.
- A second ring is installed on top of the first ring, the joint of the elements is treated with concrete mortar.
- Under the lower ring, from two opposite sides, dig up the soil with a sapper shovel or an ordinary shovel with a shortened handle. But first, soil from the middle of the excavation is selected and supplied to the top.
- Chocks or similar devices of equal height are installed in the recesses.
- They dig under the ring from sides perpendicular to the previous ones. Chocks are placed in the recess.
- By analogy, they dig under the remaining part of the ring and select the soil inside the excavation.
- Chocks are knocked out from under the completely undermined ring. The ring settles under its own weight.
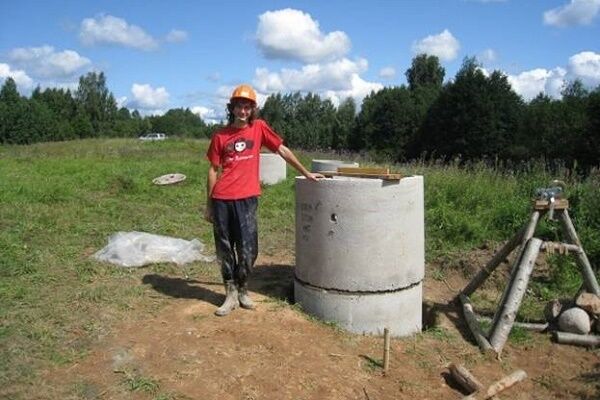
According to the described scheme, they operate until the second ring is completely immersed, on top of which the third is placed. The above algorithm is followed until underground water appears and the tunnel penetrates into the aquifer to a sufficient depth.
Dirty water is pumped out of the mine using pumping unit. After this, the bottom is arranged and a head with a clay castle and blind area is built. Before installing the lock, the upper rings are wrapped in polyethylene so that seasonal movements of freezing rocks do not damage the well trunk.

Concrete rings are secured to each other with strip metal plates. Overlays are installed at each joint at 3 or 4 points around the circumference. To attach the linings, holes must be drilled in the walls of the rings.It is better to fasten homemade rings with steel rods cast into the walls with loops on the edge.

To protect the well from groundwater seepage and clogging, install plastic insert.
Option #3 - construction of a wooden well
The optimal material for building a log house is oak, the underwater part of which will last about a century, and the surface part for at least 25 years. The wood of elm, larch, and alder is suitable; pine is quite suitable for the construction of the surface part.
They are built mainly using the submersible method, deepening them as the log house is built up from above. The widespread technology exactly repeats the method of constructing a well from concrete rings. Building from below and building from the bottom is more difficult and dangerous, therefore they are used less often.
The construction of a wooden well resembles the construction of a miniature hut. Those who want to know how to properly make a log frame for a wooden well should familiarize themselves with the classic methods of forming notches.
The plates or logs are connected in the corners with “toe-to-toe” notches with a root tenon. The crowns are stitched with dowels. To maintain the shape of the log house during the immersion period, it is temporarily covered with boards on the inside.

A wooden well is built from the bottom of the mine if the excavation depth is not planned to be more than 6 m and the walls of the dug shaft do not threaten to collapse.If it is necessary to prevent the entry of perched water, the outside of the wooden well is covered with tongue and groove boards at the level of its appearance and establishment.
If you don’t have construction skills, then it’s better to entrust the work to professionals. It is necessary to discuss in advance with the execution team possible options for preparing the sample and well digging prices.
Conclusions and useful video on the topic
Video #1: Rules for constructing a well from factory-made concrete rings

Video #2: Practical advice for those who want to dig a well

Video #3: The process of manufacturing a concrete ring in collapsible formwork

We have given only basic methods for building a well. In fact, there are more construction options; the described schemes can be combined. However, the information provided is quite sufficient for the successful installation of an individual water supply source.
If you have experience building a well, please share information with our readers. Leave comments and add photos of homemade wells in the form below.


Digging a well yourself, I’ll tell you this, is not as simple as it might seem at first glance. I just thought so myself, and in the end I really regretted it, it would have been better to order a brigade. You encounter the first difficulties when you start digging at a depth of 5-6 meters, lifting the earth with buckets, this is hellish work. We dug a well to 14.5 meters - I cursed everything in the world.
My brother and I built a well in the middle of this summer. It took us a lot of time to decide on the location. The planning also took quite a long time. We dug a well 12-13 meters deep with our own hands, I can say that this is very hard work. There were no problems with everything else. I advise you to approach construction very responsibly and spare no time in planning.
I decided to dig a well at my summer cottage. I thought I’d take my brother as an assistant, read recommendations on the Internet, watch a video and somehow dig it out. But when I found out how hard this work was, I immediately stopped wanting to dig by hand. Moreover, I can drive the tractor from work almost free of charge. I wonder if there are any significant disadvantages to digging with a tractor?