Installing a hood with a check valve: nuances of selection and installation with valuable tips
The presence of forced ventilation in the kitchen or bathroom is common in a modern apartment.But with improperly organized air exchange, there is a risk of windows fogging, mold, lack of oxygen and other undesirable aspects. To avoid this, it is necessary to install a hood with a check valve or a similar technical solution.
This is not difficult to do, the main thing is to understand where and in what cases a barrier to reverse thrust is needed. Knowledge of ventilation standards for residential premises and the basics of the physical law of air movement will help here.
From this article you will learn what designs of check valves exist, where they are best used and where to place them in the ventilation system. The installation itself is quite simple, but there are nuances that it is better to familiarize yourself with in advance, then independent installation will be easy and air exchange will be problem-free.
The content of the article:
Ventilation in an apartment or house
Air exchange in an apartment or house, on the one hand, must comply with the standards established for residential buildings, and on the other hand, it is subject to the laws of physics. Therefore, it is not always possible to get by with trivial solutions and sometimes you have to install a check valve designed to allow flow in one specific direction.
Standards and regulations
The main document that you need to rely on when designing ventilation both in an apartment and in a private house is SP 54.13330.2016. This is an updated version of SNiP 01/31/2003 “Residential multi-apartment buildings”.The air movement diagram for a residential building of any layout must be drawn up based on the provisions of paragraphs. 9.6 and 9.7 of this set of rules.
Table 9.1 establishes air exchange standards for various types of premises. Designers and owners of commercial real estate are required to strictly follow these parameters.
Residents can install ventilation with a lower capacity, focusing on microclimate indicators:
- Humidity, which can be measured with a hygrometer. Air oversaturated with water leads to the formation of fungus on the wallpaper and ceiling, as well as stains on the windows.
- Carbon dioxide, the concentration of which can be measured with a gas analyzer. Without the device, the lack of oxygen can be clearly felt immediately upon entering the room from the street.
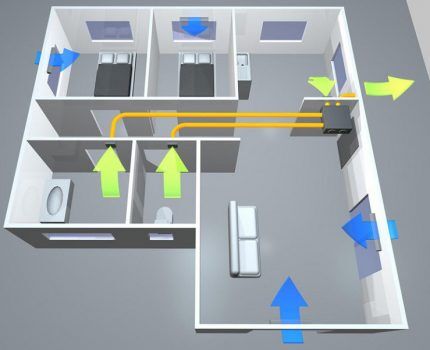
Air circulation can be natural or forced. This depends on many factors, including area, number of floors, location of rooms and technical premises.
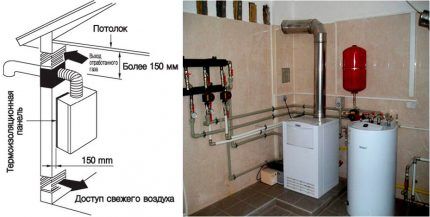
Thus, in any housing there are points of air inflow and removal, and a situation where an outflow occurs through the inlet opening and an air mass enters through the ventilation shaft is unacceptable.
This leads to violation of sanitary, hygienic, fire safety and other standards and can seriously worsen living conditions.
Artificial and natural air exchange
Sometimes a situation arises when it is necessary to forcefully remove air from the following rooms:
- Kitchen. When cooking food, intense evaporation may occur. To prevent it from spreading throughout the kitchen and further into other rooms, a hood is installed above the stove. Its operation allows you to direct contaminated air directly into the ventilation shaft.
- Bathroom. When taking a shower, the air becomes saturated with water vapor. To quickly remove it, turn on the ventilation unit, since otherwise the appearance of mold or peeling of plastic and tiles will occur much more intensely.
- Workshop. During carpentry or other work, a suspension is often formed that can be harmful to human health. To do this, run fans or hoods that are located near the source of pollution.
Turning on forced ventilation is temporary, as it consumes a lot of electricity and creates noise during operation.
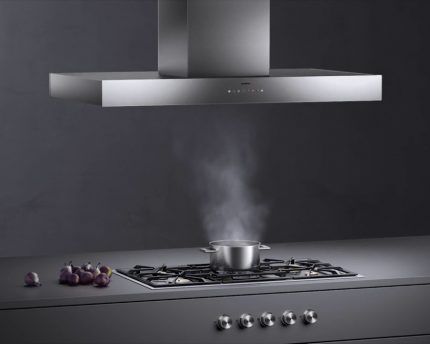
After the introduction of devices for forced ventilation, a problem arises with the natural circulation of air through the obstacle that has arisen. If an ordinary bladed fan somehow still allows air flow to pass through, then hoods, as a rule, minimize the passage to unacceptably low levels.
Stopping natural circulation can cause local problems in the room. For example, in the kitchen there will be increased humidity and in winter the windows will leak. But what's even worse is that air movement throughout the house will be disrupted, which will affect all rooms.
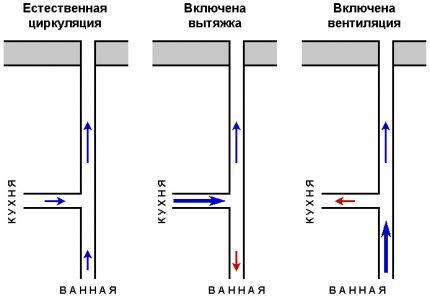
Installing a hood can have another negative consequence if this device is integrated into the general duct ventilation.Air exchange is subject to the law of maintaining balance: at any given time, the amount of incoming and outgoing air is the same.
It follows from this that an increase in pressure at one point leads to a change in readings at others. The main thing here is to exclude the possibility of flow reversal.
To solve both problems, install check valve. Taking into account the fact that modern air ducts for residential premises have standard dimensions, independent installation of such an element is not very difficult.
Check valve installation
In order for a check valve to perform its functions well, it is necessary to choose the correct type and location for installation, as well as to carry out the installation correctly. All this can be done independently without the involvement of paid installers.
Position in the ventilation system
Let's consider a situation where the inclusion of forced air exchange changes the direction of flow in a duct ventilation system. Let's take a common case when extractor fan in the kitchen and the shower fan are connected to one ventilation shaft.
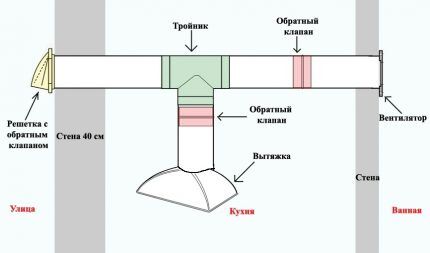
If the topology of the ventilation ducts is more complex, then the rule for placing a check valve can be formulated as follows: the valve is installed after each air entry point and before the nearest branch of the channel. The exact location is not important; it is chosen based on ease of installation.This solution ensures that there is no backdraft with any combination of hoods and fans turned on.
In order to provide an opportunity for air outflow from the room when the hood is not working, a branch is made from the duct. It must function in such a way that the flow passes only towards the ventilation shaft, so it is equipped with a check valve.
Since the valve can be installed on the duct near the hood at different angles, it is necessary to understand that the branch should not be an obstacle to air movement. High flow rates combined with additional resistance will place stress on the fan motor and contribute to noise generation.
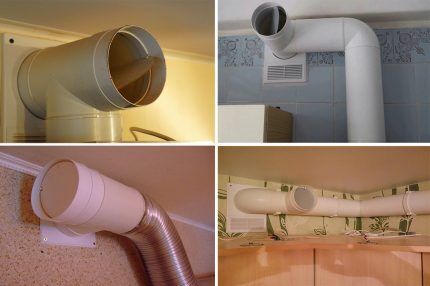
The outlet with the valve can be installed anywhere from the hood - this is not important. Most often it is placed near the shaft, since it is possible to replace the angle with a tee without changing the length of the remaining elements of the ventilation duct.
Operating principle and design
The check valve is designed for one-way passage of air flow, when reversed it must tightly close the living section of the channel.
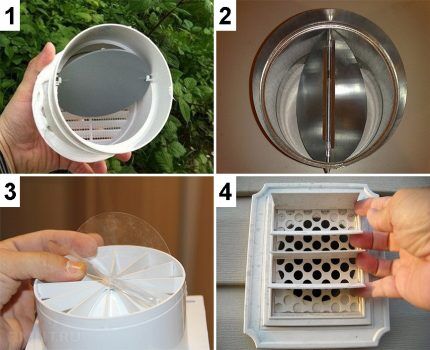
There are 4 common types of designs of such devices:
- Membrane. A small force of air flow can change the position of the flexible membrane. This type is used for natural ventilation. Sometimes the section near the membrane is strengthened with several stiffening ribs, which avoids bending of the plate during strong backdraft from the hood.
- Single leaf gravity. Under the influence of flow, the rigid valve leaf is deflected. If reverse occurs or air speed in the duct is close to zero, then the valve closes under the influence of gravity. This system is used both for natural ventilation and inside the duct.
- Double leaf spring. The butterfly type has two valves and is similar in principle to the gravity model, only springs are responsible for closing the valve, not gravity. This type is used inside the channel, since it will be difficult for a weak flow to overcome the resistance force of the springs.
- Blinds. This is a modification of the single-leaf gravity version, only with several doors. It is used as an external element of the ventilation system, since it has compact dimensions when open. Its structure is more complex, so it is better to limit yourself to the previous three options.
The cost of a check valve is low, so in the case of standard sizes of the ventilation system, it is better to buy a shaped element with the function of one-way air flow.
If the parameters of the ventilation duct are of non-standard proportions, then it is easier to independently manufacture a membrane or single-leaf type valve for it. A rigid sash is usually made of plastic or metal.
In this case, two points need to be taken into account:
- the plate must fit snugly against the walls of the housing or the fixing protrusion to prevent air leakage;
- It is necessary to prevent the plate from knocking, so soft material, usually rubber, is glued to the edges of the body.
The membrane for a homemade valve can be made from thick paper. If the product is made for a bathroom or shower room, then it is better to use lavsan film, as it will last longer in conditions of high humidity.
Installation of the device on a hood
If the ventilation duct is made independently, then it is difficult to give general recommendations for installing a check valve, since its installation depends on the material and geometry of the air ducts.
But now, standard rectangular or round solutions are usually used to create ventilation. In this case, there are no problems with introducing an additional element into the system, since it is possible to correctly install the check valve on the channel near the hood in a way that is standard for all structural parts.
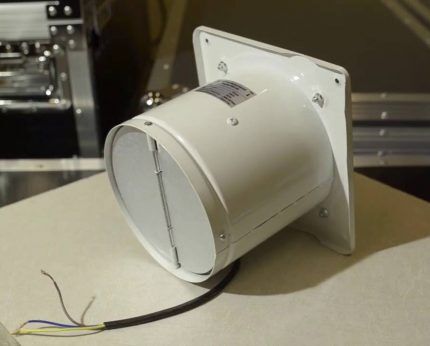
The shaped element with a check valve must be mounted in a place that provides easy access to it. The closing mechanism may lose its seal, then it will need to be cleaned of adhering dust and dirt. And for this it will need to be removed.
The joints between the tee or section with a check valve and other elements of the channel are coated with silicone sealant (for plastic boxes) or wrapped with aluminum tape (for metal structures).
The use of highly adhesive substances is undesirable, as this will make it difficult to disassemble the structure for carrying out maintenance work or changing the configuration of the ventilation system.
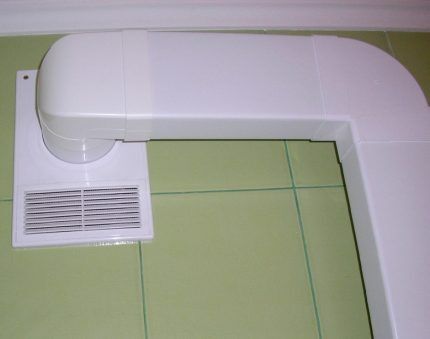
The grille is installed on the ventilation shaft using self-tapping screws. The option with liquid nails is less preferable due to difficulties in removing this element.
Particular attention should be paid to sealing the joints with foam rubber or rubber, otherwise there will be little point in installing a grille with a check valve.
Useful video on the topic and conclusions
The classic solution for installing a check valve on a tee in front of the ventilation shaft:

Built-in butterfly valve and additional valve for natural ventilation:

How to make a homemade diaphragm type valve:

Installing a check valve is a necessary measure if there is an exhaust hood in the ventilation system. It can serve to prevent backdraft or be designed to ensure air circulation when the fan is turned off.
The location for installing the valve in the ventilation duct must be selected taking into account the prospects for its removal for cleaning. The installation process itself is simple, but it is important to properly seal the joints to avoid air leakage.
Would you like to share your own experience in selecting and installing a check valve on an exhaust duct? Do you have useful information on the topic of the article? Please write comments in the block below, post photos and ask questions.


