How to repair a toilet with your own hands: analysis of common breakdowns
The toilet is not a particularly complicated device.Back in Soviet times, when calling a plumber was an almost impossible task, craftsmen successfully repaired toilets with their own hands.
Times have changed, modern plumbing has become more convenient and complex, but it is quite possible to correct some shortcomings yourself even now. To do this, you will need to identify the cause of the malfunction and select the best option for eliminating it.
To cope with this task, knowledge about the structure of the toilet and an understanding of the operating principle of the fittings located in the tank will be useful. It is these questions that we will examine in detail in our material, which will help us to detect the problem on our own and solve it. repair. And to make it easier for you to understand breakdowns and the nuances of fixing them, we have selected visual photos and useful video recommendations.
The content of the article:
The design and principle of operation of the toilet
Even the most modern toilet is not very different in design from its predecessor from the last century. It still has a bowl and a tank installed above it, which accumulates water for flushing. The flow of water is still controlled by two mechanisms: shut-off and inlet.
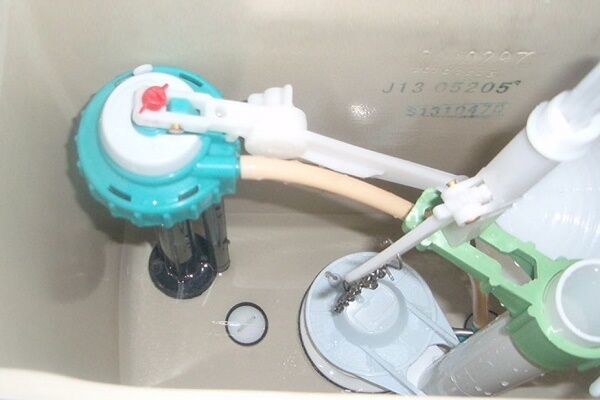
In the modern version, these elements are made like valves. The operation of the intake mechanism is still regulated using a float sensor.
Modern fittings usually made of plastic, but there are still long-lived mechanisms where the float is held by a metal lever, or even just a piece of thick wire. Sometimes these are completely modern fittings made for a retro tank in order to preserve a special style.
It is immediately worth mentioning luxury devices that use high-quality fittings. Often the inlet and locking mechanisms in such devices are a single element.
It is better to entrust the repair of such expensive plumbing to an experienced specialist, so as not to aggravate the breakdown with inept intervention.

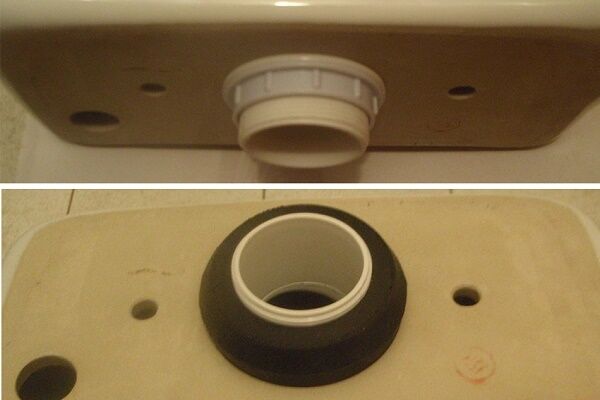
The most popular toilet option in modern apartments is the so-called compact. In it, the tank is mounted directly on the toilet bowl, or rather, on a special shelf made behind it.There is a rubber gasket at the junction of the toilet and the tank.
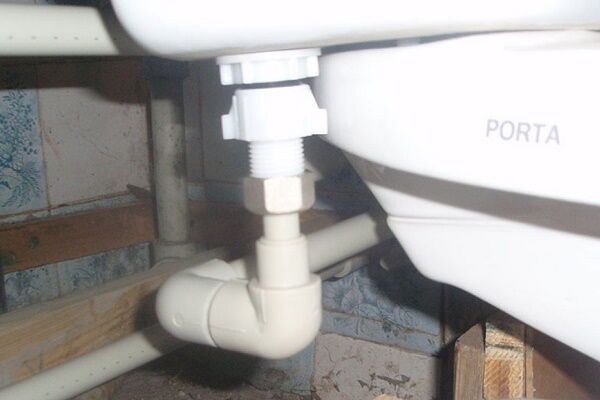
The tank is connected to the water supply using a flexible hose or a piece of plastic pipe of the appropriate diameter. The toilet bowl is also connected to the sewer system using corrugated hose and a rubber adapter.
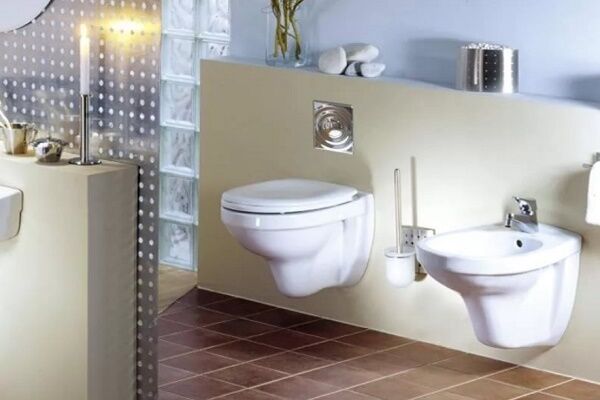
An even more compact version of the toilet is the wall-hung model. The tank of such a device operates on a similar principle and is also equipped with an inlet and locking mechanism.

But the tank itself is located in a niche behind the toilet. It is placed on the installation, which is then masked with a false panel. This system makes the fittings of the tank and its connection to the water supply system difficult to access. carrying out repairs.
In this regard, owners of wall-hung toilets are recommended to:
- carefully follow the rules for installing the device;
- fine-tune the operation of the tank fittings;
- use high-quality mechanisms with maximum service life;
- provide, as far as the situation allows, the possibility of easy dismantling of the panel behind which the installation is hidden.
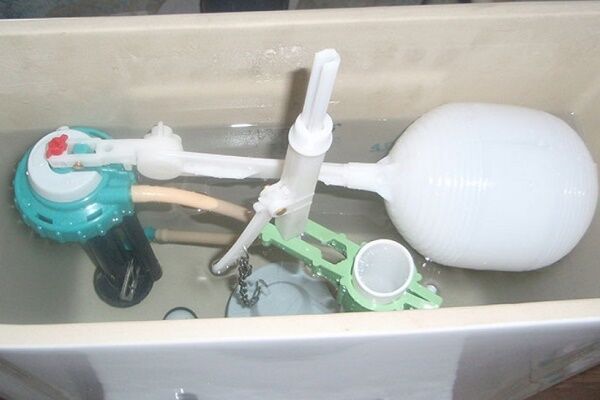
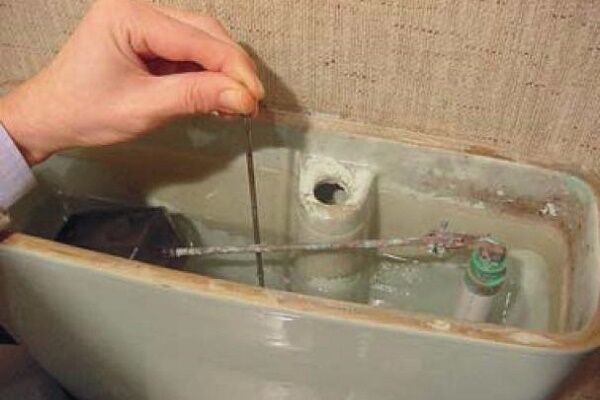
The principle of operation of the toilet is simple and familiar to almost everyone. When the float of the inlet mechanism drops below the set level, the valve shutting off the water pipe opens and the tank begins to fill with water. When the water level, and with it the float, reaches the maximum level, the valve closes.
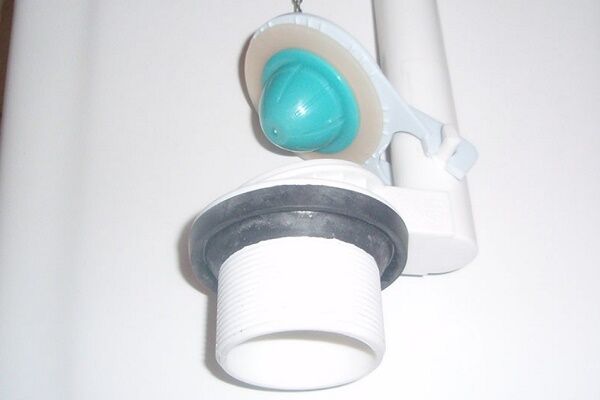
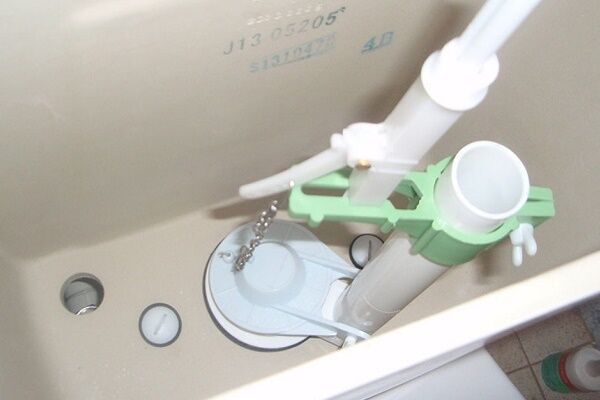
The shut-off valve mechanism, in its simplest form, consists of a heavy flap that is lifted using a lever, rope, chain, etc.More modern and “advanced” versions of the locking mechanism are controlled using a button or pedal. A receiving part is mounted at the bottom of the tank, and the valve itself is snapped into special clamps.
After this, the tank is closed with a lid and a button is installed, which is usually attached to the locking mechanism lever. When you press the button, the flap rises up, water pours into the toilet, then the mechanism lowers, blocking the outlet. At this moment, the inlet valve is activated, and the tank begins to fill with water.
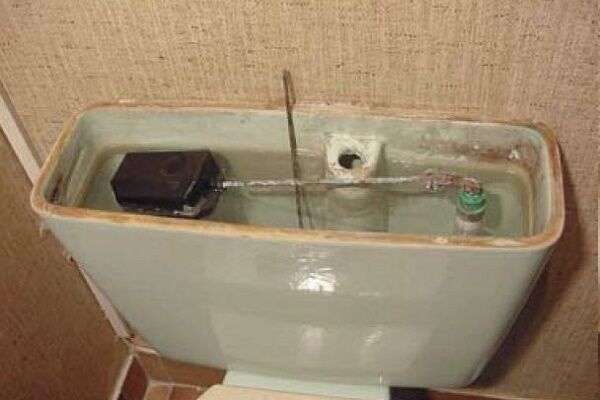
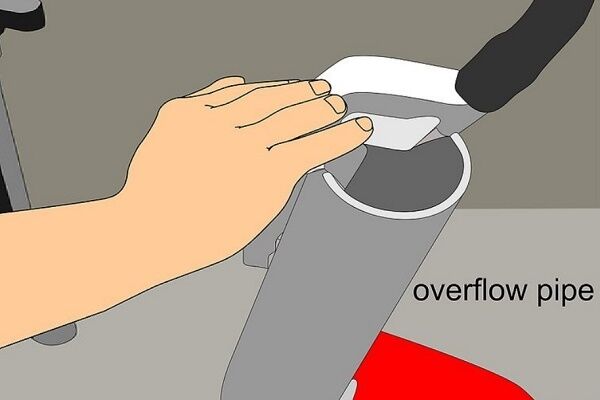
The following photo selection will introduce you to the functional and structural components of the tank and shut-off and drain valves with a simple float device:
Common Toilet Problems
The most vulnerable parts of a toilet design are the joints, as well as the fittings: membranes, gaskets, moving parts.
In the event of a breakdown, the following phenomena may be observed:
- water constantly enters the tank, gradually overflowing it;
- the tank is not filled completely or not filled at all;
- water flows in a small stream from the tank into the toilet;
- To flush, you have to press the flush button multiple times;
- while filling the tank bowl, a characteristic whistle is heard;
- water leaks onto the floor near the toilet, etc.
Before starting any repairs, you should prepare the equipment for work. To do this, first turn off the shut-off valve installed on the water pipe in front of the tank. If such a device is not available, you will have to shut off the entire water supply in the apartment. In most cases, work has to be done inside the tank.
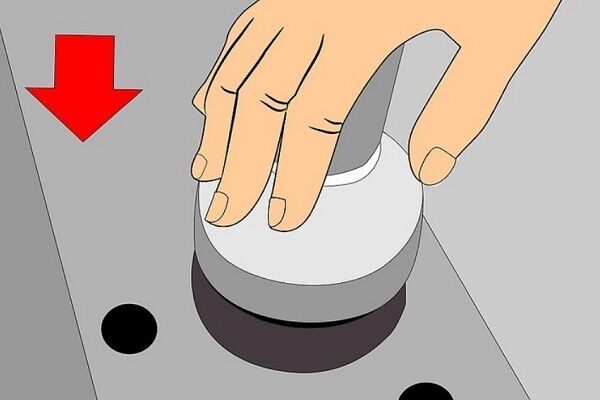
To do this, remove the cover from it. First remove the button or lever.Sometimes simply lifting it up and disconnecting it from the shut-off valve is enough.
If the button is fixed with a decorative ring, you first need to dismantle this element. It is either carefully unscrewed counterclockwise, or pryed with some sharp tool and simply removed.

A double button that allows you to regulate the amount of water that moves from the tank to the sewer is becoming more common. To remove it, press the small button, then the large one, and then begin to rotate the element counterclockwise to disconnect it.
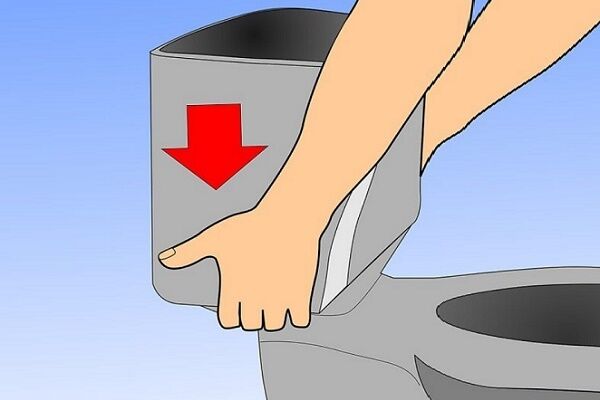
The lid is removed from the tank, having first unscrewed the fasteners, if any.

You should act carefully. If the ceramic lid breaks, it is not always possible to replace it. Sometimes you have to buy a new tank, or even the entire toilet.
If you have never disassembled a toilet cistern, we recommend that you familiarize yourself with detailed disassembly instructions.
Manufacturers usually provide both the toilet and cistern fittings with detailed instructions for installation, configuration and repair. If these documents have been preserved, before starting work you should carefully study them, understanding the design and operation of all mechanisms. This will help avoid additional breakdowns and errors.
How to make repairs?
Problems with the water level in the tank, including its overflow, are associated with a broken inlet valve or the need to adjust it. If the tank does not fill or is only partially filled after emptying, there is most likely a problem with the float.
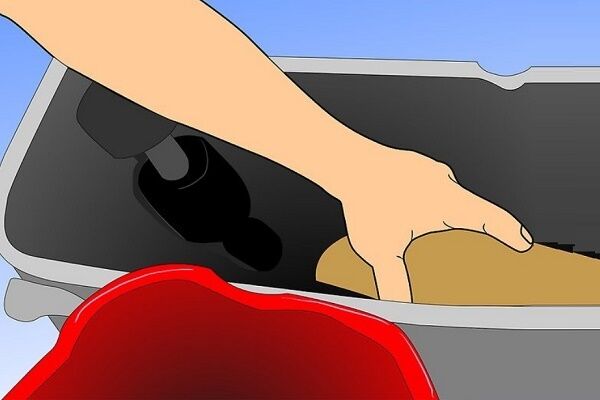
The float lying at the bottom of the empty tank has probably become leaky and filled with water. You need to disconnect it, pour out the water, seal the hole and install it back. But even a very well sealed float can soon leak again. It is best to replace it with a new element.
If the situation with the water level in the tank is not so critical, i.e. it steadily turns on and off, but its quantity is insufficient or, conversely, too large, you need to check the settings of the tank fittings. It's simple: you need to lower the float lower or raise it higher.
In old tanks, where the float was held by a horizontal piece of metal, this was done very simply. The wire was slightly bent in an arc up or down.

In the first case, the position of the float became slightly lower, and less water was collected in the tank. And if the lever was bent down, the position of the float made it possible to increase the volume of water in the tank. In modern intake valves, the float moves up or down along a plastic holder.
In most locking devices currently used for cistern equipment, it is impossible to simply bend the wire. In this case, there are several more repair steps, but they are a little more complicated:
The optimal water level in a full toilet is usually indicated on the tube by a stripe or small roller.
Water constantly flowing into the toilet indicates obvious problems with the locking mechanism.

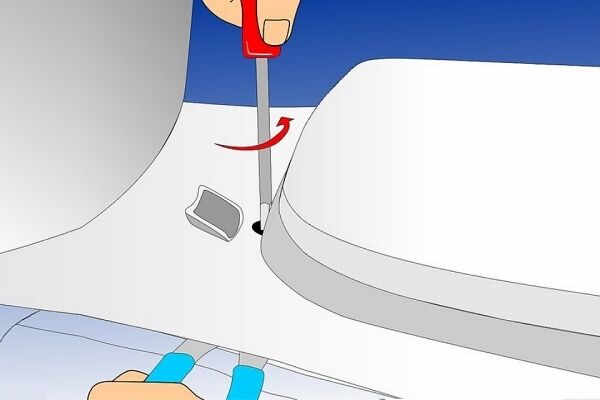
Sometimes its lower part moves slightly to the side due to design flaws. It is enough to adjust the position of the damper to stop the leak. If this does not help, or it is obvious that the valve is not displaced, most likely the problem is the wear of the locking mechanism. At the bottom of this device there is a special rubber gasket.
When closing the drain hole, it is tightly connected to the receiving part installed in the tank. Over time, this rubber element wears out and begins to leak water, which leads to water leaking into the toilet.To fix the problem, you need to either replace only the gasket or the entire mechanism.
Experienced plumbers recommend the latter as it is a simpler and more reliable option. Domestic fittings, which are included in almost all budget toilet options, are relatively inexpensive. But the service life of such devices is four to five years, or even less.
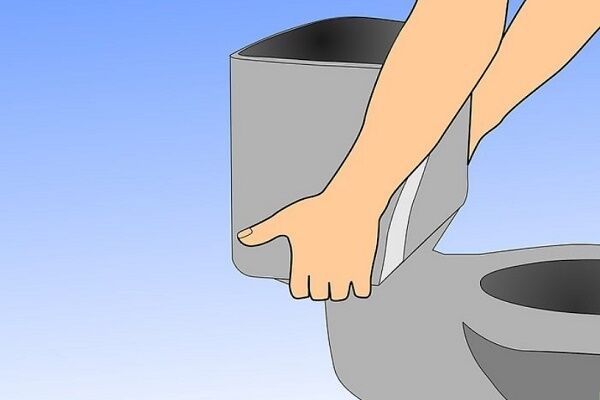
A leak between the toilet and the cistern is usually due to wear and tear. rubber gasket, which separates them. The problem is resolved by replacing this element:
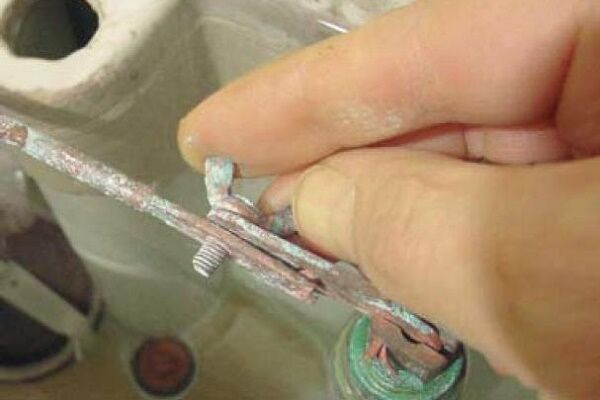
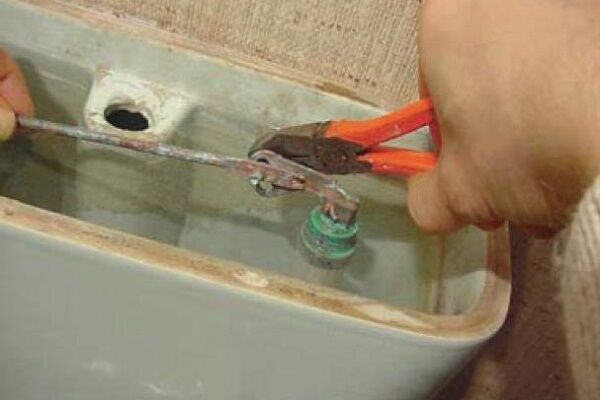
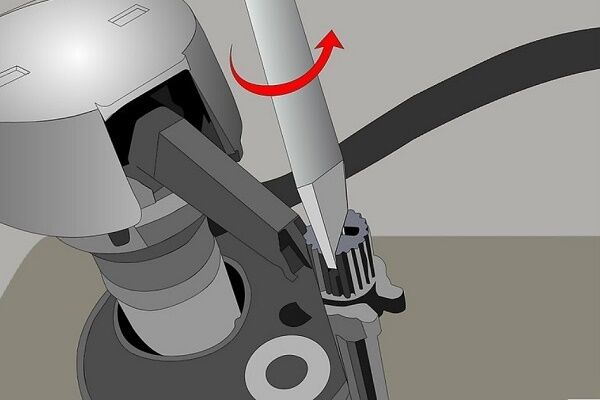
To replace the shut-off valve, you must purchase exactly the same device. Before repairs, the water from the toilet is flushed, then the damaged valve is simply removed from the clamps. With this part, you should go to a plumbing store to pick up exactly the same element. The new part is carefully snapped into the clamps, after which the repair can be considered complete.
All that remains is to replace the tank lid and the flush button. At this stage a problem may arise. If the shut-off valve has not been pre-adjusted for height, part of it will come out of the hole in the lid too high to allow the flush button to be installed.

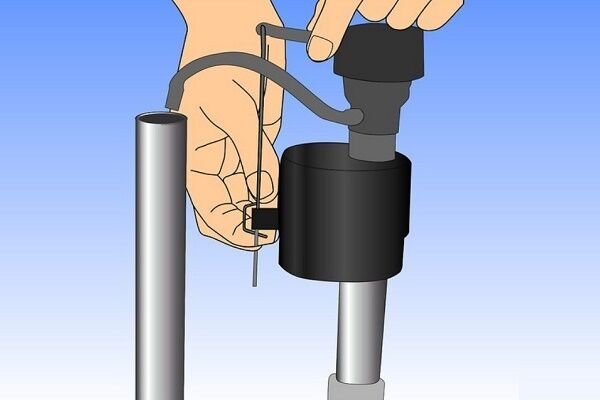
Before installing a new valve, you should compare it with the old element and set the appropriate height. To regulate the length of the float, there are two slats located on the sides and fixed in the lower part of the product. They just need to be lowered or raised a few notches.
Of course, a shut-off valve stem that is too short is useless; the flush button will not contact it, i.e. the device simply will not work.
If a suitable shut-off valve is not found in the store, the task becomes more complicated, since these products are not standard.You should not take “something similar”; it is better to consult an experienced plumber. You may have to completely replace all the toilet cistern fittings. In this case, it is necessary not only to choose it correctly, but also install and adjust according to the manufacturer's instructions.
If water is drawn into the tank with a characteristic whistling noise, most likely the filter on the inlet valve is clogged. The phenomenon is usually accompanied by slow or insufficient filling of the tank. The filter is located under the float, and the procedure for cleaning it is usually described in detail in the instructions.
If you are concerned about leaks near the handle, the following steps will help eliminate them:
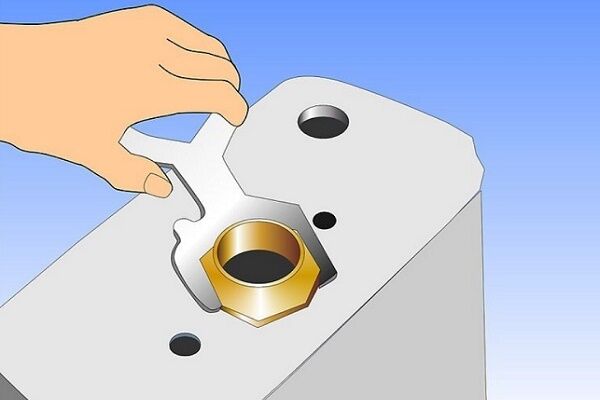
To clean the filter, you need to unscrew the clamping nut that holds it, remove the element, rinse it under running water, and then install it back. It also doesn’t hurt to flush the entire intake valve to clear the ducts of accumulated debris. After this, water will fill the tank faster, and extraneous noise will disappear.
If the problem of clogging the filter and ducts occurs too often, it makes sense to take care of filtering the tap water entering the tank. Leaks at the joints indicate that for some reason the seal has been broken. The cause may be improper installation of the toilet or simply wear and tear caused by time.
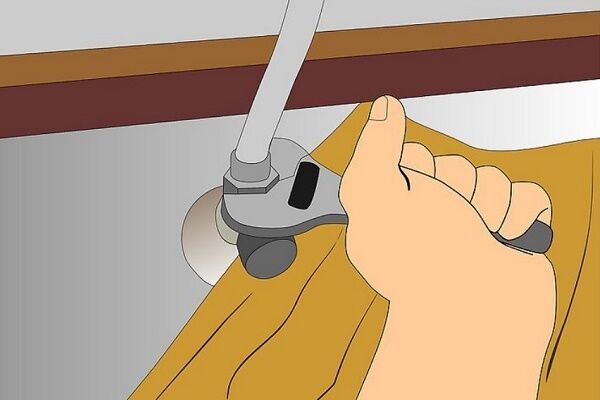
If a leak is observed in places where there is a threaded connection, it should be unscrewed and inspected. It is better to immediately replace worn elements, such as flexible hoses, with new ones. If the thread is in order, it should be cleaned of dirt and dried. After this, you need to use a new seal: flax, FUM tape, etc.

You should not wind too much sealing material, this can lead to deformation of the threads, but the lack of sealant often causes leaks.It is normal for material to protrude slightly beyond the edge of the joint after screwing it in, but there should not be too much excess.
It is necessary to wind the seal in the correct direction along the thread. If the edge of the thread is directed towards the master, the thread or tape should be wound clockwise, if away from the master - counterclockwise. After tightening, the joint is additionally treated with sealant.

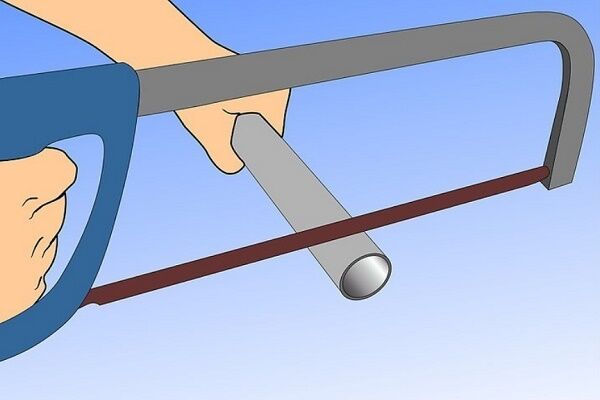
A leak under the toilet usually indicates a problem with the corrugated hose that connects the unit to the drain. If worn rubber cuff (usually this happens), it should be replaced, and then everything should be carefully treated with sealant. Sometimes the corrugation itself fails and will also have to be completely replaced.
Conclusions and useful video on the topic
The repair of a current toilet is presented in detail in the following video:

If you understand the principles of the structure and operation of the toilet, as well as its fittings, then minor repairs will be carried out without any problems. Of course, it is necessary to follow the work technology, and in particularly difficult cases it is better to involve an experienced plumber.
Have you repeatedly encountered various types of toilet breakdowns and repaired them? Share your experience with beginners - tell us which problems you fixed yourself, and in which cases you could not have done it without calling a plumber. Perhaps you want to leave useful recommendations - write your opinion and advice in the comments block.


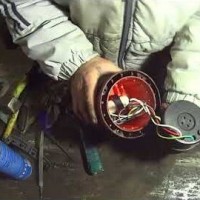
The following problem happened to the toilet: the injection of water did not stop, and over time it poured out through the watchman’s hole. It turned out that the mechanism did not have the usual float, but a hollow plastic dome. Instead, I installed a homemade float: I took dense foam and sanded it into a rectangular shape. I installed it on the stem using waterproof glue. The problem has disappeared. So it’s quite possible to fix the toilet with your own hands.
The tank is easy to disassemble, and if the problem is minor, it won’t be difficult to fix it yourself. I had experience repairing a tank - after draining the water continued to leak. At first it happened occasionally, then more and more often. At the end, the valve barely held, I had to completely remove the tank cap and manually press it down each time. The only way to fix the problem was to replace it.
In my opinion, there is a mistake in the video, a conical plastic washer is placed inside the barrel, in front of the rubber cone down